
Receta de Pollo Frito Crujiente
El pollo frito crujiente es un plato clásico que encanta a muchos. Esta receta te enseñará cómo hacer un pollo frito perfectamente crujiente y jugoso que hará que tu paladar se derrita. Con una combinación simple de especias y una fritura en aceite caliente, lograrás ese crujido irresistible por fuera mientras mantienes la carne tierna y sabrosa por dentro. Sigue estos pasos fáciles para preparar un delicioso pollo frito casero que superará cualquier versión de restaurante.
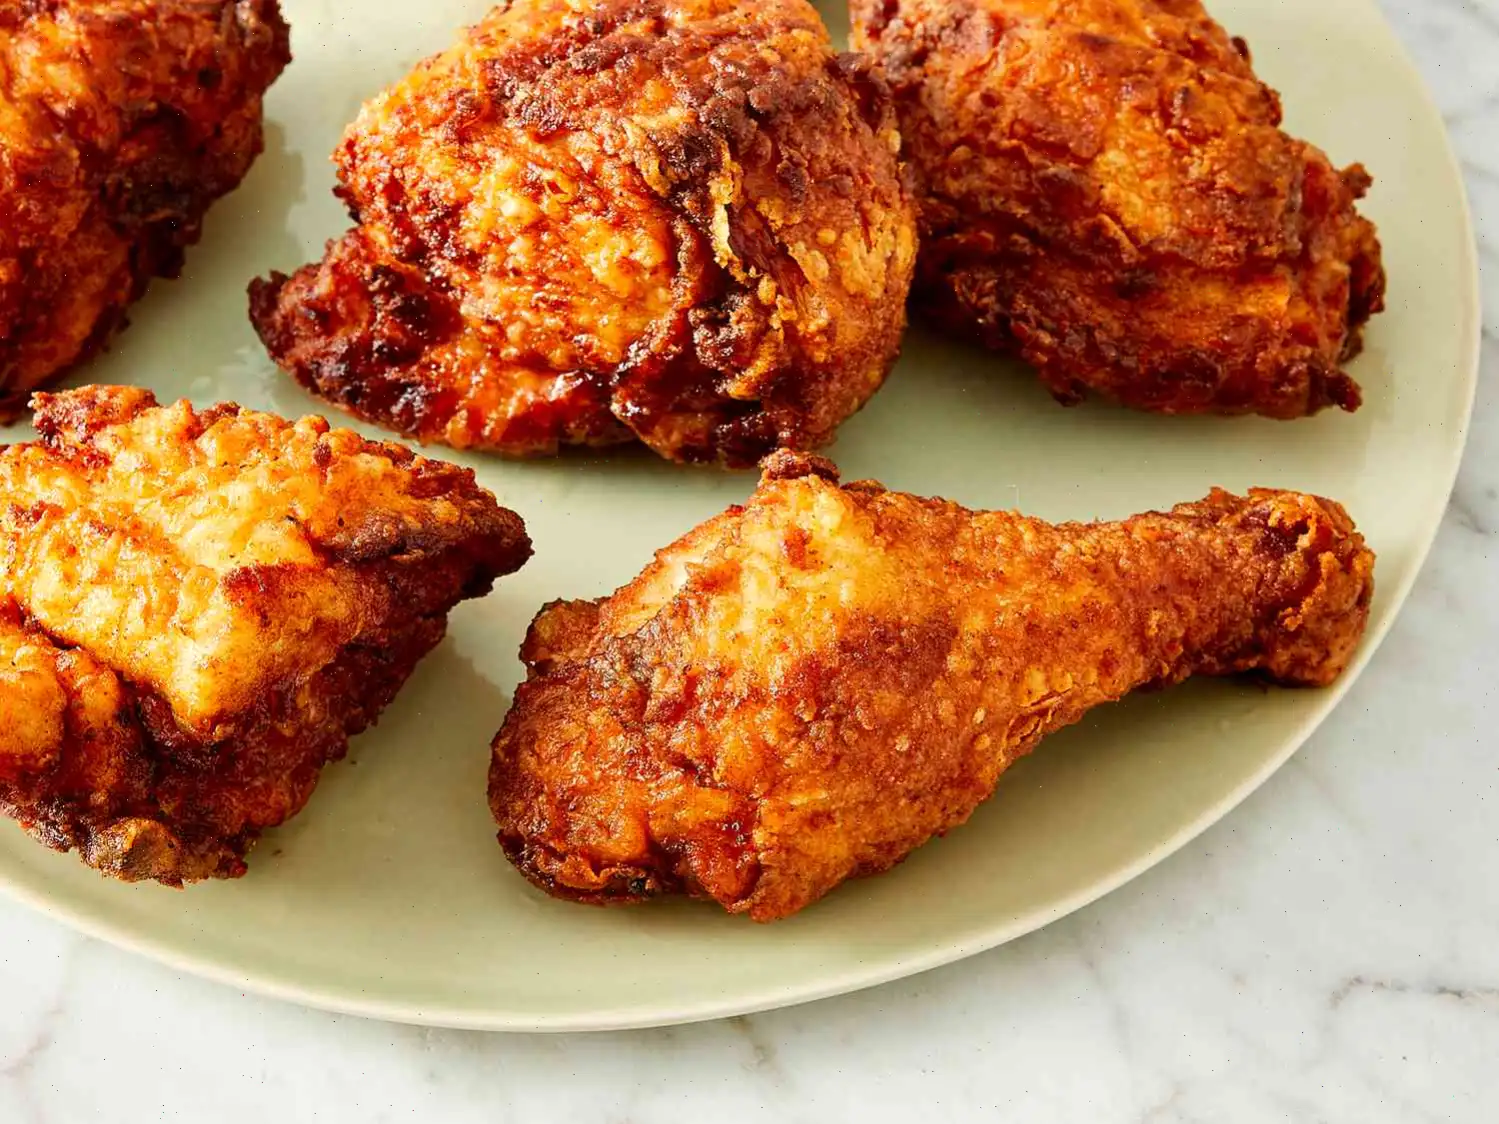
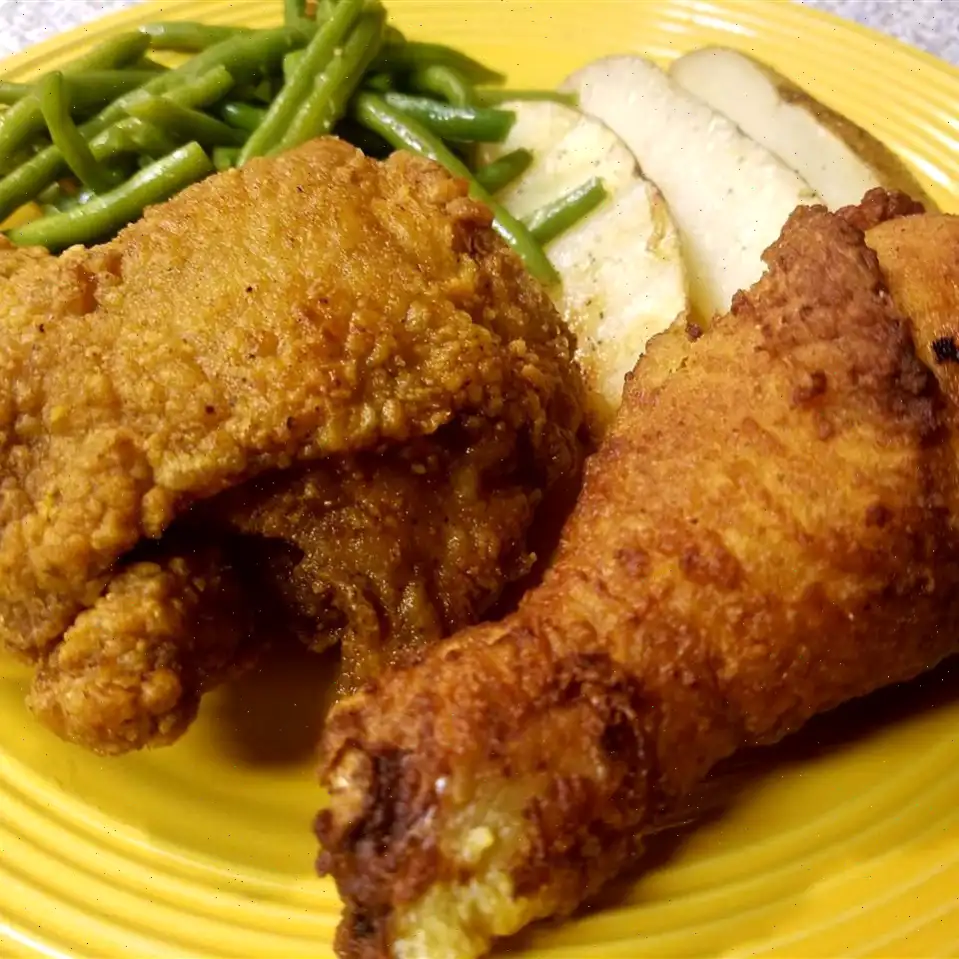
Este es el nico receta de pollo frito crujiente que necesitars. Por qu? Porque combina todos los trucos infalibles para asegurarte de que el pollo quede jugoso, sabroso y crujiente en cada ocasin.
Qu hace que este pollo frito sea tan crujiente?
La clave est en dejar que la mezcla de suero de leche y harina se vuelva de una consistencia parecida a una pasta. Esto garantiza un exterior crujiente y un interior jugoso. Mientras que la mayora de los pollos fritos se cocinan a alta temperatura durante todo el proceso, esta receta comienza con un calor muy alto. Despus de dorar, se reduce el fuego durante unos 30 minutos. Al final, se aumenta nuevamente la temperatura para conseguir una textura realmente crujiente. La paprika (pimentn) no solo da sabor ahumado, sino que tambin ayuda en el dorado debido a su bajo punto de humo.
Ingredientes para Pollo Frito Crujiente:
- 1 pollo entero de aproximadamente 1.8 kg, cortado en piezas (o 1.8 kg de pechugas, muslos, alas, piernas o muslos)
- 1 taza de suero de leche
- 2 tazas de harina para todo uso
- 1 cucharadita de paprika
- Sal y pimienta al gusto
- 2 litros de aceite vegetal (para frer)
Instrucciones para preparar Pollo Frito Crujiente:
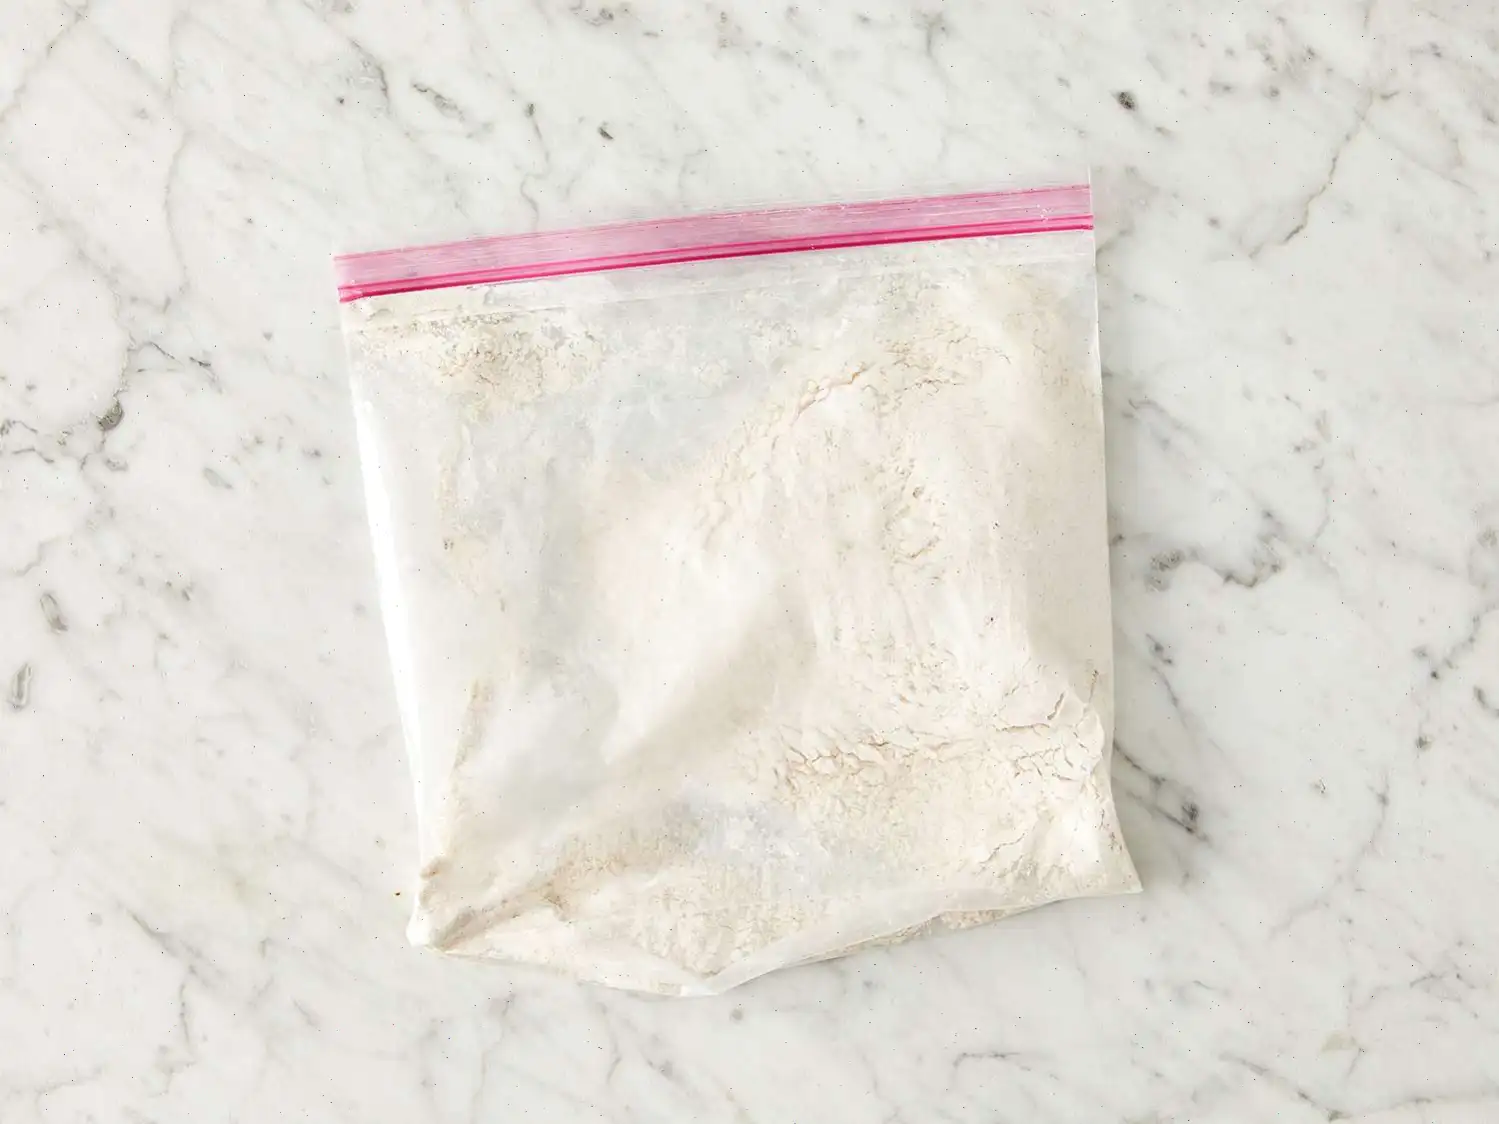
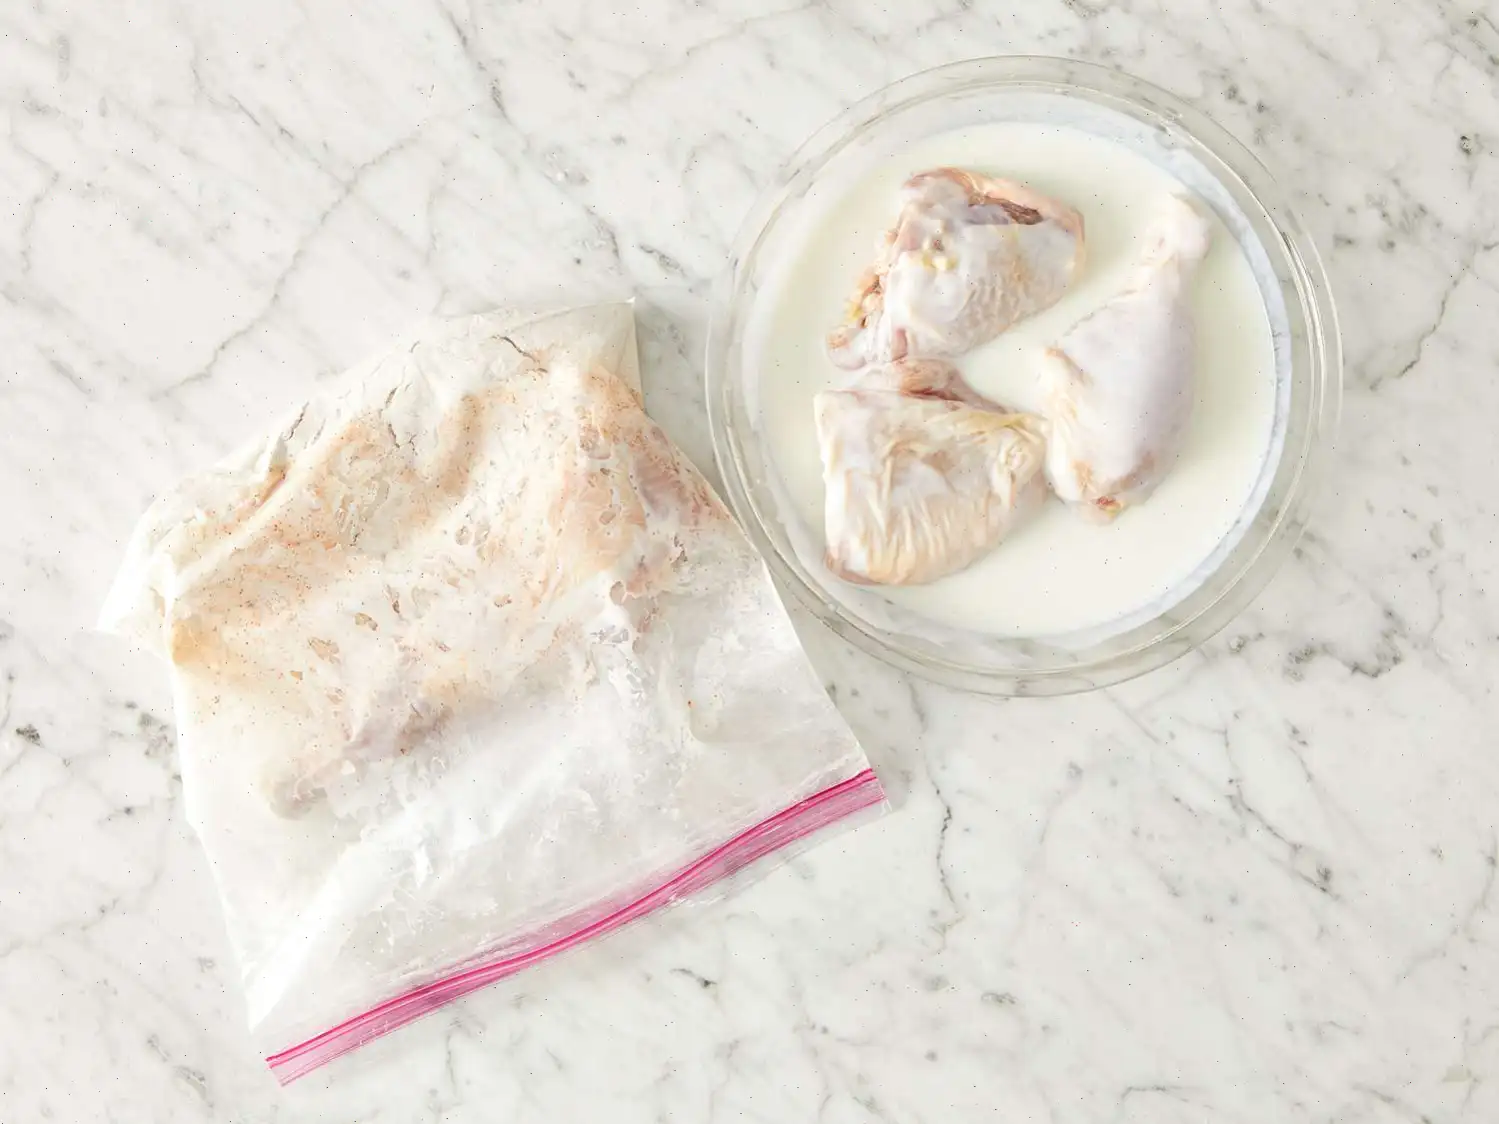
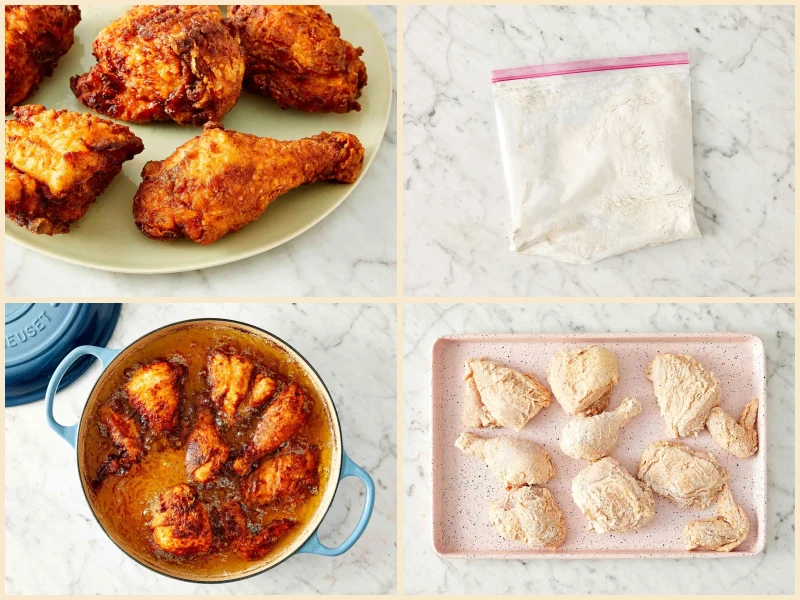
Paso 1: Preparar el empanado
En una bolsa de plstico con cierre, mezcla la harina, la paprika, la sal y la pimienta. Cierra la bolsa y agita bien hasta que todos los ingredientes estn bien incorporados.
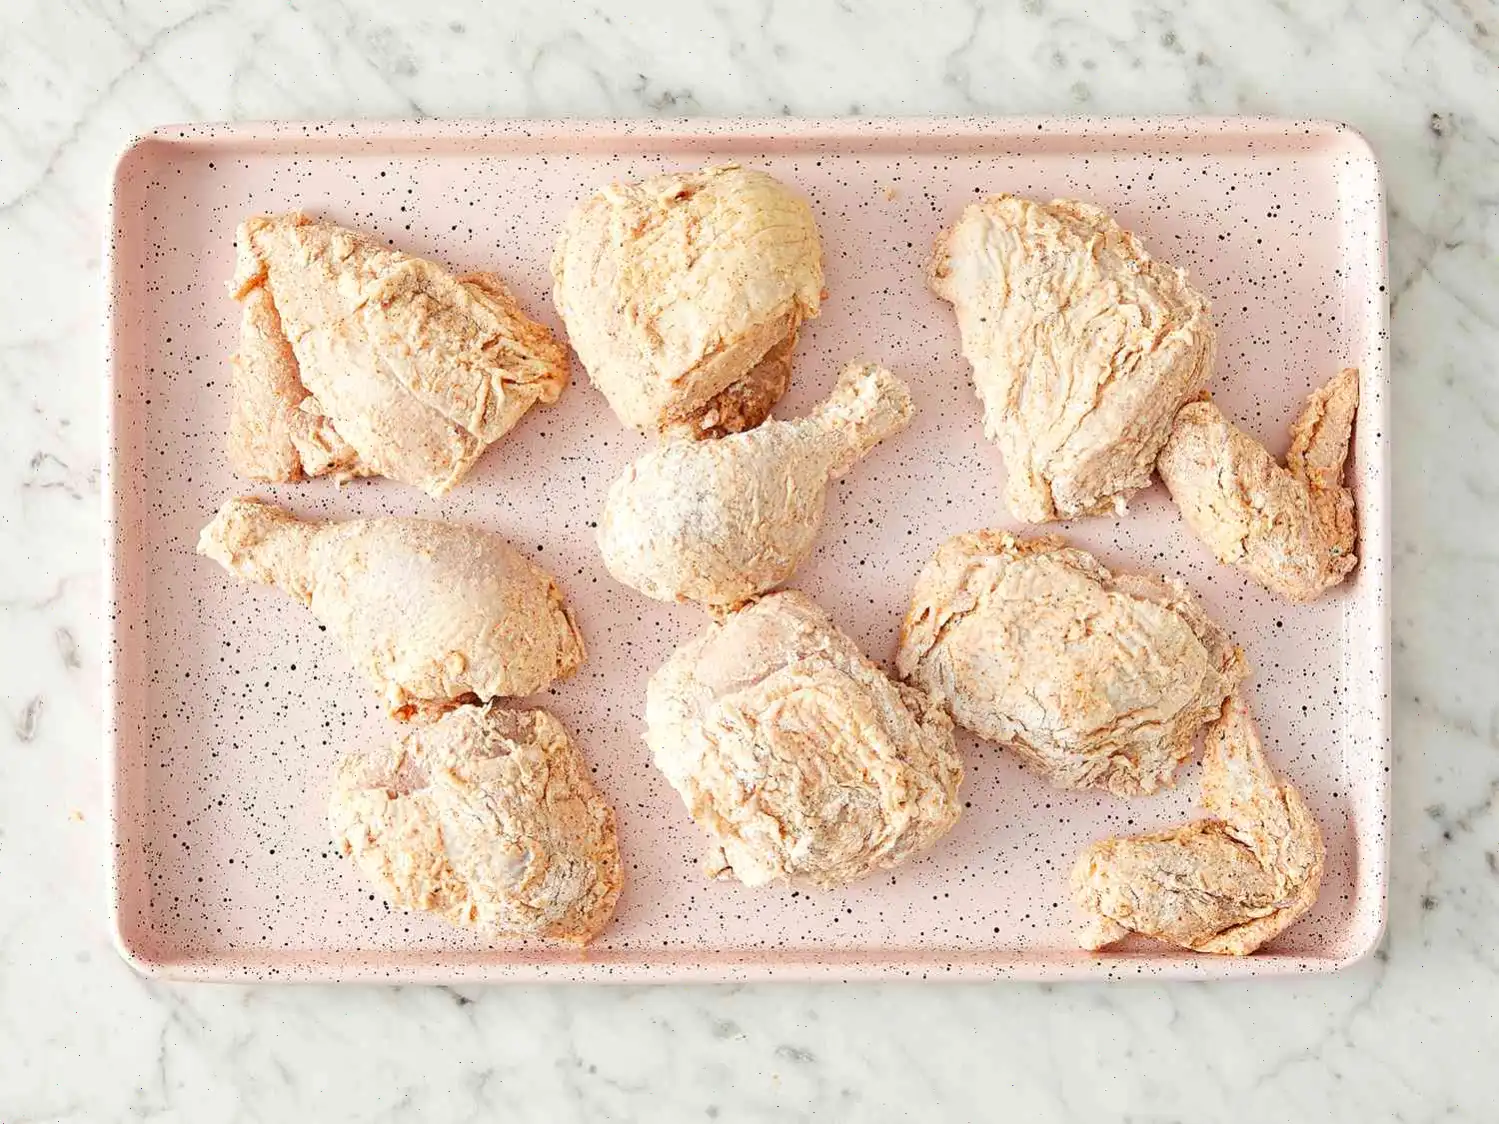
Paso 2: Pasar el pollo por el suero de leche
Coloca el suero de leche en un recipiente poco profundo. Sumerge las piezas de pollo en el suero, asegurndote de que se empapen completamente. Luego, pon el pollo empapado dentro de la bolsa con la mezcla de harina, cirrala y sacdela hasta que el pollo quede bien cubierto. Coloca las piezas de pollo empanadas en una bandeja de hornear y cbrelas. Deja reposar durante unos minutos hasta que la mezcla de harina adquiera una consistencia pastosa, este paso es fundamental!
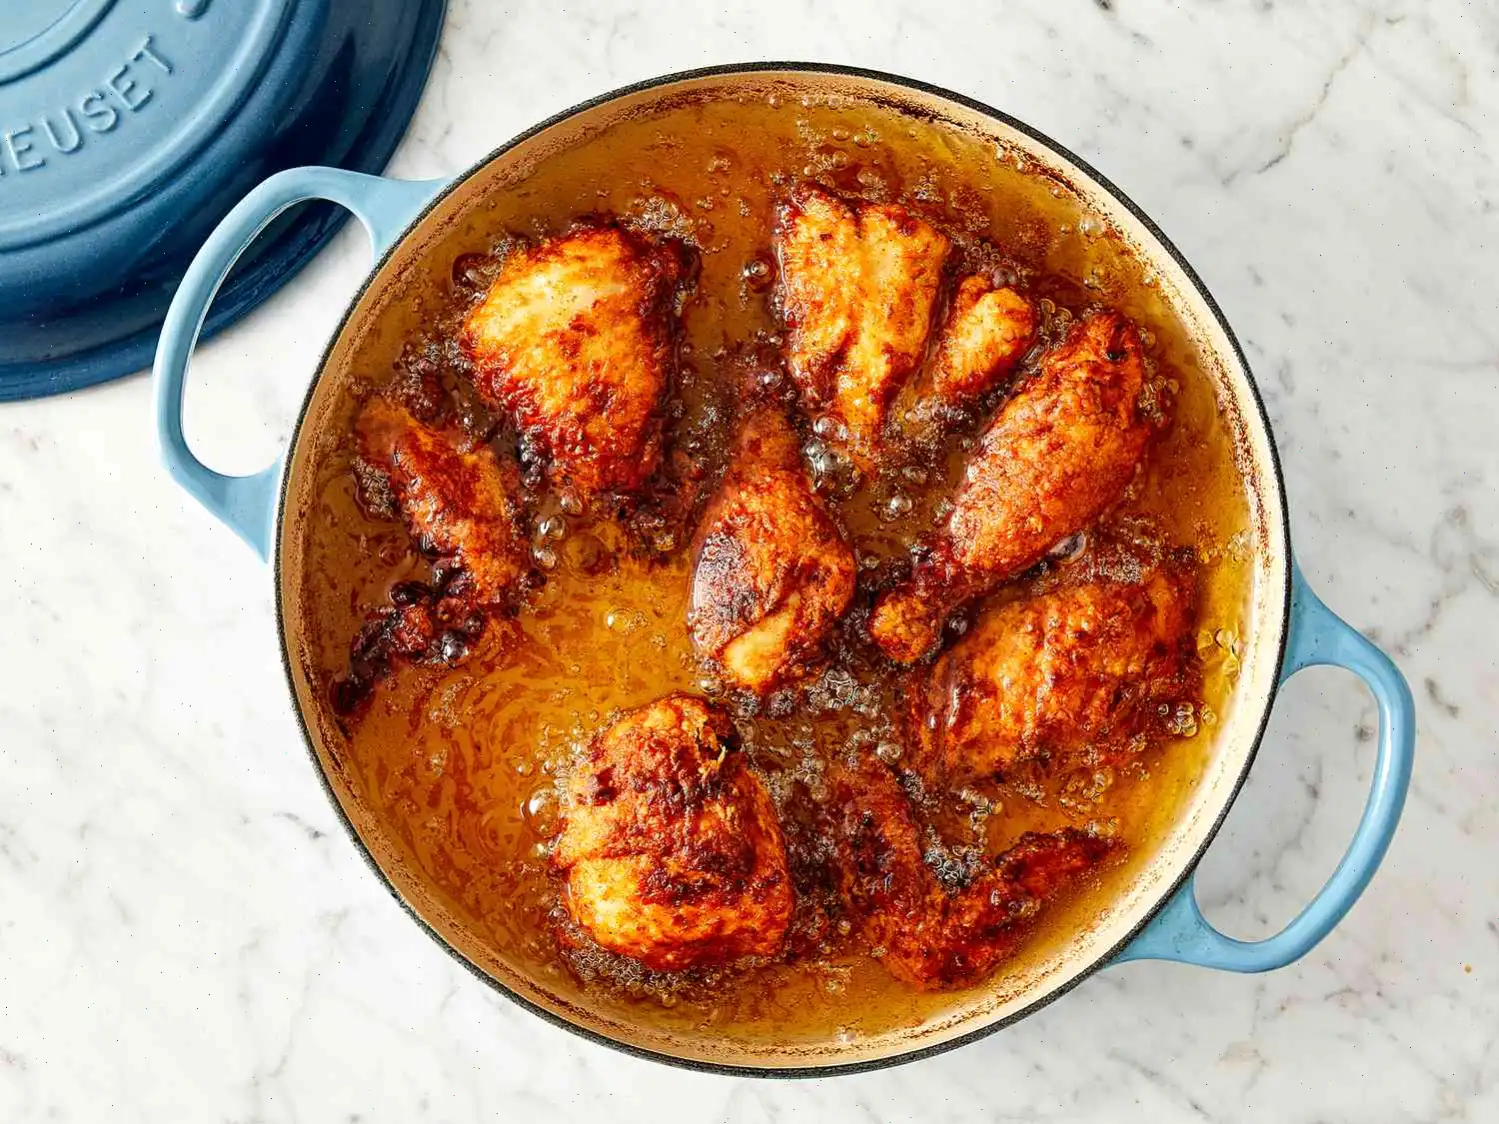
Paso 3: Frer el pollo
Calienta el aceite vegetal en una sartn grande a fuego alto. Cuando el aceite est caliente, agrega las piezas de pollo en lotes, sin sobrecargar la sartn. Fra el pollo hasta que est dorado por ambos lados. Luego, reduce el fuego y cubre la sartn. Cocina el pollo durante unos 30 minutos. Este paso permite que el pollo se cocine por completo, pero an no estar crujiente.
Paso 4: Conseguir el crujiente perfecto
Despus de los 30 minutos, retira la tapa y sube nuevamente el fuego a alto. Contina friendo hasta que el pollo se ponga dorado y crujiente. Cuando est listo, coloca el pollo frito sobre un plato con toallas de papel para eliminar el exceso de aceite.
Paso 5: Mantener caliente mientras fres el resto
Si ests cocinando en varias tandas, puedes mantener el pollo ya frito en un horno ligeramente caliente mientras preparas el resto de las piezas.
Con qu acompaar el pollo frito?
Si buscas algunos acompaamientos deliciosos para acompaar tu pollo frito crujiente, te sugiero probar estas opciones clsicas:
- Cazuela de calabacn amarillo
- Macarrones con queso al horno, la receta de mam
- Succotash al estilo de Al
Cmo almacenar el pollo frito:
Deja que el pollo se enfre completamente antes de guardarlo, para evitar la proliferacin de bacterias. Colcalo en un recipiente hermtico poco profundo o envulvelo bien en papel aluminio. Se puede refrigerar durante un mximo de cuatro das. Para recalentar, utiliza el microondas o el horno para obtener mejores resultados.
Valores nutricionales (por porcin):
- Caloras: 489
- Grasas totales: 22g (28% Valor Diario)
- Grasas saturadas: 6g (29% Valor Diario)
- Colesterol: 116mg (39% Valor Diario)
- Sodio: 140mg (6% Valor Diario)
- Carbohidratos totales: 30g (11% Valor Diario)
- Fibra diettica: 1g (4% Valor Diario)
- Protenas: 41g (81% Valor Diario)
- Vitamina C: 1mg (1% Valor Diario)
- Calcio: 62mg (5% Valor Diario)
- Hierro: 3mg (18% Valor Diario)
- Potasio: 385mg (8% Valor Diario)
Nota: Los valores diarios estn basados en una dieta de 2,000 caloras. Tu requerimiento calrico puede ser mayor o menor dependiendo de tus necesidades.
Puedes escuchar esta receta en formato de audio de IA. Simplemente haz clic en el botón de reproducción a continuación para escuchar el contenido en el formato que mejor te convenga. ¡Es una excelente manera de absorber información sobre la marcha!
Preguntas frecuentes sobre Receta de Pollo Frito Crujiente
Compartir
Comentarios
Deborah Gomez
08/30/2022 11:54:56 AM
Decidí usar filetes sin hueso cortados en tiras para esta receta. Normalmente cubro el pollo en huevo antes de pasarlo por harina, pero usar suero de leche esta vez hizo una gran diferencia: el pollo quedó mucho más tierno y jugoso que mi pollo frito habitual. Las instrucciones de preparación fueron perfectas y descubrí que puedo congelar el pollo después de cubrirlo con harina, lo que permite una preparación más rápida la próxima vez. Para un toque divertido, a veces agrego ajo en polvo y parmesano seco a la mezcla de harina. Después de freír las tiras, me gusta servirlas sobre pasta con salsa marinara, mozzarella fresca y queso parmesano, creando un delicioso plato rápido de pollo a la parmesana. A mi familia le encanta y mis amigos siempre quieren más cuando lo preparo: ¡nunca sobra nada!


 audio version


CookGuide es tu guía culinaria para descubrir nuevos sabores y cocinar con confianza. Encuentra recetas de confianza, consejos prácticos e inspiración tanto para cocinas domésticas como profesionales.
Cualquier copia, distribución o uso de los materiales de este servicio sin autorización está estrictamente prohibido. Las infracciones serán procesadas según la legislación aplicable y pueden dar lugar a responsabilidades civiles y penales.
© Guía de cocina Studio 2026 | Cookies | Política de PrivacidadEncuentra la receta perfecta con IA. Solo introduce los ingredientes y deja que Cook te guíe hacia la magia.