
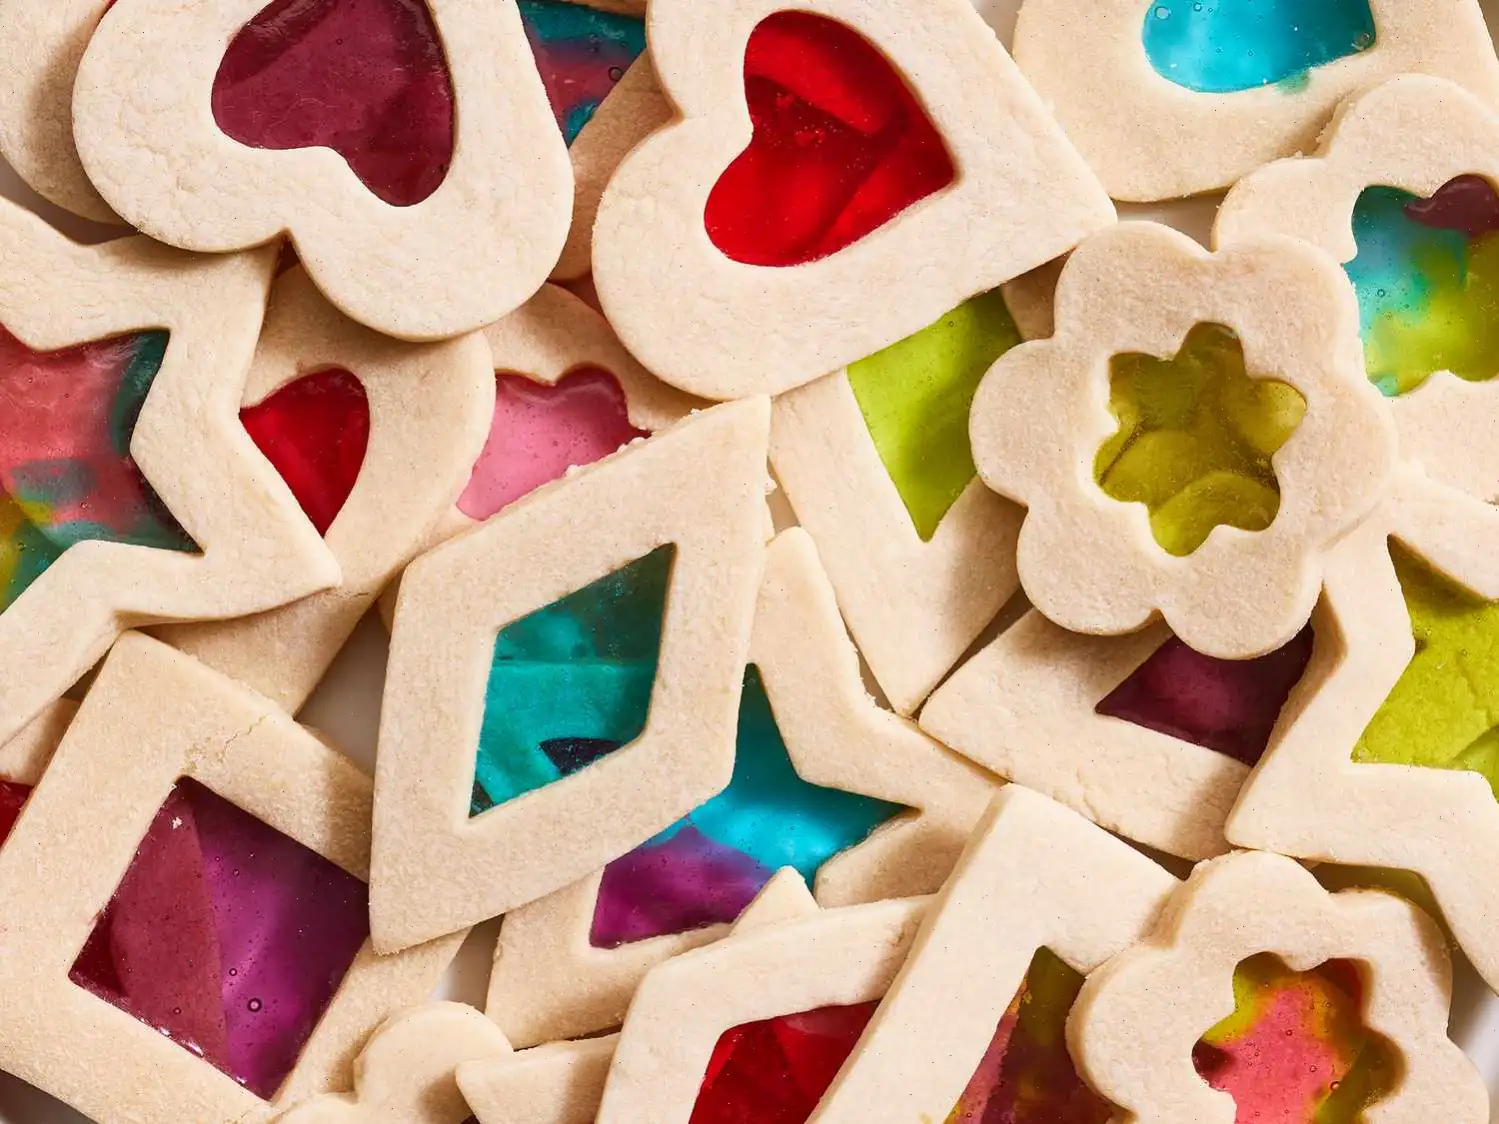
Receta de galletas de cristal teñido
Estas galletas de vidrio de colores son un dulce divertido y festivo para cualquier ocasión. La combinación de masa de galleta dulce y centros de caramelos duros vibrantes crea un efecto de vidriera que seguro impresionará a tus amigos y familia. Sigue esta receta fácil para hacer tu propio lote de galletas de vidriera increíbles.


Ingredientes
- 1 taza de mantequilla sin sal a temperatura ambiente
- 1 taza de azcar glas
- 1 yema de huevo grande
- 1 cucharadita de extracto de vainilla
- cucharadita de sal kosher
- cucharadita de extracto de almendra (opcional, al gusto)
- 3 tazas de harina de trigo, ms extra para espolvorear
- 20 caramelos duros con sabor a fruta
Instrucciones
- Calienta el horno a 175C (350F) y prepara dos bandejas con papel vegetal.
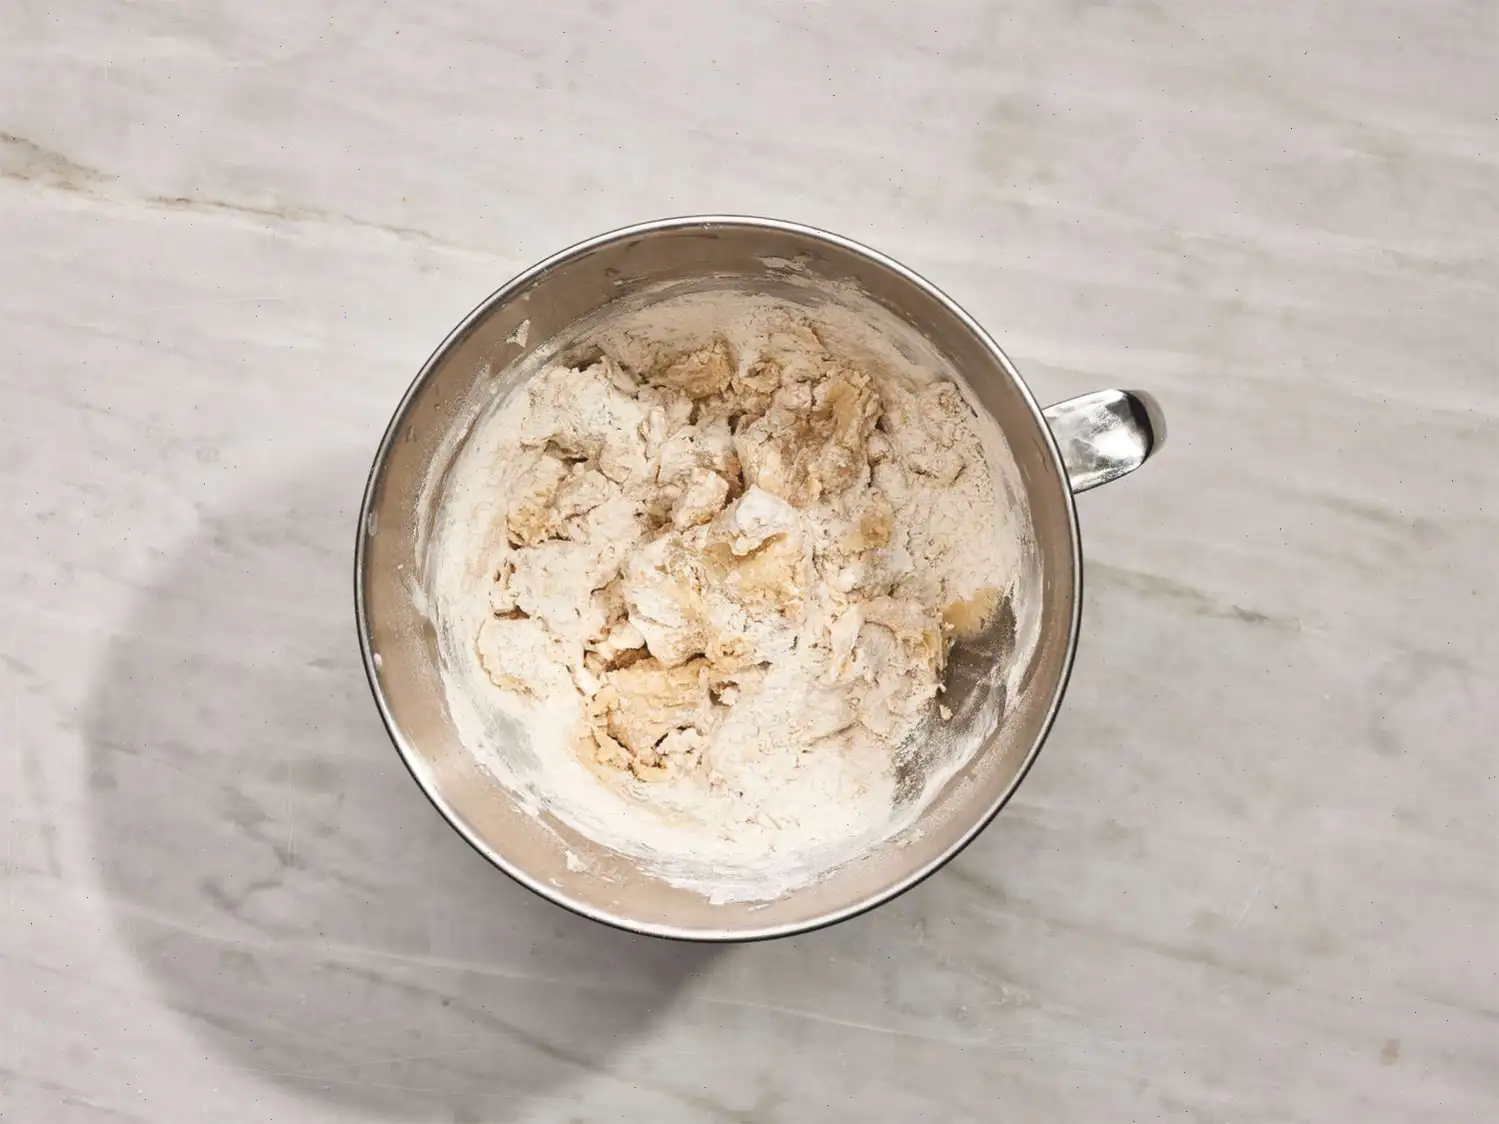
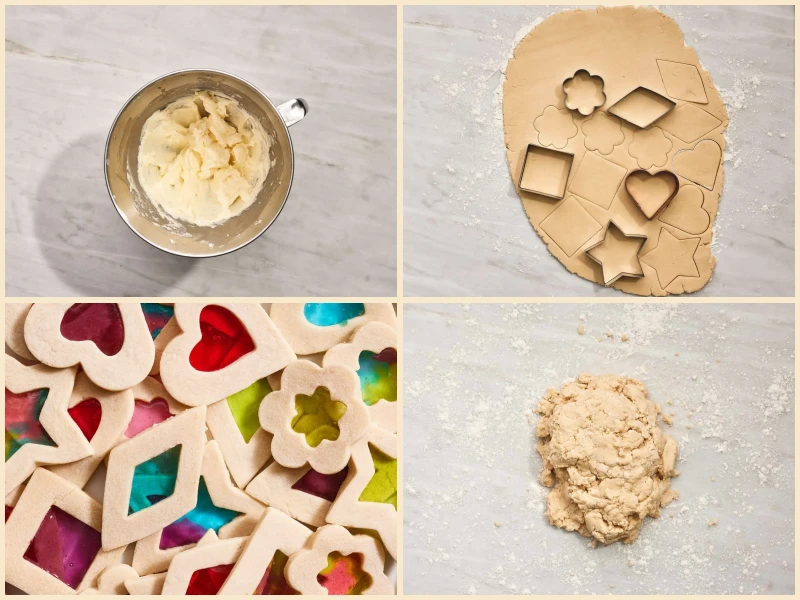
- En un bol grande, bate la mantequilla junto con el azcar glas durante unos 30 segundos, solo hasta que se integren.
- Con una esptula, recoge la mezcla de los lados y la base del bol. Aade la yema de huevo, la vainilla, la sal y el extracto de almendra. Mezcla a baja velocidad hasta que quede homogneo, unos 15 segundos.
- Incorpora la mitad de la harina y mezcla suavemente. Agrega la harina restante y contina mezclando a baja velocidad hasta que se forme una masa uniforme, unos 15 segundos ms.
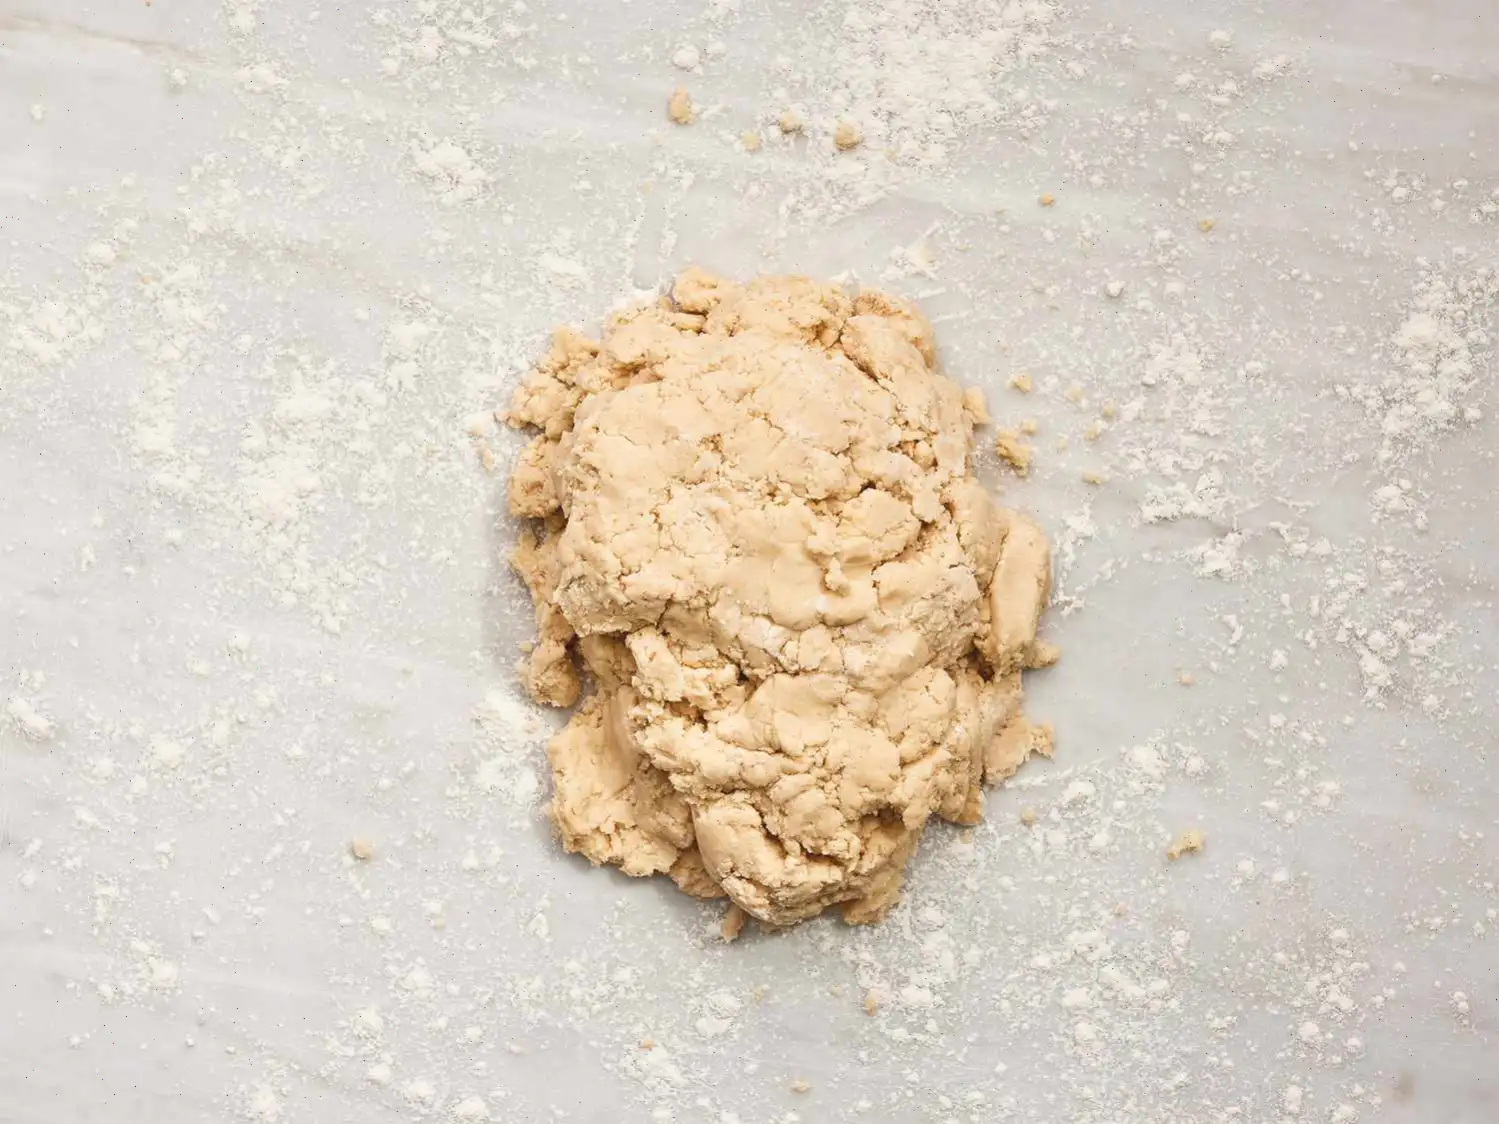
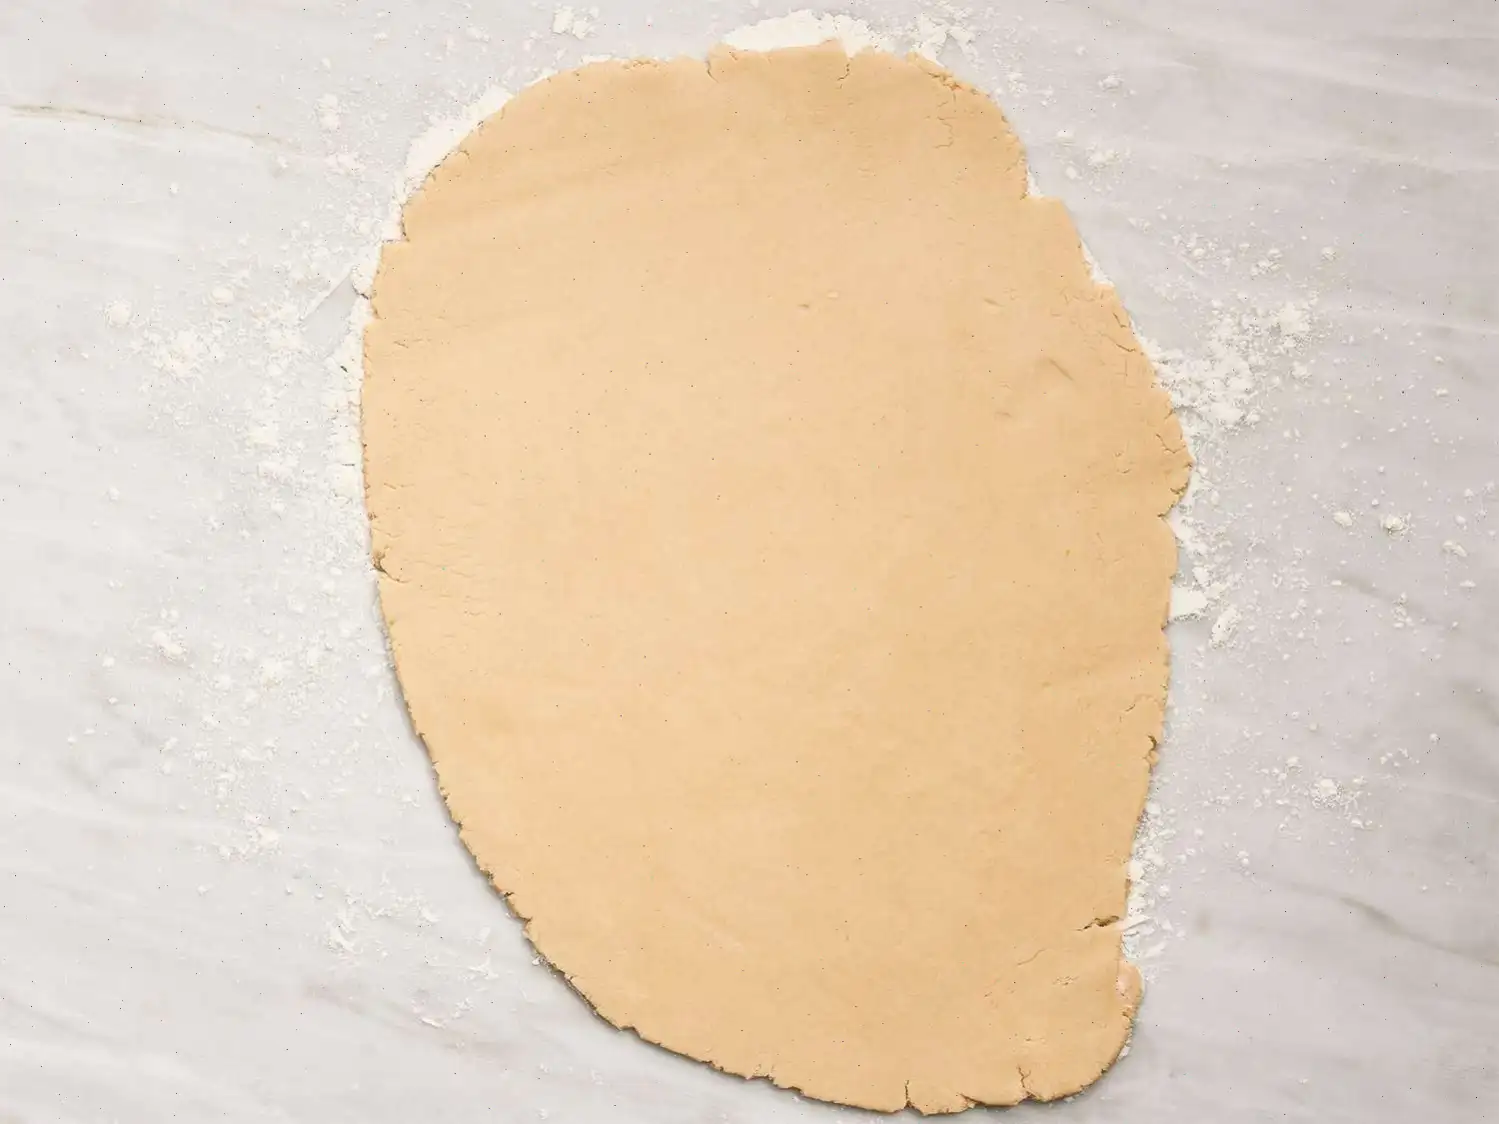
- Vuelca la masa sobre una superficie ligeramente enharinada y amsala 3 o 4 veces hasta conseguir una bola lisa. Aplana la masa en un disco y extindela hasta que tenga un grosor aproximado de cm.
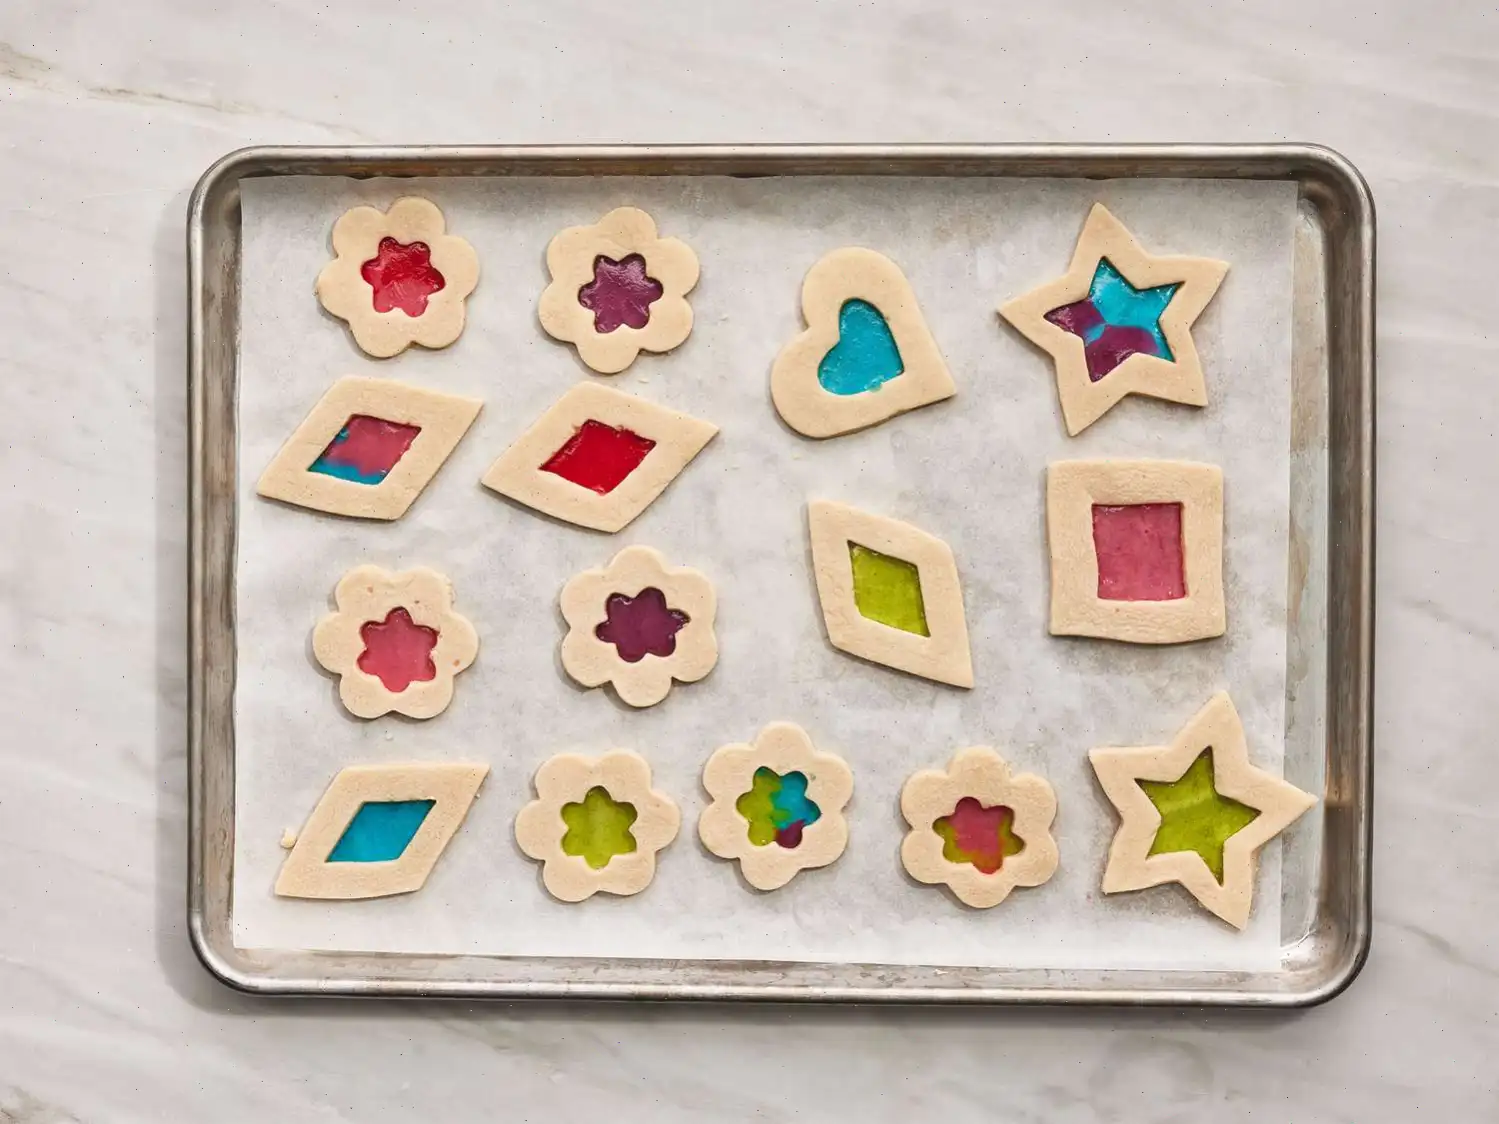
- Usando una esptula, despega la masa del mesn y corta formas con un cortador de galletas decorativo de unos 7-8 cm de dimetro. Coloca las figuras en las bandejas preparadas.
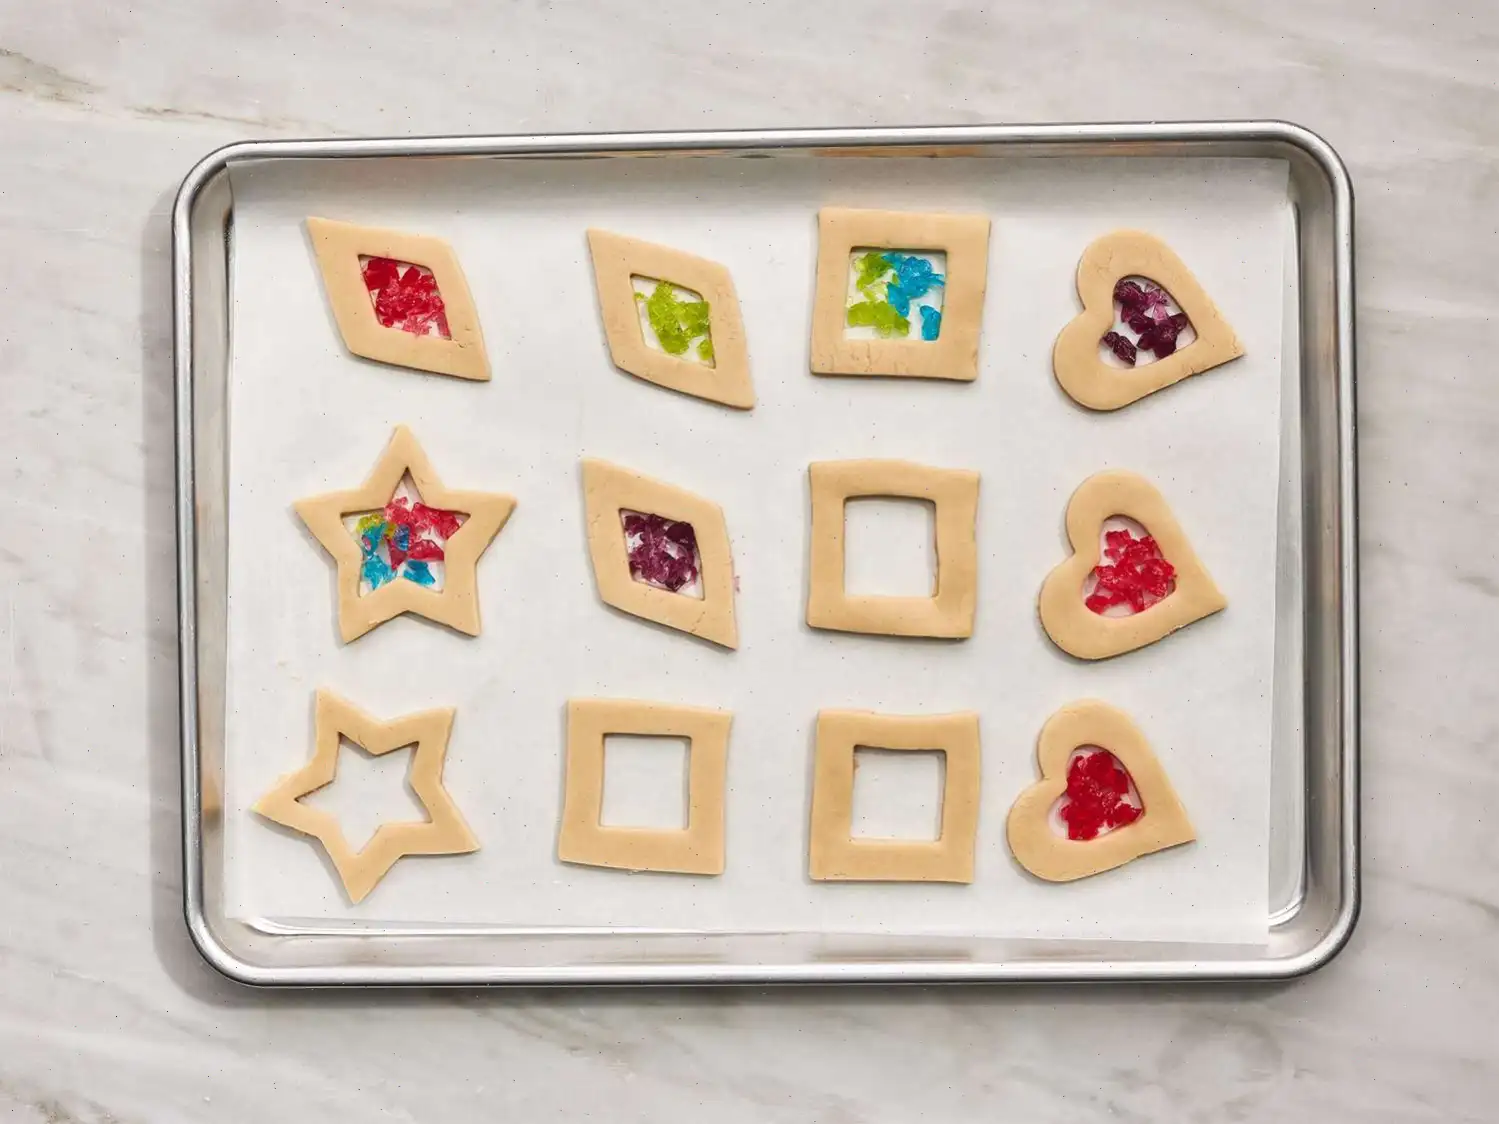
- Con un cortador ms pequeo (3-5 cm), recorta el centro de cada galleta. Si es necesario, ayuda con un palillo a retirar la masa central. Junta los restos, vuelve a estirar la masa y repite el proceso. Los centros de masa pueden hornearse por separado en otra bandeja.
- Envuelve los caramelos por separado y colcalos en bolsas de plstico resistentes. Aplstalos con un rodillo hasta obtener trozos pequeos, no en polvo fino.
- Rellena cada hueco central de las galletas con los trozos de caramelo hasta cubrir aproximadamente 2/3 del espacio.
- Hornea las galletas en la rejilla central durante 9-10 minutos, hasta que estn firmes y el caramelo se haya derretido. Los centros de masa solos requieren alrededor de 8 minutos.
- Retira del horno y deja enfriar 10 minutos sobre las bandejas. Luego, transfiere las galletas a rejillas para que se enfren completamente, unos 15 minutos ms.
Consejos del chef
- No batas la mantequilla con el azcar por demasiado tiempo para evitar que la masa se expanda al hornear.
- Puedes usar cualquier caramelo duro de colores o sabores variados segn tu preferencia.
Informacin Nutricional (por porcin)
- Caloras: 202
- Grasas: 10 g
- Carbohidratos: 26 g
- Protenas: 2 g
- Grasas saturadas: 6 g
- Colesterol: 43 mg
- Sodio: 55 mg
- Fibra diettica: 1 g
- Azcares totales: 9 g
- Vitamina C: 0 mg
- Calcio: 8 mg
- Hierro: 1 mg
- Potasio: 28 mg
Estas galletas vibrantes, cortadas en forma y con centros de caramelos de colores, son una tradicin encantadora durante las fiestas. No solo son deliciosas, sino que tambin son regalos o decoraciones llamativas. A continuacin, exploraremos los orgenes, variaciones regionales y algunos datos interesantes sobre las Galletas de Vidriera.
Historia y Origen de las Galletas de Vidriera
Las Galletas de Vidriera se han convertido en un elemento bsico durante la temporada navidea, especialmente en Estados Unidos. La idea de estas galletas probablemente se origin en el concepto de crear artculos decorativos a partir de caramelos a base de azcar, una tradicin que data de siglos atrs. Las primeras versiones de estas galletas se popularizaron en Europa, donde los panaderos usaban caramelos duros para llenar formas de galletas, creando un efecto de "vidriera". Hoy en da, este dulce se ve a menudo como una manualidad navidea, combinando la repostera con el arte. Aunque el origen exacto no est claro, su popularidad creci a finales del siglo XX, cuando los panaderos caseros buscaron formas creativas de celebrar la temporada.
Variaciones Regionales
Si bien las Galletas de Vidriera estn principalmente asociadas con las tradiciones navideas estadounidenses, su creacin se ha extendido a diversos pases, cada uno aadiendo su propio toque. En algunos pases europeos, los panaderos incorporan especias como canela o nuez moscada en la masa, mejorando el sabor con los aromas tradicionales de las fiestas. En Escandinavia, donde las galletas de "pan de jengibre" son comunes, se aplica la misma tcnica de vidriera a las formas de pan de jengibre. Sin embargo, el principal atractivo de las Galletas de Vidriera es el uso de caramelos duros y vibrantes con sabor a frutas, lo que las hace visualmente impactantes, sin importar dnde se hagan.
Qu Hace nicas a las Galletas de Vidriera?
Comparadas con otros tipos de galletas, las Galletas de Vidriera se destacan por su apariencia artstica. Mientras que muchas galletas se hornean en una forma uniforme, el efecto de vidriera las convierte en un dulce decorativo nico. La masa en s es simple, a menudo similar a las galletas de azcar, pero la diferencia clave radica en el uso de caramelos duros triturados. Estos caramelos se derriten en el horno, creando una ventana translcida en la galleta que imita el efecto de una vidriera. Esta caracterstica distintiva hace que las Galletas de Vidriera se diferencien de otros dulces similares como las galletas de azcar o las galletas de mantequilla, que carecen de atractivo visual y centro de caramelo.
Dnde se Sirven Habitualmente las Galletas de Vidriera?
Las Galletas de Vidriera son a menudo vistas como parte de las decoraciones festivas, especialmente durante las celebraciones de Navidad y Ao Nuevo. Son una excelente adicin a una bandeja de galletas navideas o pueden ser empaquetadas como regalos caseros. Debido a su diseo nico, a menudo se usan como adornos en los rboles de Navidad o como decoracin para casas de jengibre. Estas galletas tambin son populares en fiestas con temtica invernal, ventas de pasteles escolares y eventos benficos. Sus colores brillantes y su aspecto intrincado las convierten en una opcin ideal para quienes buscan agregar un toque de alegra festiva a sus reuniones.
Datos Interesantes sobre las Galletas de Vidriera
- Algunos panaderos utilizan una variedad de caramelos duros de diferentes sabores, como Jolly Ranchers o Life Savers, para crear diferentes colores y sabores en sus galletas.
- Estas galletas pueden hacerse en cualquier forma, pero los temas festivos como estrellas, rboles y copos de nieve son los ms populares durante la temporada navidea.
- A pesar de su apariencia delicada, las galletas son sorprendentemente resistentes y pueden almacenarse hasta una semana, lo que las hace perfectas para regalar en las fiestas o como parte de un intercambio de galletas.
- El efecto "vidriera" se crea gracias al caramelo derretido, que acta como vidrio, pero es importante no triturar el caramelo demasiado fino; los trozos ms grandes son los mejores para el impacto visual.
- Algunos panaderos experimentan aadiendo glaseado a las galletas, decorando las secciones de "vidriera" o incluso pintndolas para mejorar su atractivo artstico.
Conclusin
Las Galletas de Vidriera son ms que un simple dulce: son una manualidad divertida y festiva que aporta color y creatividad a tu mesa navidea. Ya sea que las ests horneando para una fiesta, como regalo, o simplemente para disfrutar con la familia, sus centros vibrantes llenos de caramelo seguramente alegrarn el da de cualquiera. Con sus orgenes en las tradiciones navideas tanto europeas como americanas, estas galletas se han convertido en un smbolo universal de la alegra y la belleza de la temporada navidea.
Puedes escuchar esta receta en formato de audio de IA. Simplemente haz clic en el botón de reproducción a continuación para escuchar el contenido en el formato que mejor te convenga. ¡Es una excelente manera de absorber información sobre la marcha!
Preguntas frecuentes sobre Receta de galletas de cristal teñido
Compartir
Comentarios
Rebecca Rodriguez
04/05/2024 09:35:26 AM
La receta fue fácil de seguir y el resultado fue hermoso. Opté por mantequilla vegetal, pero no funcionó bien, requiriendo añadir más agua para lograr la consistencia adecuada de la masa. La próxima vez usaré mantequilla normal. Inicialmente utilicé papel pergamino, pero los centros de caramelo se pegaron, así que cambié a papel de aluminio, lo que funcionó mejor. Usar caramelos duros Jolly Rancher fue complicado porque eran difíciles de triturar, resultando en centros de caramelo demasiado duros que no fueron muy agradables. Podría experimentar con otro tipo de caramelo la próxima vez. A pesar de mis dudas sobre la cantidad de sal indicada (3/4 cucharadita), el resultado final no estuvo salado. Los horneé 12 minutos en lugar de 10. Mezclar todo a mano, ya que no tengo batidora, fue manejable. En general, el resultado fue bueno y estaría dispuesta a intentarlo de nuevo con algunas sustituciones de ingredientes.
Jessica Carter
10/23/2022 10:19:38 PM
¡Me divertí mucho haciendo estas galletas! Seguí las instrucciones exactamente como estaban escritas y las horneé durante 13 minutos en lugar de 10. La próxima vez las hornearé unos minutos más para que se doren un poco más y queden más crujientes. Eran bastante mantecosas, como galletas de mantequilla, pero más delgadas con un relleno delicioso en el centro. La receta rindió 30 galletas, y horneé algunas formas recortadas muy lindas. No usé todos los Jolly Ranchers Zero triturados que tenía, pero las galletas quedaron muy bonitas y sabrosas. ¡Definitivamente planeo hacerlas de nuevo para el Día de San Valentín!

 audio version


CookGuide es tu guía culinaria para descubrir nuevos sabores y cocinar con confianza. Encuentra recetas de confianza, consejos prácticos e inspiración tanto para cocinas domésticas como profesionales.
Cualquier copia, distribución o uso de los materiales de este servicio sin autorización está estrictamente prohibido. Las infracciones serán procesadas según la legislación aplicable y pueden dar lugar a responsabilidades civiles y penales.
© Guía de cocina Studio 2026 | Cookies | Política de PrivacidadEncuentra la receta perfecta con IA. Solo introduce los ingredientes y deja que Cook te guíe hacia la magia.