
Old-Fashioned Chocolate Fudge Recipe

Whether enjoyed during the holidays, on the boardwalk, or even on a regular ol' Tuesday, indulgent fudge is the perfect candy. With this chocolate fudge recipe, five ingredients is all you'll need to have the absolute best fudge for gifting or snacking. Plus, this classic fudge recipe makes for a great base if you want to make new fudge creations by adding ingredients like nuts, candy, chocolate chips, or marshmallows.
Fudge and chocolate are both candy, but they have different main ingredients. Fudge is made with sugar, while chocolate is made primarily from cocoa. Fudge is created by heating sugar past its boiling point, making it a confection formed from crystallized sugar. Unlike chocolate, fudge doesnt need to be flavored with cocoa powder. There are plenty of variations, with some recipes replacing cocoa powder with peanut butter, vanilla, or other flavored extracts.
Here's how to make the perfect chocolate fudge:
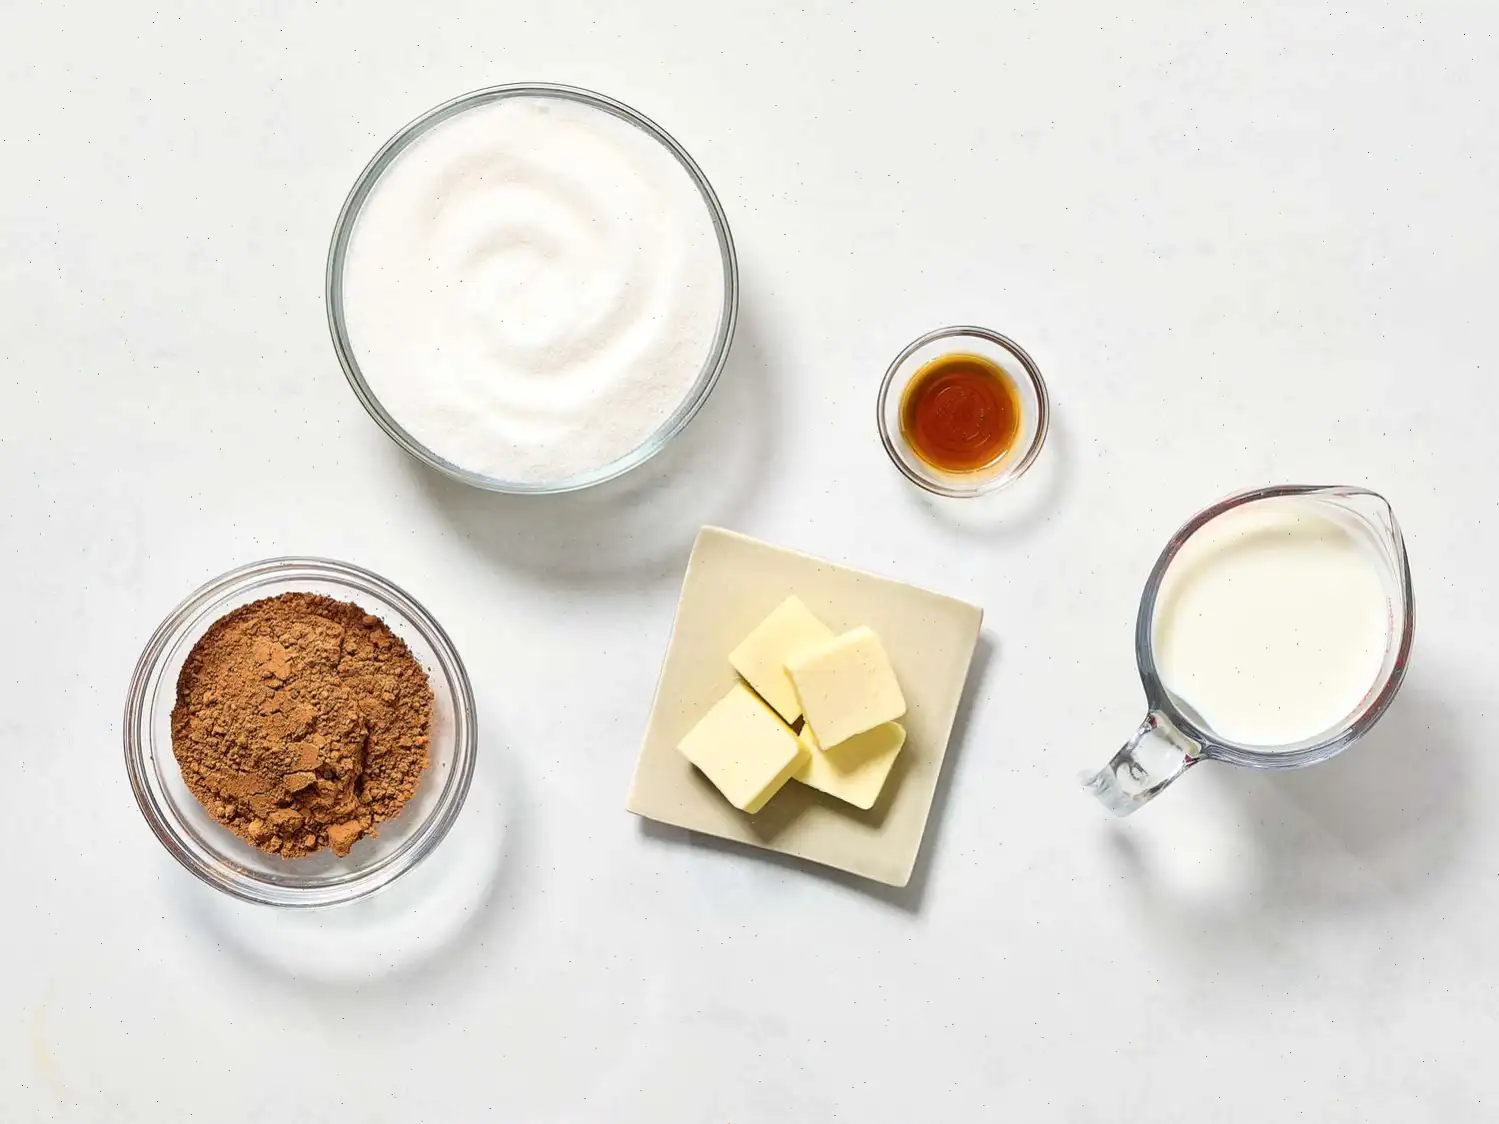
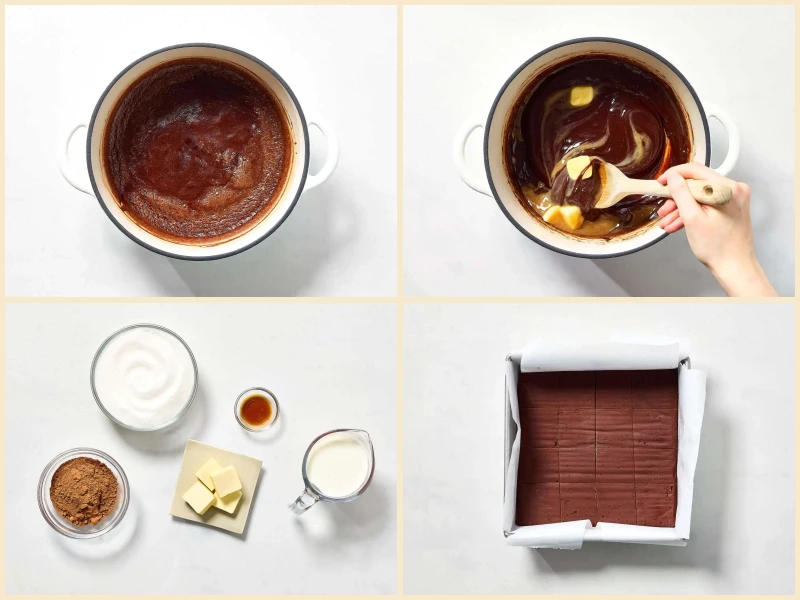
- Prepare the ingredients: Gather all the ingredients: 2 cups white sugar, cup unsweetened cocoa powder, 1 cup whole milk, 4 tablespoons unsalted butter (sliced and softened), and 1 teaspoon vanilla extract.
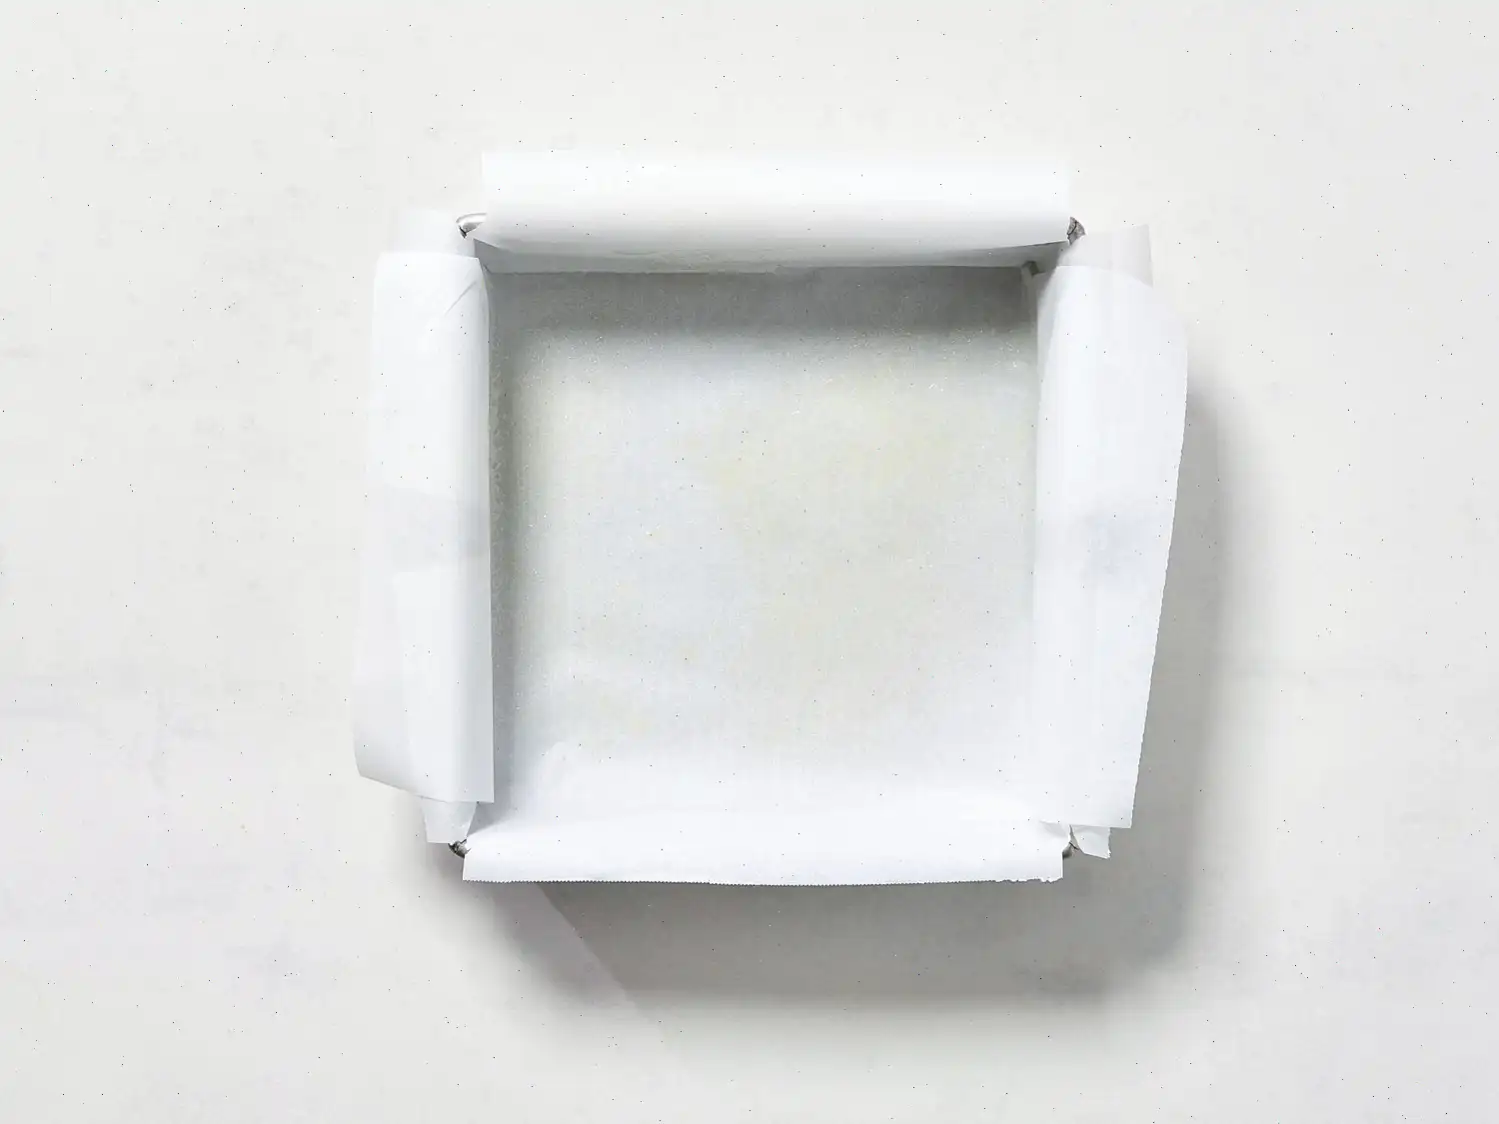
- Grease the baking pan: Grease an 8-inch square baking pan to prevent the fudge from sticking later.
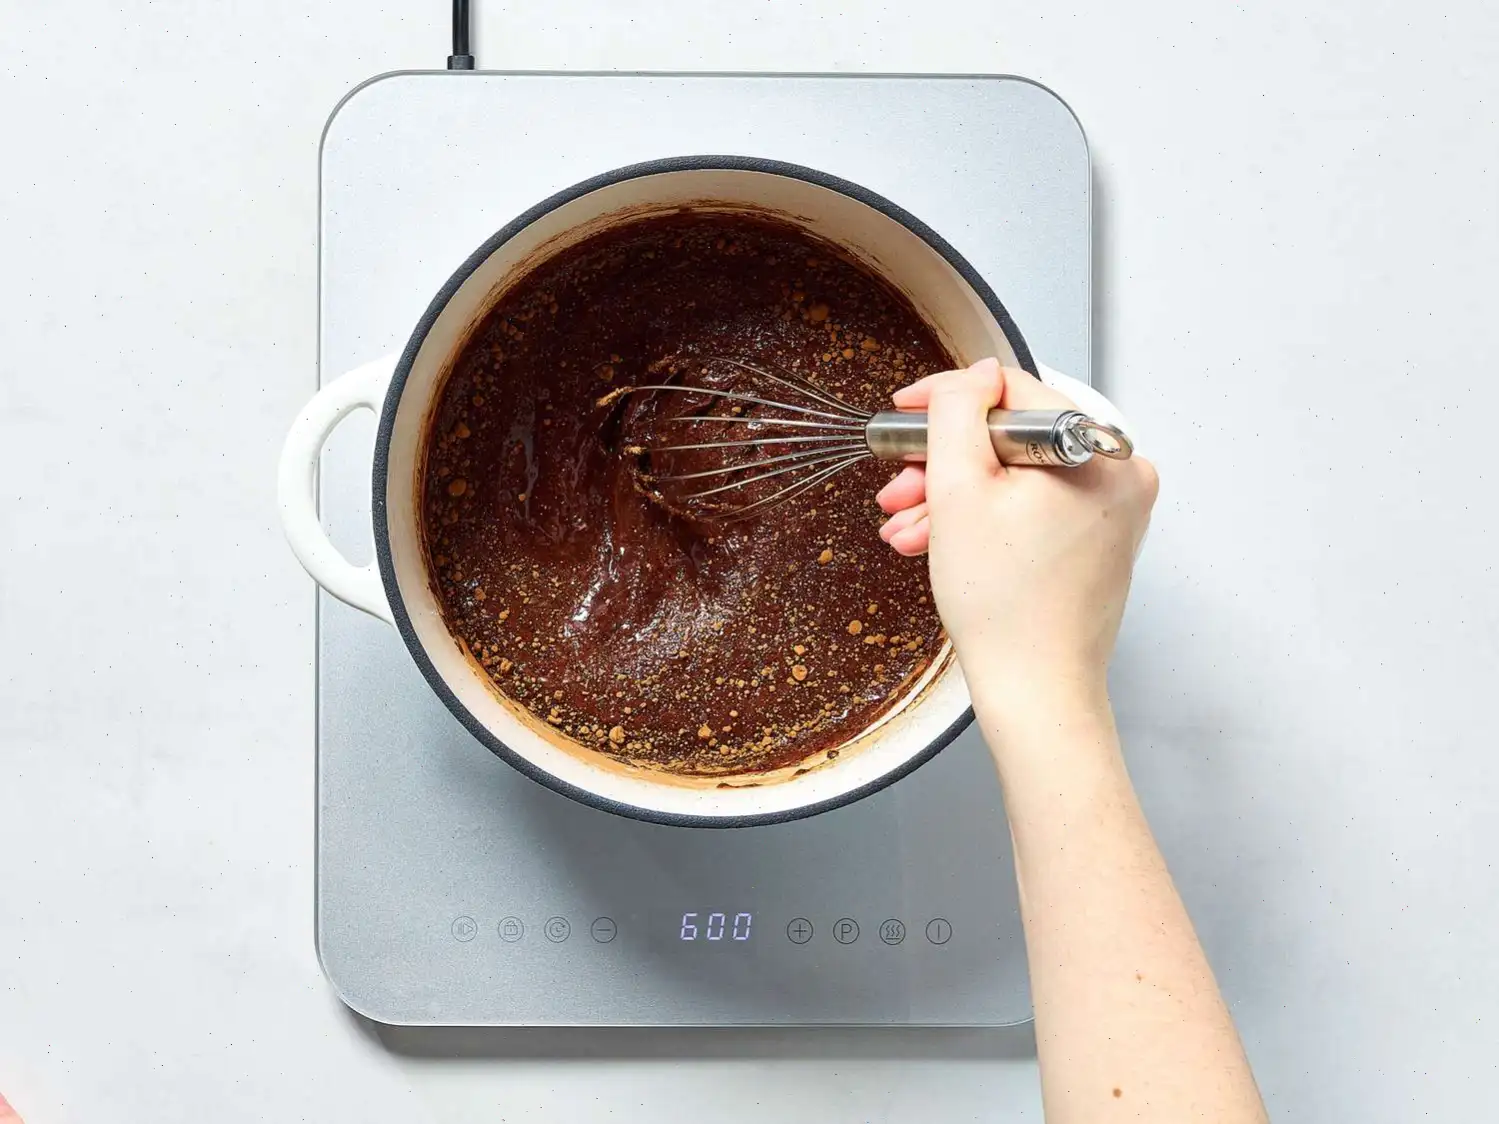
- Mix the ingredients: In a medium saucepan, combine the sugar and cocoa powder. Pour in the milk and stir until everything is well blended.
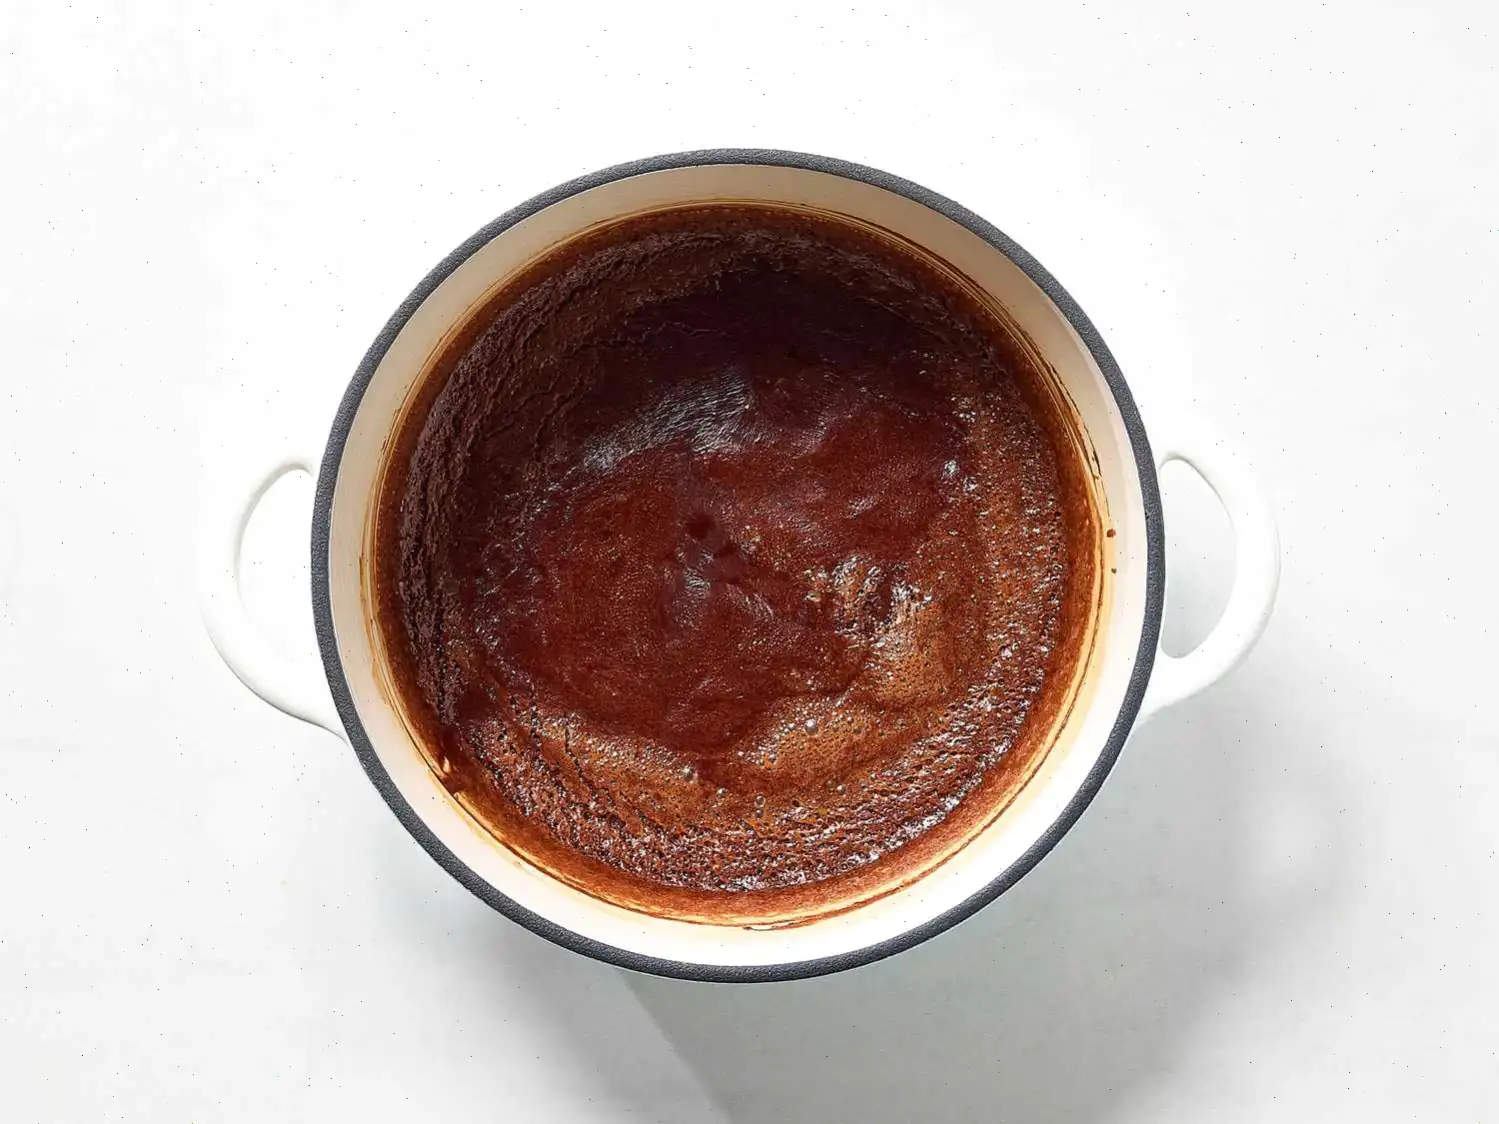
- Boil the mixture: Set the heat to medium-high and stir constantly until the mixture begins to boil. Once its boiling, reduce the heat to low.
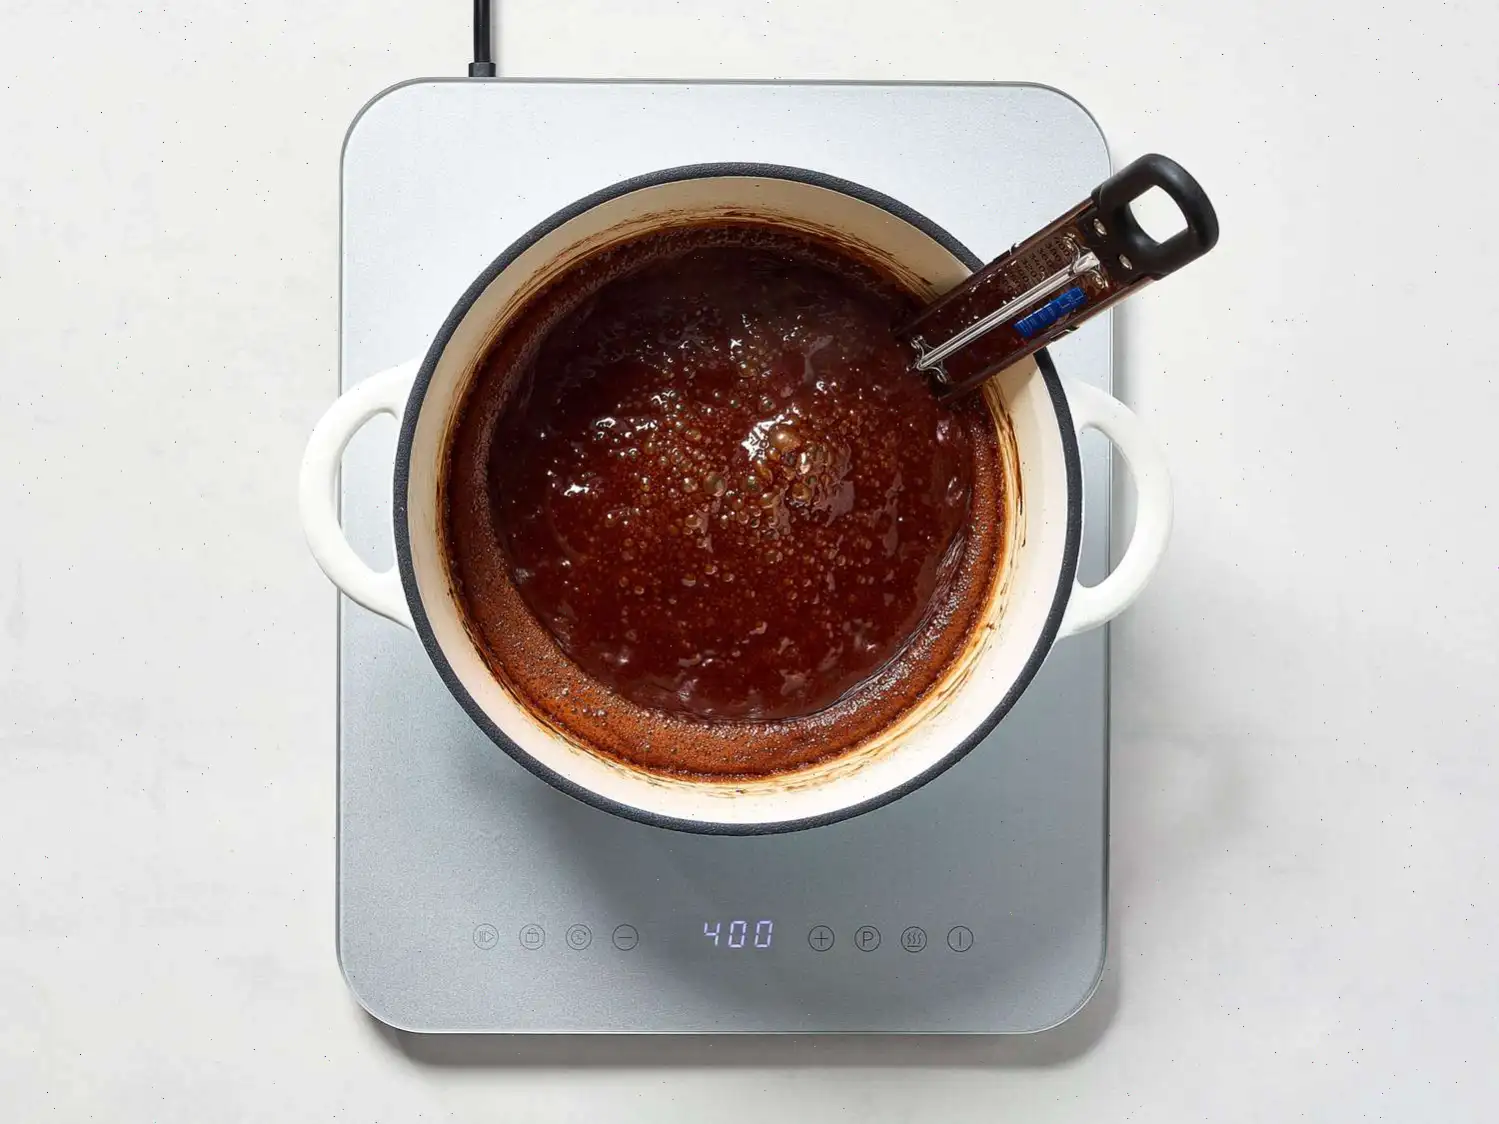
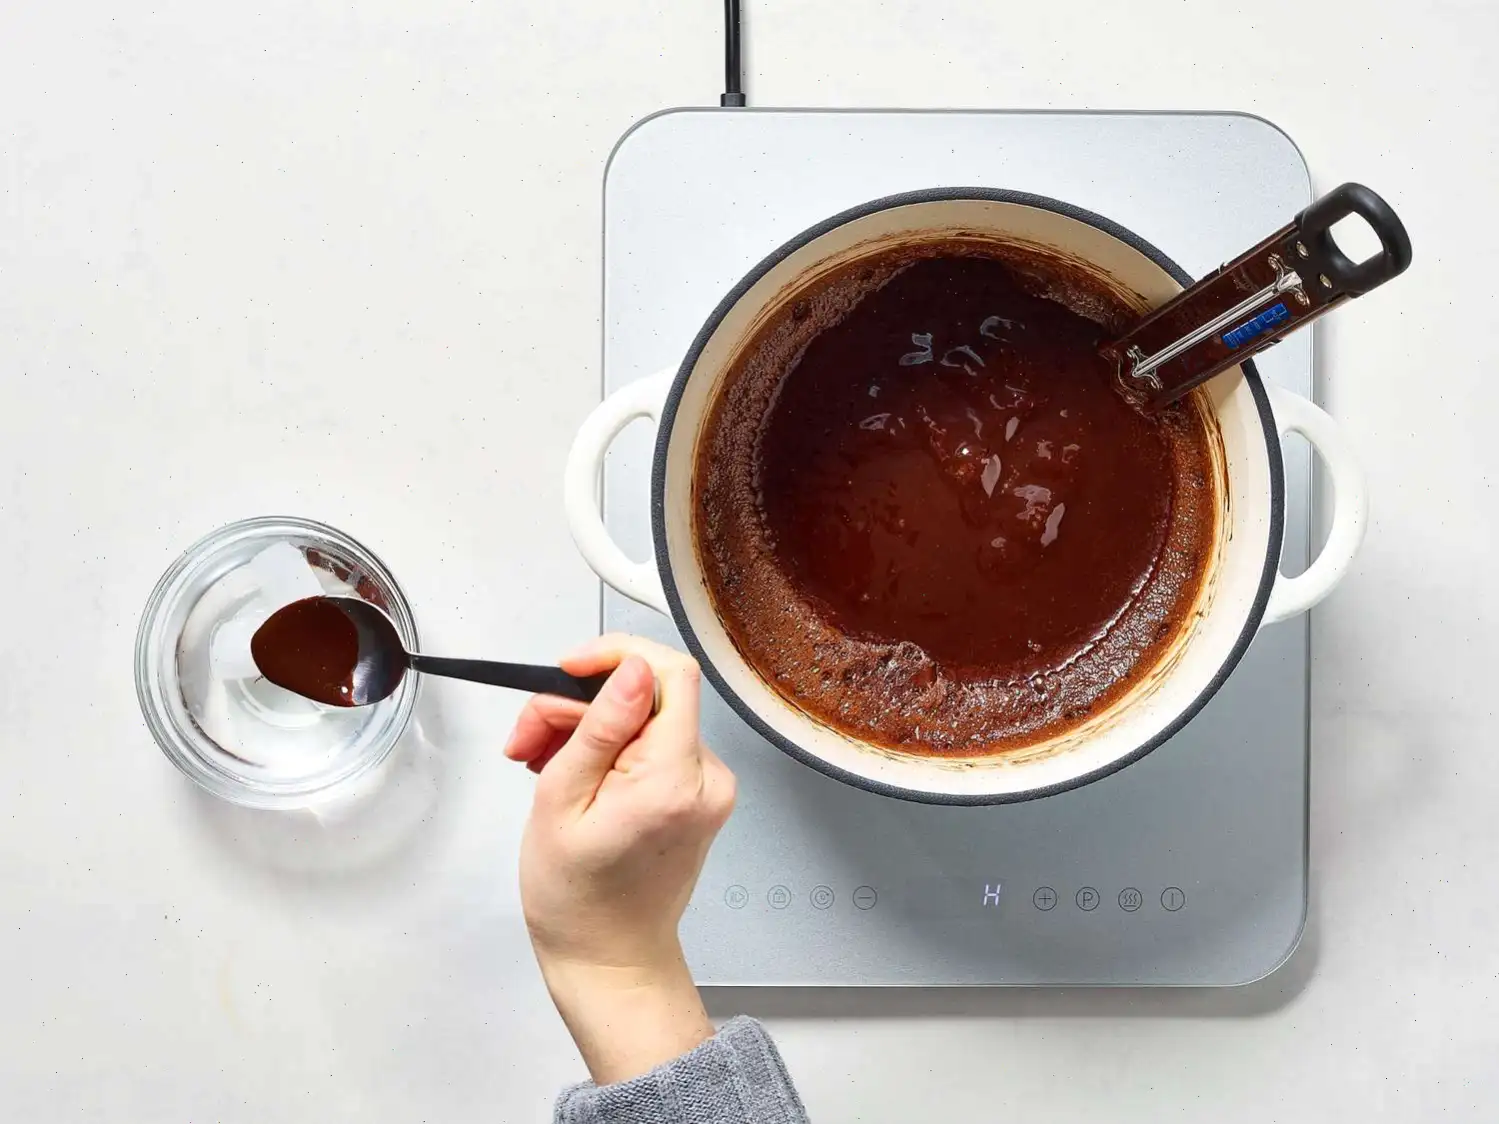
- Simmer and measure: Insert a candy thermometer into the mixture. Let it simmer without stirring until the temperature reaches 238F (114C), about 10 minutes. If you dont have a thermometer, you can check by dropping a small amount into cold water; if it forms a soft ball that flattens when removed, its ready.
- Cool the fudge: Remove the pan from the heat and allow the mixture to cool undisturbed for 50 to 70 minutes until it reaches about 110F (43C).
- Add butter and vanilla: Once the mixture has cooled, add the butter and vanilla. Beat with a wooden spoon until fully incorporated. Continue beating until the fudge loses its sheen, but dont stop too early.
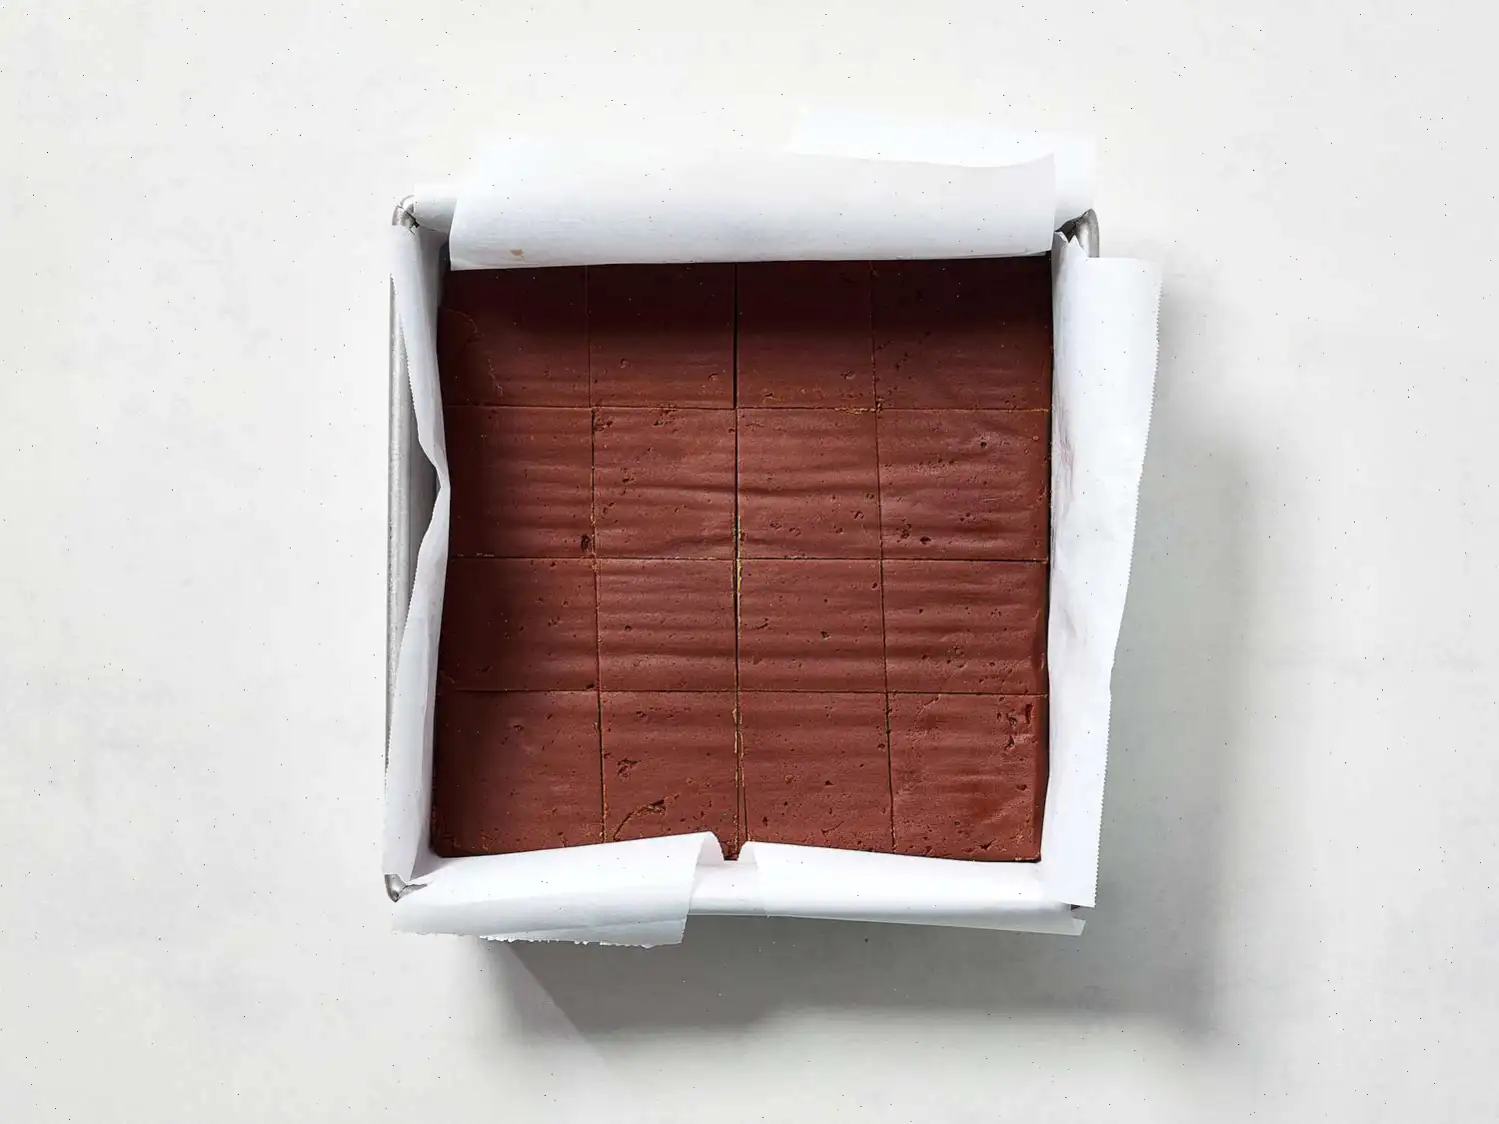
- Transfer to the pan: Pour the fudge into the prepared pan and gently press it to flatten it out.
- Cool and cut: Let the fudge cool at room temperature or refrigerate it for faster results. Once cooled, cut it into 1-inch squares.
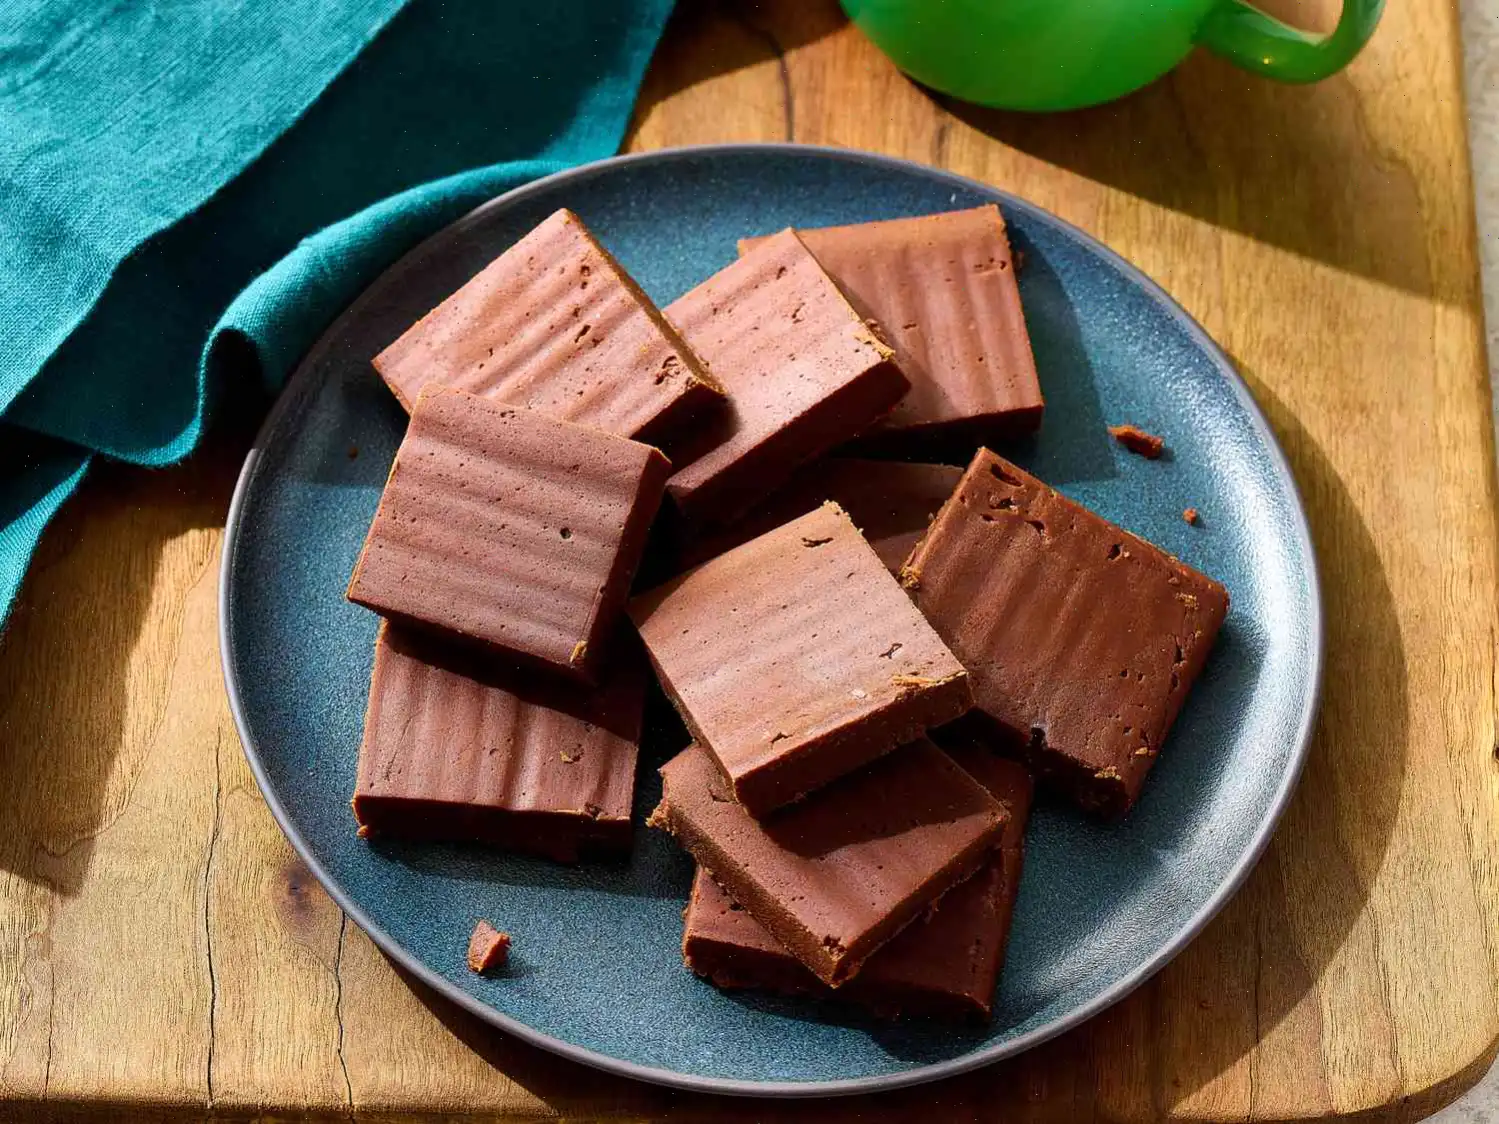
- Enjoy: Your homemade fudge is ready to enjoy! Serve it as a treat or give it as a gift to share the sweetness.
Recipe Tip: For best results, make sure to simmer the fudge mixture without stirring in Step 4. Stirring during this stage can cause the sugars to crystallize, which will affect the texture of the fudge.
Storage and Freezing Tips:
How to store chocolate fudge: Store your fudge in an airtight , with a layer of parchment paper or aluminum foil between each piece. You can keep it at room temperature for up to two weeks or refrigerate it for up to three weeks.
How to freeze fudge: Wrap each square of fudge in plastic wrap and place the wrapped pieces into a zip-top freezer bag or an airtight . Freeze for up to three months. To enjoy, thaw the fudge overnight in the refrigerator.
Nutrition Facts (per serving):
Calories: 35
- Total Fat: 1g (1%)
- Saturated Fat: 1g (3%)
- Cholesterol: 2mg (1%)
- Sodium: 2mg (0%)
- Total Carbohydrate: 7g (2%)
- Dietary Fiber: 0g (1%)
- Protein: 0g (1%)
- Calcium: 6mg (0%)
- Iron: 0mg (1%)
- Potassium: 16mg (0%)
Percent Daily Values are based on a 2,000 calorie diet. Your daily values may vary depending on your calorie needs.
Comments
erin mitchell
10/06/2025 01:52:54 PM
I've made it twice-loved it both times! I used to watch my grandmother make fudge when I was little. I've ruined a few batches on my own. There is nothing wrong with this recipe. You just have to be careful. Fudge can be frustrating to make. Thanks for all of your helpful tips. 1st batch came out just as I remember it. Firm, but not rock hard, and not sugary either. I was concerned, because it was snowing at the time I made it. 2nd batch: Snowing again. And this time I wanted it to be JUST a hair softer than before, so I took it off of the heat sooner. Too soon. It took forever to set. Both times I took it off of the heat and immediately added the butter, mixed it in, and then added the vanilla. The first time it didn't take too long to beat the sheen off of it. The second time it wasn't done, but I'm SO glad I didn't give up and throw it out! I got out my hand mixer and just mixed and mixed it...I'm guessing I mixed it for at least 20 minutes until it lost it's sheen! I kept going because I could tell that as it cooled it was thickening. The second time was much softer, and not as good as the first at all. But still worth the effort. I make mine on an electric flat top stove with a thermometer and the cold water test-no stirring after it comes to a boil. I just wanted to list both of my experiences in case somebody was tempted to throw out your fudge if it didn't seem to be setting.
wert23
05/09/2010 03:17:19 PM
Excellent recipe. At the end, I was left with a lot of very hard, crusty remains in the pot. I was going to soak it and hope for the best but then I came up with a better idea. To clean the pot, add some milk and reheat it, while swirling it around and scraping the sides. It will all come off and you will end up with the best mug of chocolate you’ve ever had. And an utterly clean pot. I recently had a $5 mug of hot chocolate a local luxury chocolatier, and it was indistinguishable from the one I made last night with all the leftovers in the pot. Why soak it with soapy water when you can make yourself a free mug of utterly decadent hot chocolate?
Cindy
01/03/2008 09:51:46 PM
Very difficult to make properly. I butter sides of pot after sugar is poured in so it lessens the chance of crystallization. I recommend reading further (top) reviews to ensure you follows steps properly
VioletMead7307
03/21/2023 05:11:56 PM
I just made this. You just have to go a little bit beyond 238. I went up to 244. I added raisins and pecans. Everyone loved it. If you follow the rules like not touching it until it reach the desired temp, your fudge will be great. Having a candy thermometer sure does help a lot. The only downside is that when you wait for it to cool yo about 140, there will be so much wastage because it hardens real quick. I think once you’re in 180-170 you can add room temp butter and vanilla. And mix nail the mixture looses its shine. With 140, too much left over on the wall of the pan. When you scrape it, it kinda becomes chalky. But the rest are truly creamy. We didn’t even have anything left to take pictures.
Kathy O'Howell
12/17/2023 03:20:46 PM
Just like my mother used to make. However, the first batch did not work because I let the temperature go up too far. Candy thermometer, for me, is a must. Second batch I cooked to exactly 234 degrees and kept it there for a minute or two. I did not let it cool before adding the butter and vanilla. I will make it again for sure.
ChillyAhi6351
02/11/2023 07:11:37 AM
I've made fudge for 30 years and never once gotten the consistency I wanted. Always hard and gooey. So I was skeptical of the texture. i simmered it for 20 minutes at low then gradually raised temp. After cooling, I added butter and vanilla at 120° and thought it would have been gooey like all the other times. It was perfect texture. I will only be using this recipe from now on. Thank you for being so precise and helping me finally get the consistency I wanted. It's been 30 years of fudge failure🤣
Goldie Owens
01/30/2020 12:33:26 AM
This turned out just the way I like it. I'm going to try leaving out the cocoa and adding 3 tablespoons of instant coffee. So I made it! I also used 1/4 c. Liquid coffee mate, cinnamon and vanilla cream flavor. And reduced Milk to 3/4 c. It turned out amazing!
BlueCress8296
04/28/2025 07:47:13 AM
My kid recipe book from the 70's had a very similar recipe - same measurements but I lost that and haven't made it in decades so tried this recipe. I boiled for about 10 mins and checked temp - took a lot longer to reach 238 deg maybe 20 mins. Eventually using thermom AND soft ball test, I took off the heat. My old 70's recipe had me rest the candy for only 5 mins before beating in butter and vanilla so I did that. By hand with a wooden spoon it lost its shine in about 3 mins. I only just made it to the bench to spread out on baking paper. I never bothered with a baking tin. Pretty good fudge. Too much cocoa for my taste - next time I'll use only a qtr cup and add a little salt to the sugar.
TealFlour7842
09/04/2023 12:35:42 AM
I made it and I think it turned out well. I used a digital thermometer and having very little cooking experiance. Mime turned out a little grainy but I'm sure it was my error. Still good. Set up well.
ChillyWater9457
02/27/2023 02:31:10 AM
Good recipe, though it definitively takes more than 10 minutes to hit the soft ball stage. I did add 1/4t salt to it. Key things to consider when making candy: your altitude, how fast you’re cooking it, and what the humidity is. If it’s humid, it’ll never set up, because what you’re trying to do is cook the moisture out of the candy. Cook too fast, it could boil over and you might accidentally cook it too hot. Cook too slow, you could end up with dry, crumbly fudge.
William Goodwin
03/08/2024 07:06:48 PM
I love this recipe, I did although make a couple alterations, I used almond instead of vanilla, at the very last min when I first turned my stove off, I added into it a whole bar of bakers chocolate, plus I added 2 cups of icing sugar, really made a wonderful creamy texture to it.
StrongUdon3994
06/22/2025 07:19:30 AM
I have won State Fair equivalent baking competitions in Australia, and made many candies with success. I followed this recipe to a T, using a quality candy thermometer and the result is an absolute disaster which has also destroyed one of my best cooking pots. Burnt sugar in pot, and fudge mix was too solid to beat in the butter and vanilla. Avoid!!
metaxis
06/17/2025 06:58:56 AM
A lot of people seem to have trouble with this recipe. This is actual candy making, where the exact form of the sugar created really matters, so you rneed to pay close attention to the instructions, have accurate instruments, and reasonable technique. Pointers for suspected areas of trouble: *lightly* grease the pan or use parchment. Make sure your candy thermometer works, ideally with an accurate digital. Don't stir after it boils, definitely turn the heat to low and be patient. If the room is cold, don't let It cool so long before adding the butter and actually measure it at 110 F/43C. The unsalted butter should be sitting out the whole time so it's really soft. You really have to beat it, this is the magic. I'm a big guy and my arms get tired, So maybe take turns stirring it, really strongly. If it loses it shine you're in good shape. It probably won't really pour at this point but you'll definitely be able to press it into the pan. After it firms up it should cut easily, though you may want to butter the knife. It's super rich. 64 pieces is actually about right.
SmartCream7727
05/30/2025 12:29:14 AM
I would not let it cool in pot again. It set in there and I couldn't get back out. Waste
RedMalt8572
05/15/2025 06:30:24 PM
I love this recipe. Suggestion- try adding 1/4 cup of creamy peanut butter with butter and vanilla. It is delicious!
Daniel Wilson
04/03/2025 02:13:15 PM
Made it with friends — epic win.
CalmAcai7594
03/20/2025 10:28:32 PM
Came out good...just wished I'd watched the video prior. I thought I was about to summon Cthulhu when it started boiling.
DaisyPusher
03/10/2025 07:41:26 PM
Tried twice, 1st time it wouldn't set and I had to reheat it to save it, 2nd time was the same and this time around was pretty sure the butter after the cooling was messing with it making it more liquid. After looking for another recipe I find another one that has the butter added BEFORE cooling. So I'm pretty sure the steps are in the wrong order.
WiseMead9951
02/15/2025 01:43:14 AM
The sugar had to get granulated after wards so really beat it and if it is still gooey try freezing a bit. The beater brings the sugar out of solution making candy solid and dissolve in your mouth.
saflorendo
12/25/2024 07:24:41 PM
Followed the recipe to a T. Didn’t set up, came out like frosting. Don’t use spray like the recipe suggests…it left my outer corners greasy and they turned to mush.


 audio version
 Recipe")


CookGuide is your culinary guide to discovering new flavors and cooking with confidence. Find trusted recipes, practical tips, and inspiration for both home and professional kitchens.
Any copying, distribution, or use of the materials from this service without authorization is strictly prohibited. Violations will be prosecuted under applicable law and may result in both civil and criminal liability.
© Cook Guide Studio 2025 | Cookies | Terms and conditionsFind the perfect recipe with AI. Just enter your ingredients and let CookGuide do the magic.