
Receta de caramelos de calabaza con sal
Estos caramelos de calabaza con sal son el dulce perfecto para la temporada de otoño. Hechos con puré de calabaza cremoso, caramelo rico y un toque de sal marina, son un postre delicioso y decadente que seguro saciará tu antojo de dulce. Disfruta de estos caramelos como un tentempié delicioso o envuélvelos como un regalo casero pensado para amigos y familiares.
Ingredientes
- 2/3 taza de semillas de calabaza sin sal
- 2/3 taza de pur de calabaza
- 1 1/4 tazas de crema espesa
- 2 tazas de azcar granulada
- 1/3 taza de jarabe de arce puro
- 1/4 taza de jarabe de maz ligero
- 1/4 taza de agua
- 3 cucharadas de mantequilla sin sal, fra y cortada en trozos
- 1/4 cucharadita de canela molida
- 1/8 cucharadita de clavos molidos
- 1/8 cucharadita de nuez moscada molida
- 1/8 cucharadita de sal fina
- 3/4 cucharadita de vinagre blanco o jugo de limn fresco
- 1/4 cucharadita de sal marina en escamas, como fleur de sel
Instrucciones
Paso 1: Tostar las semillas
Coloca las semillas de calabaza en una sartn seca y calintalas a fuego medio, removiendo frecuentemente durante unos 3 minutos hasta que tomen un tono dorado suave. Retralas del fuego y djalas enfriar en un recipiente aparte. Esto ayudar a preservar su sabor dulce y a nuez.
Paso 2: Preparar el molde
Engrasa un molde apto para horno de 20x20 cm con mantequilla y cubre el fondo con papel manteca. Asegrate de que el lado con mantequilla quede hacia arriba. Coloca las semillas de calabaza ya enfriadas uniformemente sobre el papel.
Paso 3: Preparar la base de azcar
En una olla grande, mezcla el azcar, el jarabe de arce, el jarabe de maz y el agua. Remueve ligeramente y deja reposar hasta que sea momento de cocinar.
Paso 4: Calentar la crema de calabaza
En una olla pequea, combina el pur de calabaza con la crema espesa. Calienta a fuego bajo, removiendo de vez en cuando. Corta la mantequilla en trozos pequeos y coloca las especias, la sal y el vinagre en recipientes separados para tener todo a mano.
Paso 5: Cocinar la mezcla de azcar
Coloca la mezcla de azcar a fuego medio-alto y lleva a ebullicin suave, removiendo ocasionalmente. Una vez que hierva, reduce el fuego y deja cocinar hasta que la temperatura alcance los 118C (245F).
Paso 6: Integrar las mezclas
Con cuidado, vierte la crema de calabaza caliente en el jarabe de azcar mientras sigues batiendo constantemente. Ten precaucin con las salpicaduras y burbujas. Continua cocinando y batiendo hasta que la temperatura llegue a entre 115C y 118C (240F a 245F).
Paso 7: Aadir los sabores
Retira la olla del fuego y agrega los trozos de mantequilla, las especias, la sal y el vinagre. Remueve bien hasta que todo se mezcle de manera uniforme.
Paso 8: Verter el caramelo
Vierte con cuidado la mezcla de caramelo en el molde preparado, asegurndote de no mover las semillas de calabaza. Deja reposar durante unos 10 minutos para que se endurezca ligeramente.
Paso 9: Espolvorear sal
Distribuye de manera uniforme la sal marina en escamas sobre la superficie del caramelo, ajustando la cantidad segn tu gusto personal.
Paso 10: Enfriar
Deja que el caramelo alcance la temperatura ambiente y luego cbrelo. Refrigralo durante unos 30 minutos para facilitar su corte.
Paso 11: Cortar y servir
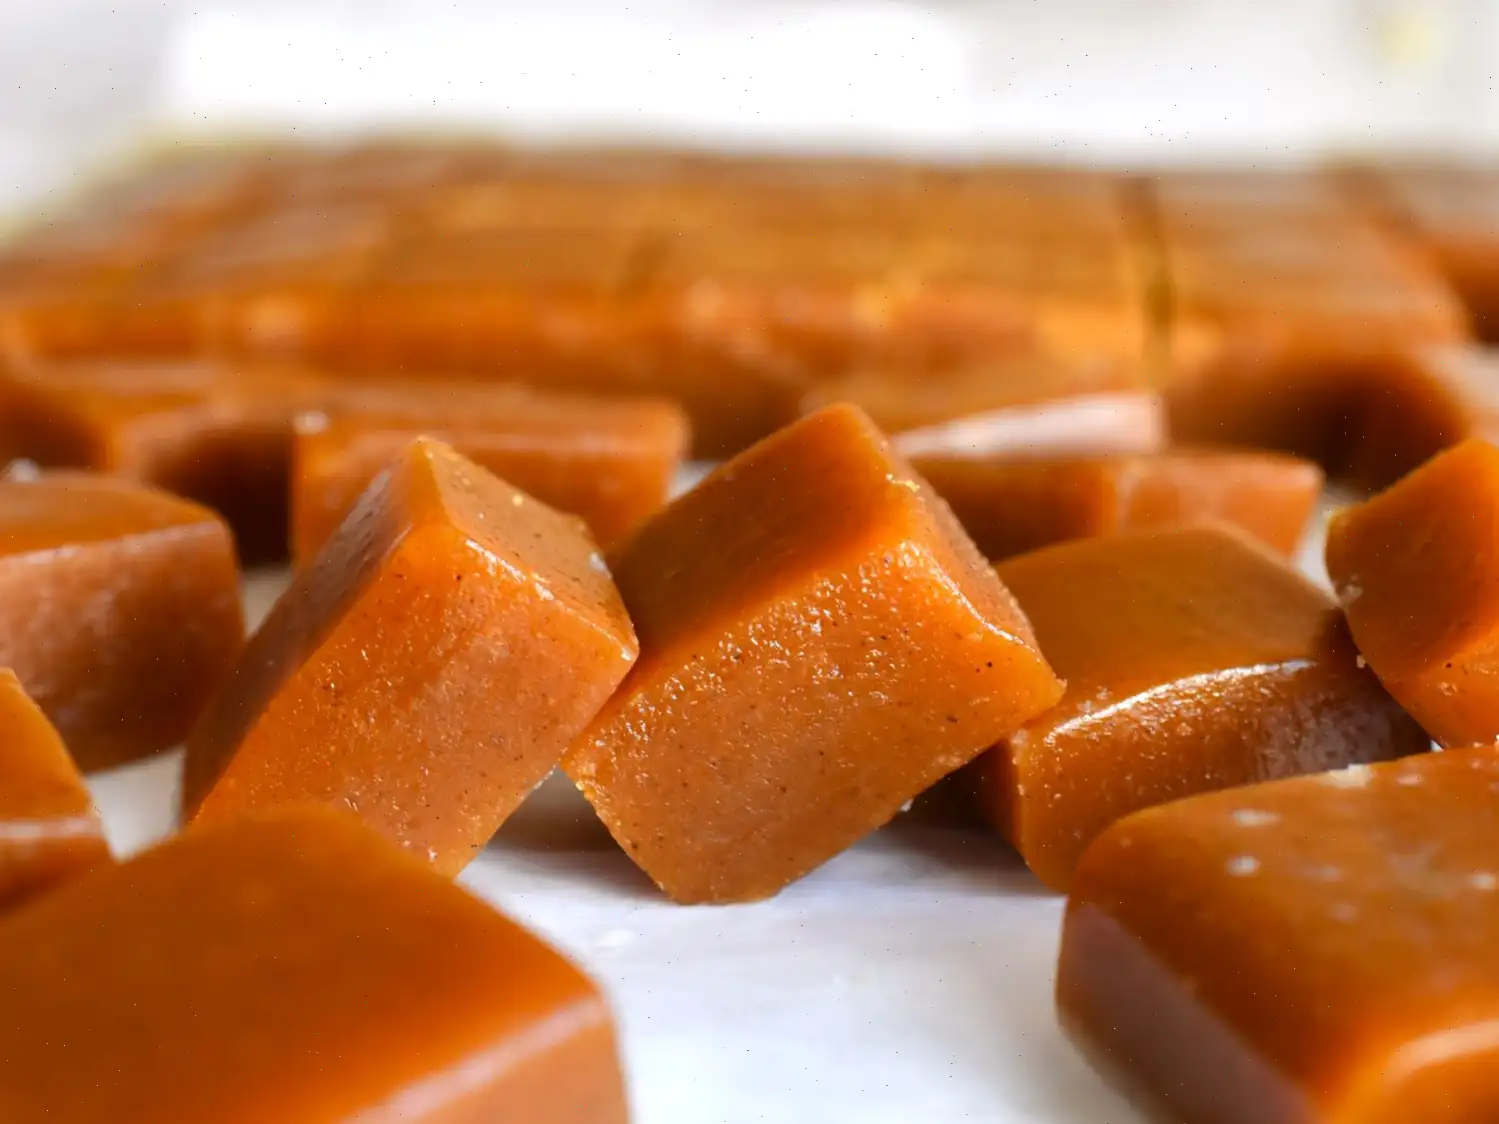
Usando un cuchillo largo y afilado, corta el caramelo en 64 trozos. Limpia la cuchilla con un pao tibio y hmedo entre corte y corte para evitar que se pegue. Sirve y disfruta de tus deliciosos caramelos de calabaza con sal.
Los Orgenes de los Caramelos de Calabaza con Sal
Los caramelos de calabaza con sal son una versin moderna del clsico caramelo, que combina la dulzura tradicionalmente mantequillosa con el sabor estacional de la calabaza y un toque de sal marina. Los orgenes de los dulces a base de calabaza en Amrica del Norte se remontan al perodo colonial temprano, cuando la calabaza era abundante y se usaba comnmente en pasteles y conservas. La idea de combinar la calabaza con el caramelo probablemente surgi en el siglo XX, cuando los confiteros estadounidenses experimentaron con sabores otoales para los dulces de Halloween y Accin de Gracias. El elemento salado se inspira en la prctica francesa de equilibrar la dulzura con la fleur de sel, lo que le da a este dulce un toque gourmet.
Variaciones Regionales
Esta receta refleja un enfoque distintivamente estadounidense hacia la confitera, particularmente asociado con el noreste de Estados Unidos, donde la calabaza es abundante y los festivales de otoo celebran las cosechas estacionales. En el Medio Oeste, los dulces similares pueden incluir semillas de calabaza tostadas incrustadas en fudge o chocolate, mientras que en el Sur, los postres de calabaza a menudo se especian con nuez moscada, canela y clavo. Cada regin adapta ligeramente la dulzura y la textura, pero la esencia de combinar la calabaza con el rico caramelo sigue siendo la misma.
Diferencias con Dulces Similares
Los caramelos de calabaza con sal se diferencian de los caramelos tradicionales principalmente por la adicin de pur de calabaza y especias clidas. A diferencia de los caramelos comunes, que dependen nicamente del azcar y la crema para su sabor, estos dulces introducen una complejidad terrosa y ligeramente dulce proveniente de la calabaza. En comparacin con los caramelos de especias de calabaza, que suelen ser masticables o esponjosos, los caramelos de calabaza con sal mantienen una textura suave y densa que se derrite en la boca, mientras que la sal marina acenta la dulzura y mejora la profundidad general del sabor.
Ocasiones Tpicas de Consumo
Estos caramelos se disfrutan tpicamente durante la temporada de otoo, especialmente alrededor de Halloween y Accin de Gracias. Se sirven comnmente como bocados pequeos en fiestas, cestas de regalos o reuniones estacionales. Muchas panaderas y confiteras los presentan junto con otros dulces otoales, y a menudo se utilizan en cajas de regalos caseras o como cobertura para postres como brownies o helados. Su tamao porttil y su sabor festivo los hacen ideales para compartir.
Datos Interesantes
Curiosamente, los caramelos de calabaza con sal han ganado popularidad en los ltimos aos como un dulce artesanal, destacando la combinacin de productos estacionales con tcnicas artesanales. El proceso de caramelizacin es delicado: alcanzar la temperatura perfecta de 240-245F (115-118C) asegura una consistencia firme pero masticable. El uso de semillas de calabaza agrega tanto textura como un toque de nuez, recordando los sabores tradicionales de otoo. Adems, la capa de fleur de sel no solo es decorativa, sino que tambin eleva el sabor, creando un equilibrio perfecto entre notas dulces, saladas y terrosas. A pesar de ser una invencin relativamente nueva, este dulce se ha convertido en uno de los favoritos entre los entusiastas de la comida estacional y se celebra tanto por su sabor como por su atractivo esttico.
Puedes escuchar esta receta en formato de audio de IA. Simplemente haz clic en el botón de reproducción a continuación para escuchar el contenido en el formato que mejor te convenga. ¡Es una excelente manera de absorber información sobre la marcha!
Preguntas frecuentes sobre Receta de caramelos de calabaza con sal
Compartir
Comentarios
Elizabeth Perez
09/25/2022 09:50:36 AM
Súper sabroso, pero siendo mi primer intento de hacer caramelo, puede que haya cometido algún error. Cortar y separar el caramelo fue increíblemente frustrante, y cuando se calentaron de nuevo, se transformaron en una consistencia tipo salsa, muy suaves y pegajosos. ¿Es posible cocinarlos más tiempo o a mayor temperatura para lograr una textura más firme que mantenga mejor la forma? Ni siquiera puedo envolverlos sin que se peguen entre sí.
Deborah Martinez
08/29/2022 11:37:19 AM
¡Me encantaron estos caramelos! Son increíblemente ricos, mantecosos y llenos de sabor a calabaza. Decidí omitir las semillas de calabaza porque solo me interesaba el caramelo. Me ayudó mezclar todas las especias con la crema infusionada con calabaza antes, lo que hizo el proceso más eficiente y evitó añadir ingredientes extra después. Una vez cocinado el caramelo, solo tuve que incorporar la mantequilla antes de verter la mezcla en el molde. Este método simplificó los pasos y funcionó perfecto. Ojo, toma un poco de tiempo que la mezcla alcance la temperatura deseada tras añadir la crema (unos 30 minutos para mí), así que paciencia. Definitivamente haré estos caramelos otra vez. ¡Mil gracias al Chef John por esta receta fantástica!
Gary Hall
05/06/2023 05:34:58 AM
¡La mezcla ya está enfriándose y lista para la nevera! Todo va bien hasta ahora, aunque tomó más tiempo del esperado alcanzar la temperatura ideal después de agregar la mezcla de crema y calabaza. Lo tendré en cuenta para la próxima. Estas deliciosas golosinas se regalarán durante la Navidad. ¡Gracias Chef John por otra receta fantástica y divertida para añadir a mi repertorio culinario! 😄
Victoria Garcia
11/06/2024 05:48:06 PM
¡Me encantó esta receta! Lo único que no incluí fueron las semillas de calabaza porque no las encontré en Portugal. Definitivamente intentaré conseguir algunas para la próxima, porque estas golosinas son absolutamente deliciosas y fáciles de hacer. También son perfectas para regalar. Recomiendo añadir pequeños trozos en la masa de brownies antes de hornear para un toque otoñal delicioso.
Brenda Hill
05/25/2025 01:50:02 PM
Uno de los mejores postres que he hecho, y usualmente ni siquiera me gusta la calabaza en postres. El sabor a calabaza añade un toque de complejidad sin ser la típica receta básica de especias de calabaza. La próxima vez, definitivamente duplicaré la cantidad de crumble de semillas de calabaza en el fondo porque es deliciosamente terroso y complementa perfectamente los otros sabores. Asegúrate de usar un termómetro y tener paciencia al cocinar la mezcla de crema y calabaza: puede tomar de 20 a 30 minutos alcanzar los 240°F. Usé ese tiempo para preparar la cena, y el resultado valió la pena. ¡Recomiendo mucho esta receta, gracias Chef!
Frank Gomez
07/22/2023 12:07:08 PM
Hice estos caramelos esta tarde y usé jarabe de arce ahumado, lo que añadió una capa de sabor extra deliciosa. ¡Quedaron muy bien! Cabe destacar que la segunda ebullición (después de agregar la crema y la calabaza) tomó bastante tiempo. Los guardé en la nevera con papel encerado entre capas.
Ashley Scott
04/12/2023 02:21:34 PM
¡Estas galletas fueron fantásticas! Capturan totalmente la esencia del otoño y Halloween. Una cosa a tener en cuenta es no apilarlas al guardarlas, ya que podrían pegarse y perder su bonita apariencia en capas. Quizá usar papel de hornear pueda evitar esto la próxima vez. En general, ¡las recomiendo totalmente!


 audio version


CookGuide es tu guía culinaria para descubrir nuevos sabores y cocinar con confianza. Encuentra recetas de confianza, consejos prácticos e inspiración tanto para cocinas domésticas como profesionales.
Cualquier copia, distribución o uso de los materiales de este servicio sin autorización está estrictamente prohibido. Las infracciones serán procesadas según la legislación aplicable y pueden dar lugar a responsabilidades civiles y penales.
© Guía de cocina Studio 2026 | Cookies | Política de PrivacidadEncuentra la receta perfecta con IA. Solo introduce los ingredientes y deja que Cook te guíe hacia la magia.