
Receta de pan de pita casero
El pan de pita casero es una opción deliciosa y versátil para cualquier comida. Con solo unos pocos ingredientes simples, puedes hacer pitas suaves y esponjosas, perfectas para rellenarlas con tus ingredientes favoritos. ¡Sigue esta receta fácil para hacer tu propio pan de pita casero hoy mismo!


Receta de Pan Plano Casero
Ingredientes:
- 1 paquete (7 g) de levadura seca activa
- 1 taza de agua tibia (aproximadamente 38C)
- 1 taza de harina de trigo todo uso
- 1 cucharadas de aceite de oliva
- 1 cucharaditas de sal
- 1 tazas de harina de trigo todo uso, o la cantidad necesaria
- 1 cucharadita de aceite de oliva, dividido
Instrucciones:
- Rene todos los ingredientes necesarios para la receta.
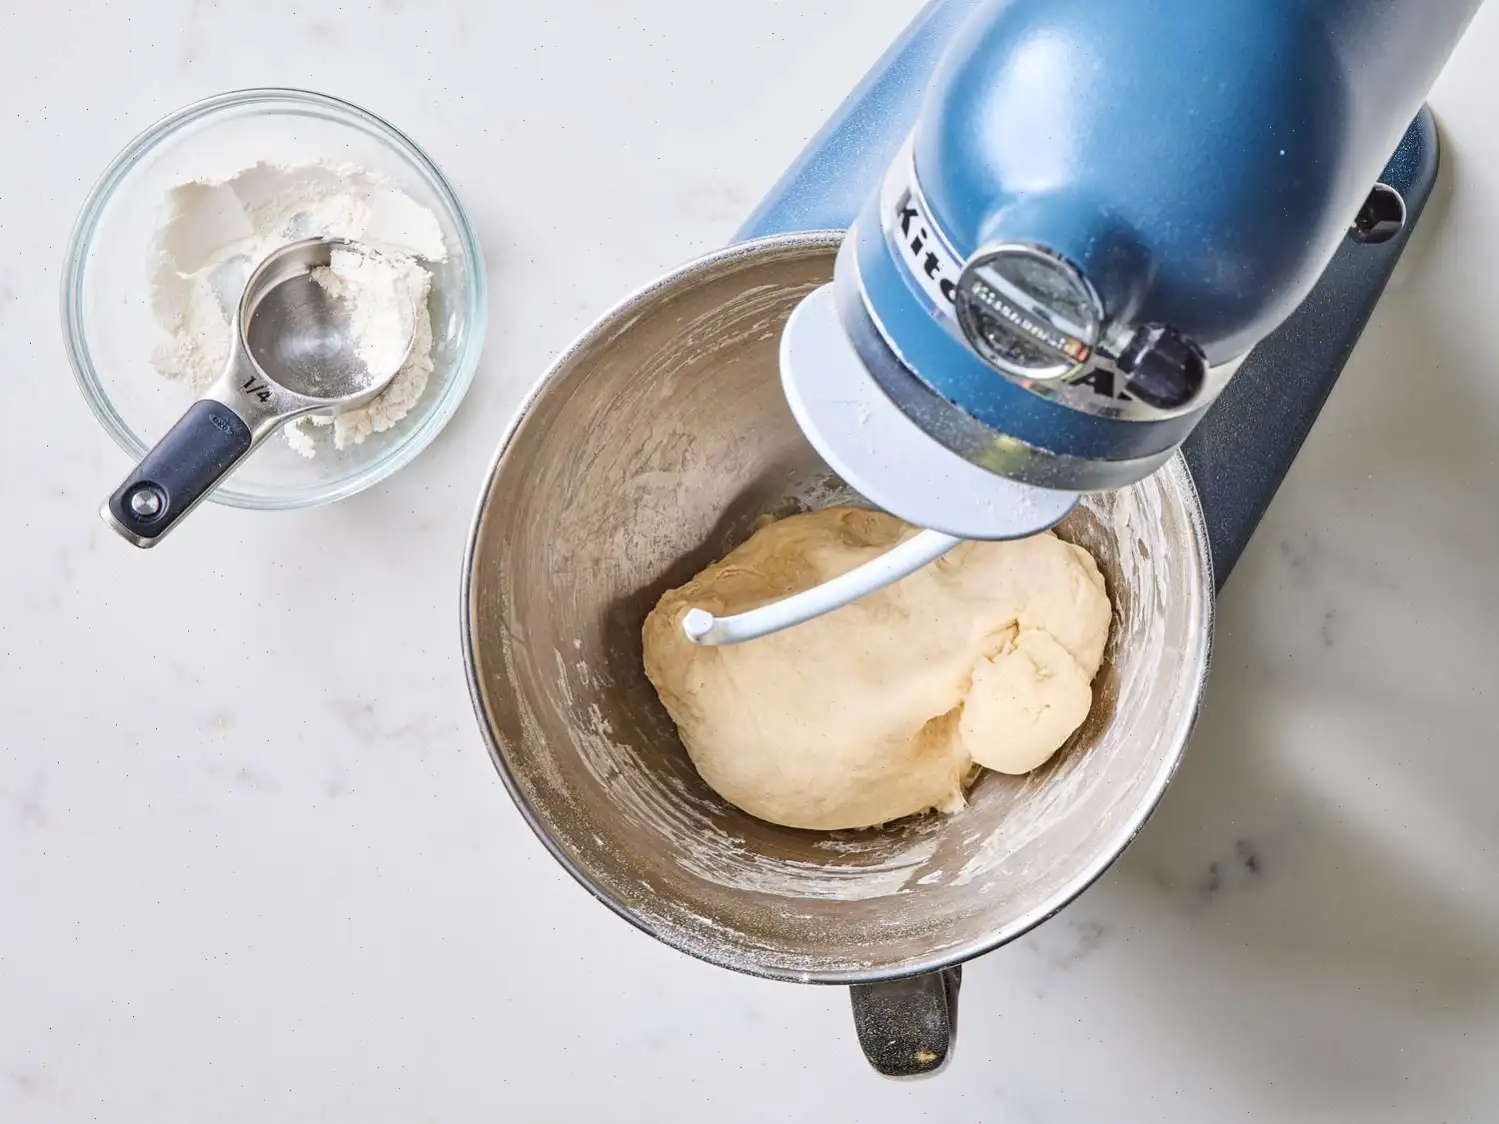
- Coloca la levadura en el bol de una batidora de pie, agrega el agua tibia y la harina. Mezcla bien con un batidor de mano y deja reposar durante unos 15 minutos hasta que empiece a burbujear y formar espuma.
- Incorpora el aceite de oliva y la sal a la mezcla de levadura, seguido de 1 tazas de harina. A velocidad baja, mezcla con el gancho para amasar hasta obtener una masa suave, flexible y un poco pegajosa. Amasa a baja velocidad durante 5-6 minutos, hasta que la masa sea algo elstica pero an suave. Si la masa se pega a los bordes del bol, agrega un poco ms de harina, de 1 a 2 cucharadas a la vez, hasta que la masa no se pegue.
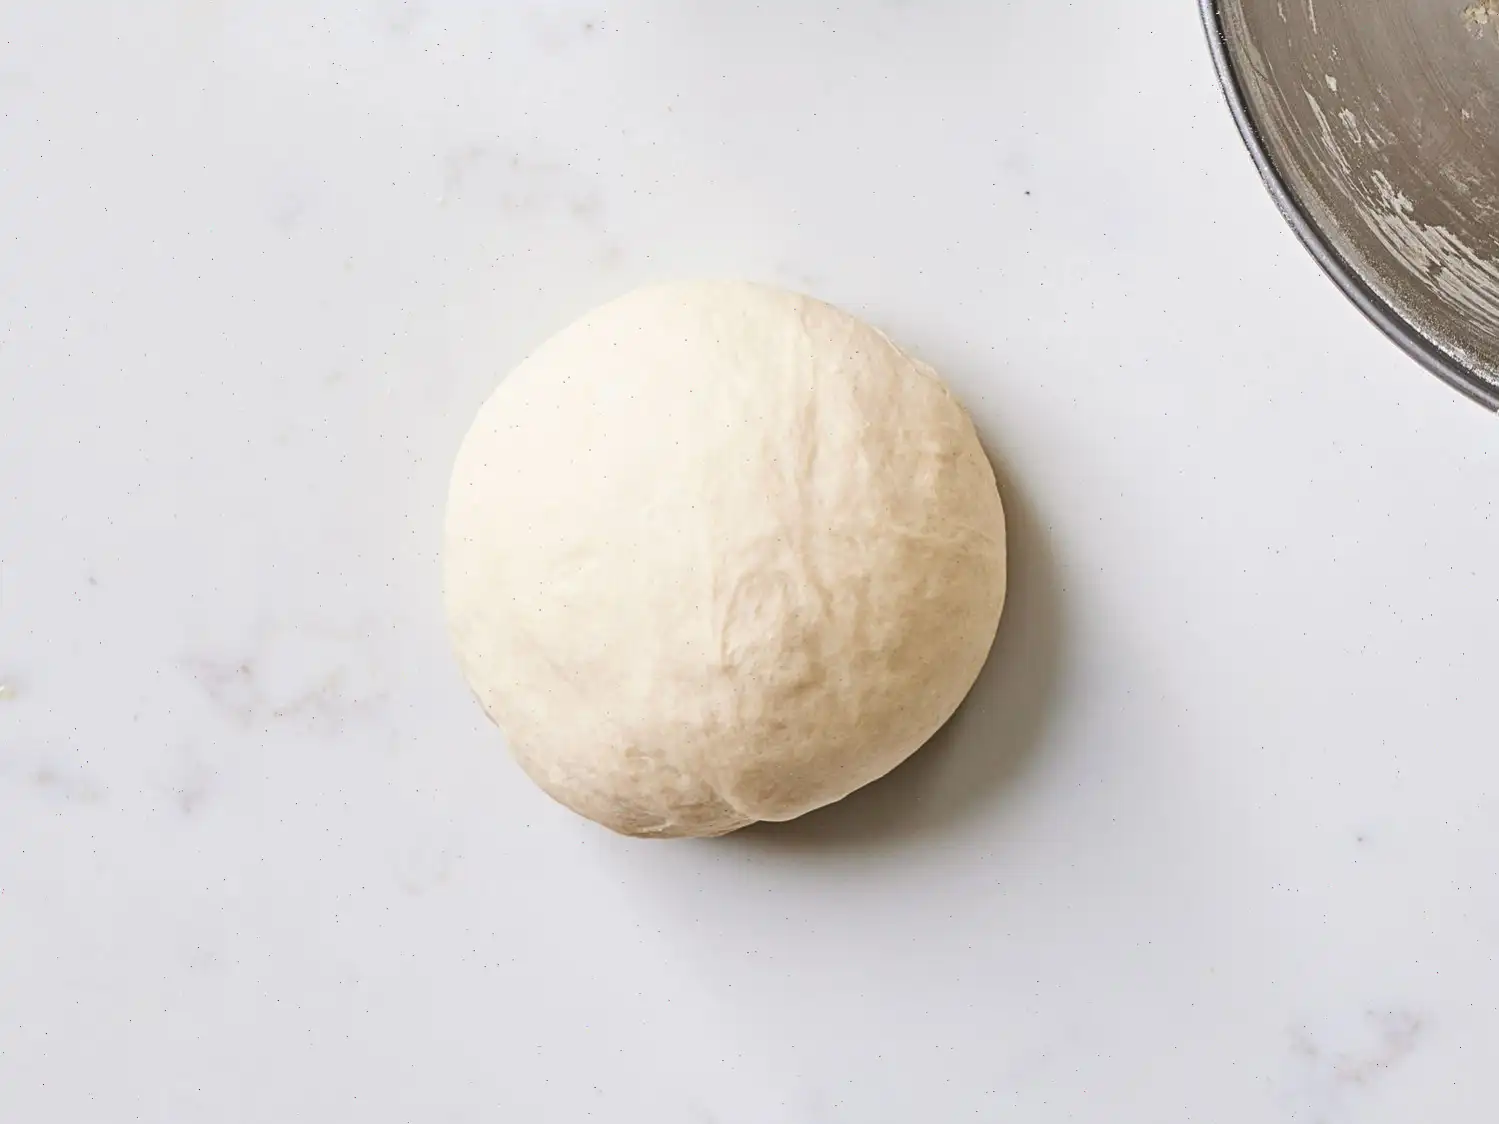
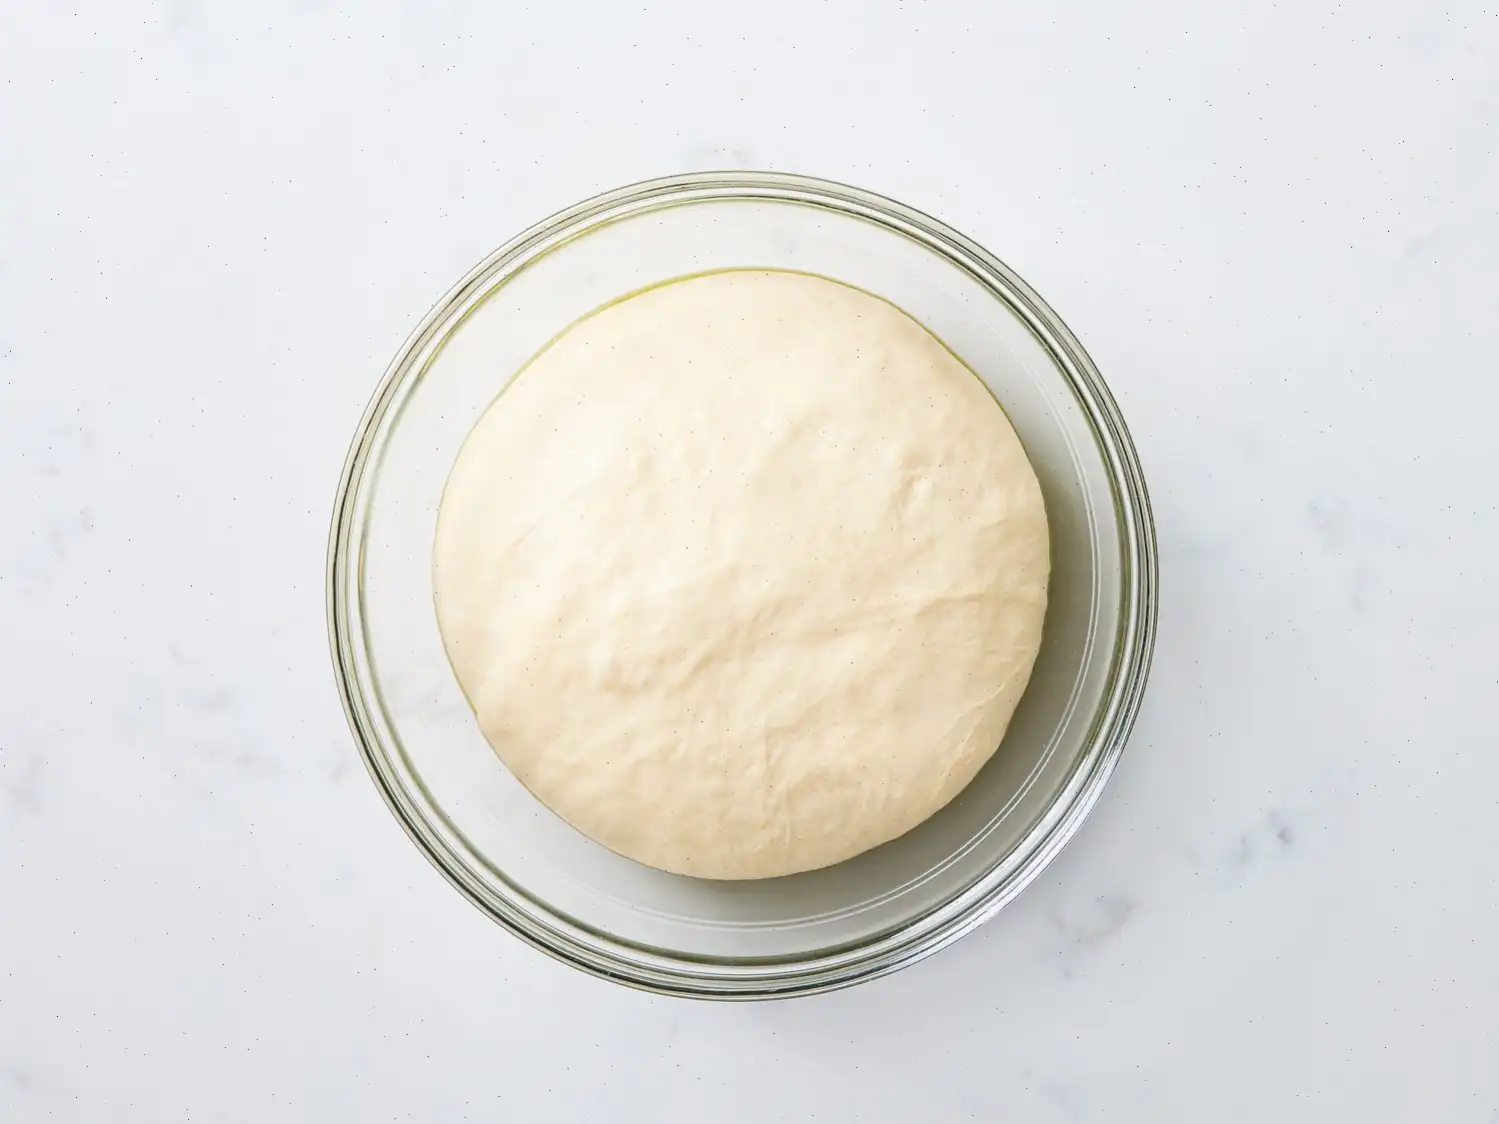
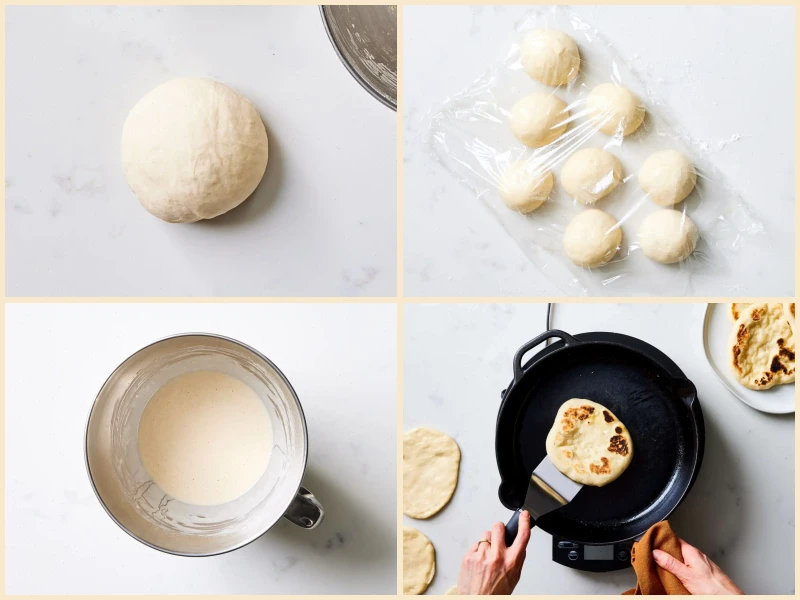
- Transfiere la masa a una superficie plana y ligeramente enharinada. Forma una bola con la masa. Unta ligeramente el interior del bol con cucharadita de aceite de oliva. Coloca la masa en el bol y grala para que se cubra ligeramente con el aceite. Cubre el bol con papel aluminio y deja que la masa repose durante 2 horas o hasta que haya duplicado su tamao.
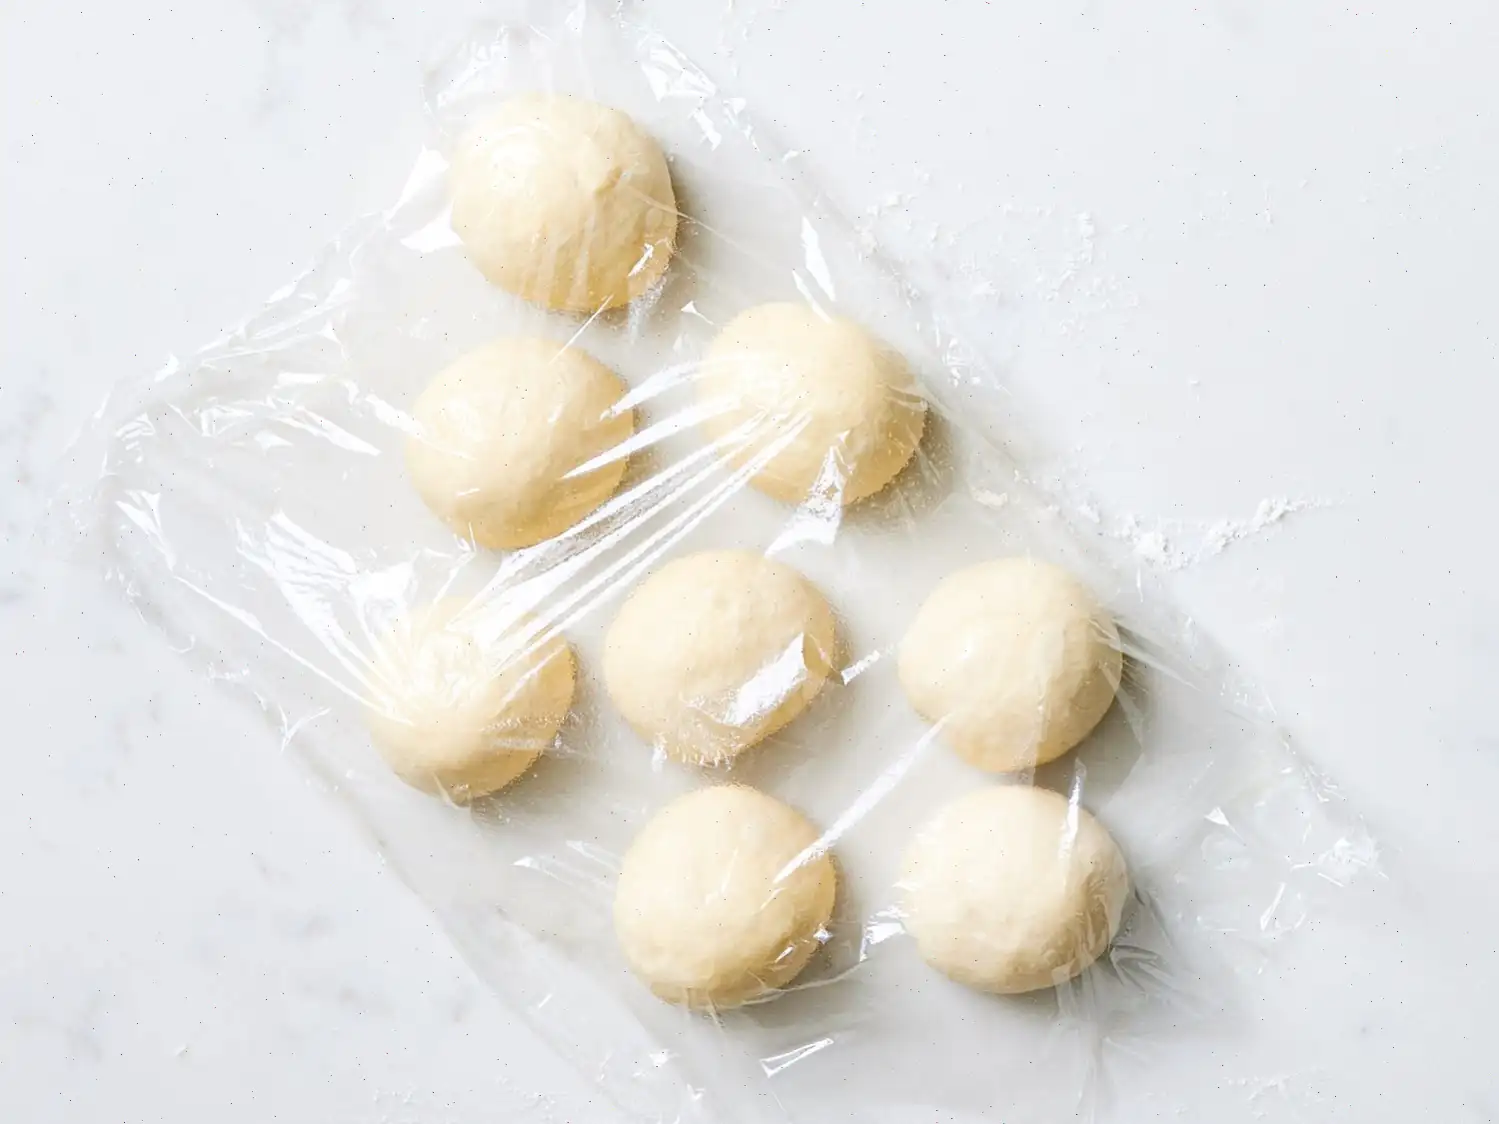
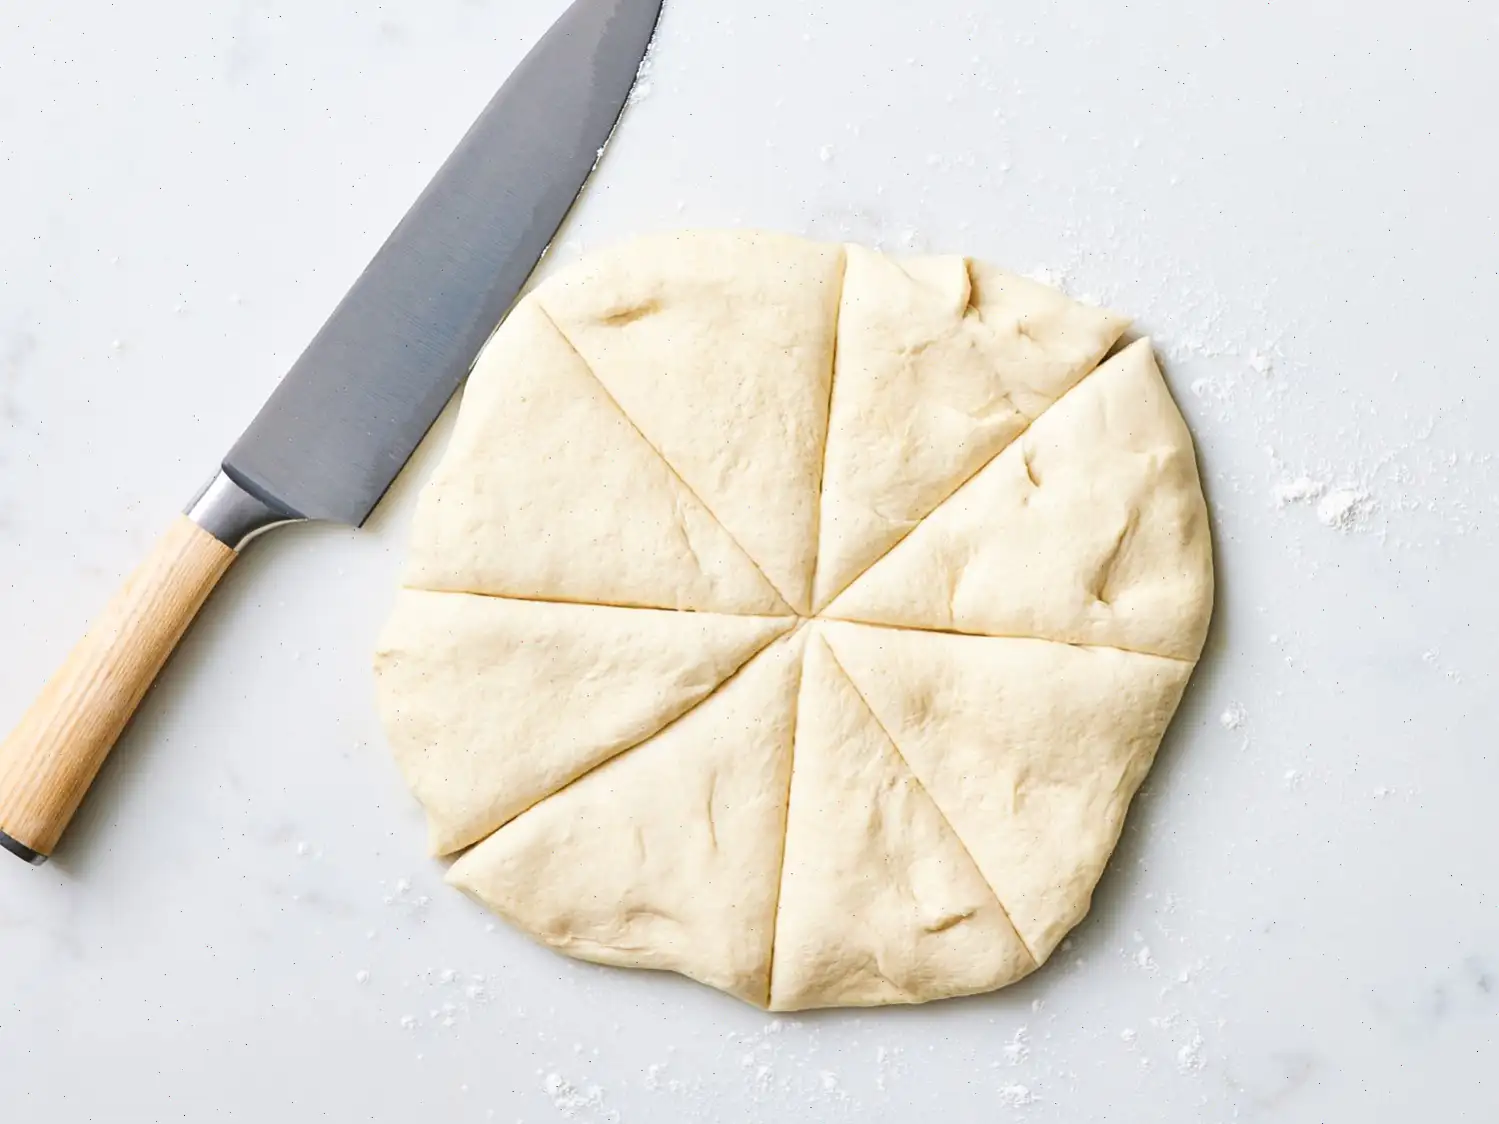
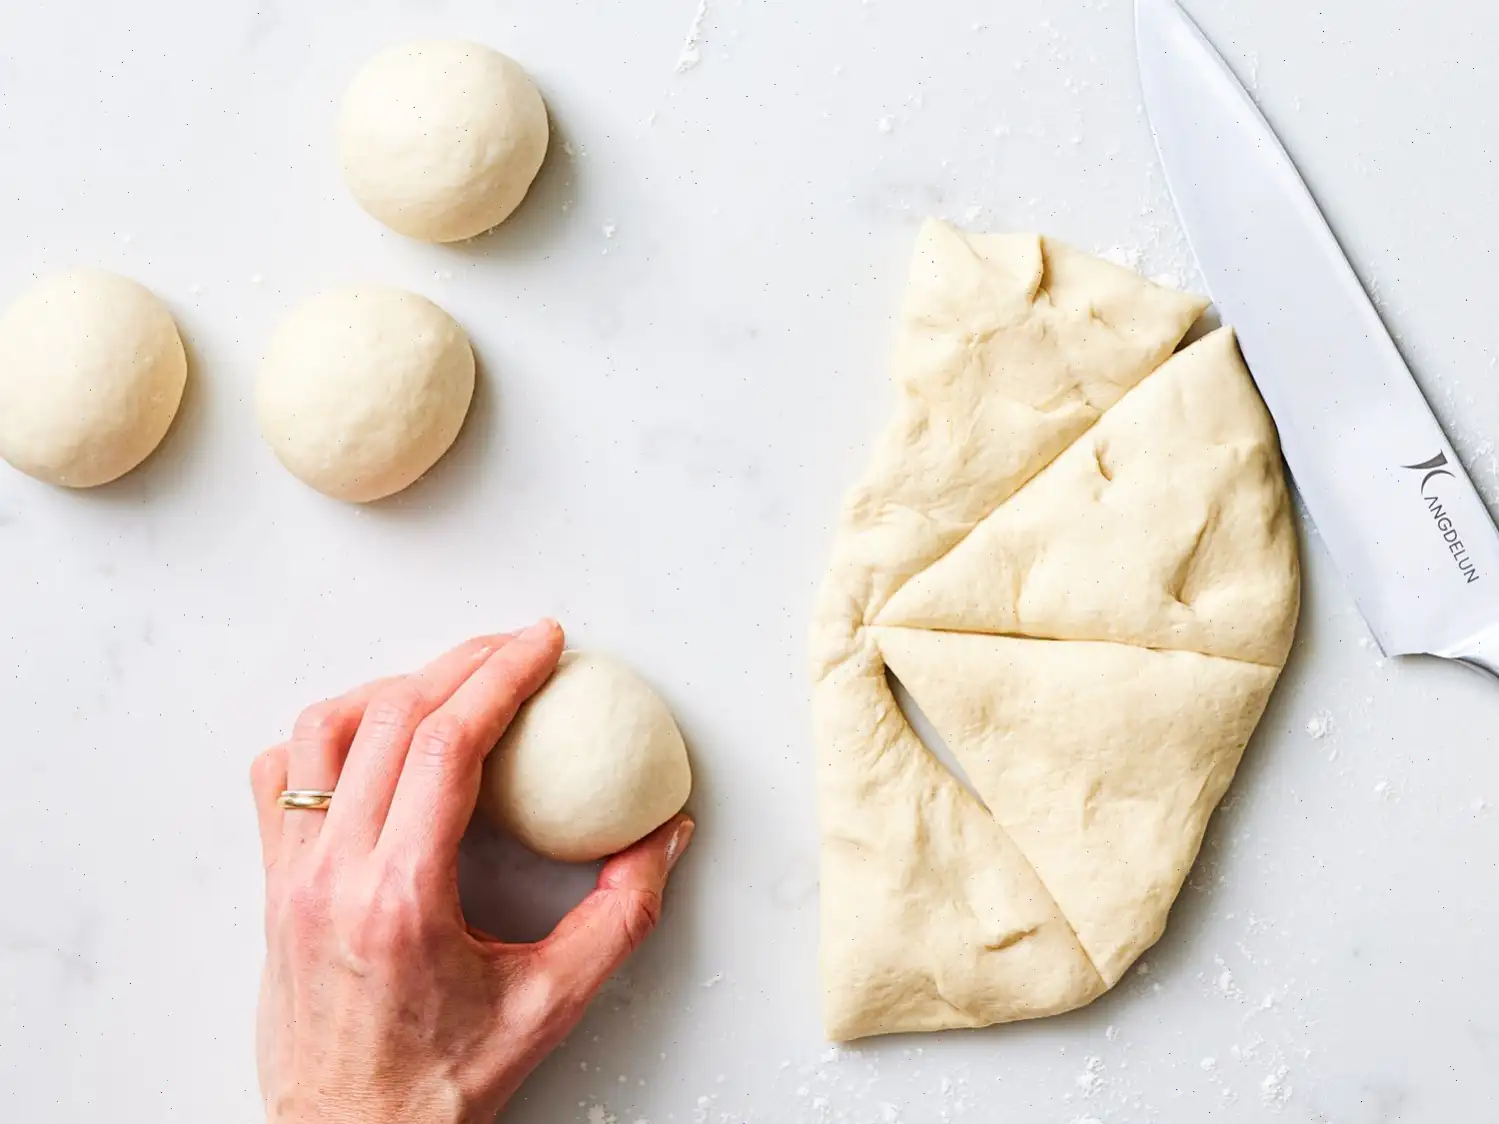
- Una vez que la masa haya aumentado de tamao, retrala del bol y ponla en una superficie enharinada. Aplnala con las manos hasta que tenga un grosor de aproximadamente 2 cm. Con un cuchillo, divide la masa en 8 partes iguales.
- Forma cada pieza en una pequea bola, estirando la masa desde los lados y metiendo los extremos hacia abajo. Deja que las bolas de masa reposen, cubiertas con plstico ligeramente engrasado, durante unos 30 minutos.
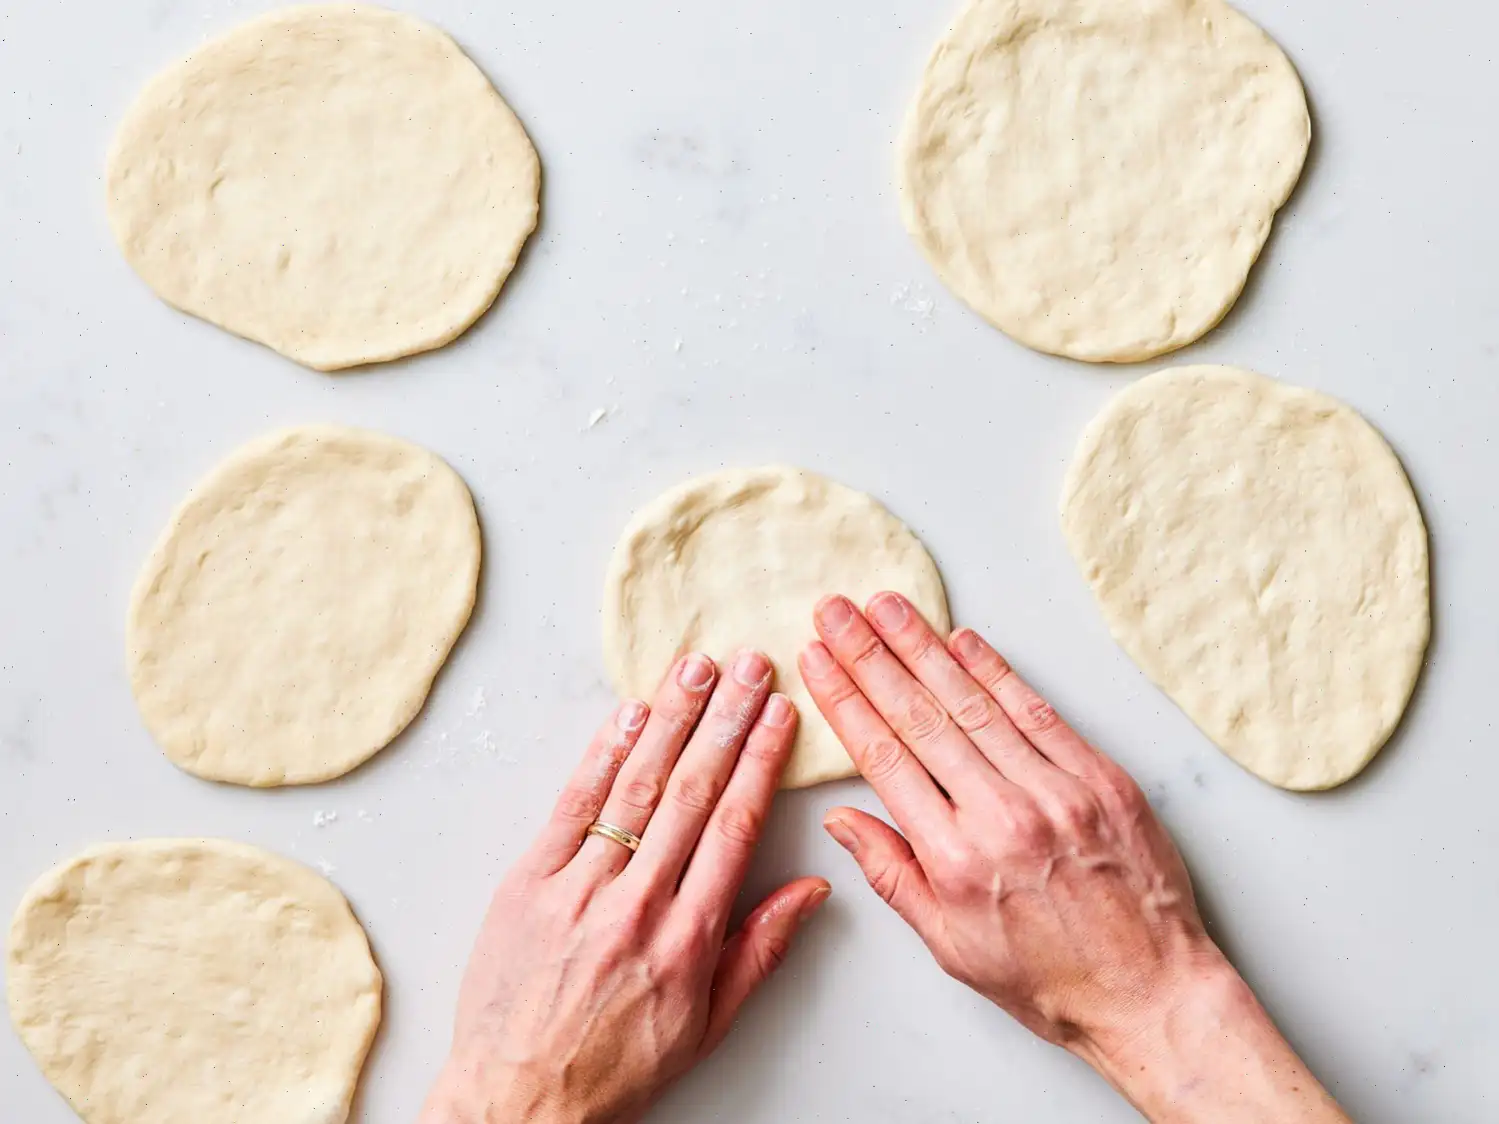
- Coloca las bolas de masa sobre una superficie enharinada. Espolvorea las bolas con un poco de harina y, con las yemas de los dedos, aplnalas suavemente hasta formar discos de aproximadamente 6 cm de dimetro y 0,5 cm de grosor. Deja reposar la masa formada durante 5 minutos.
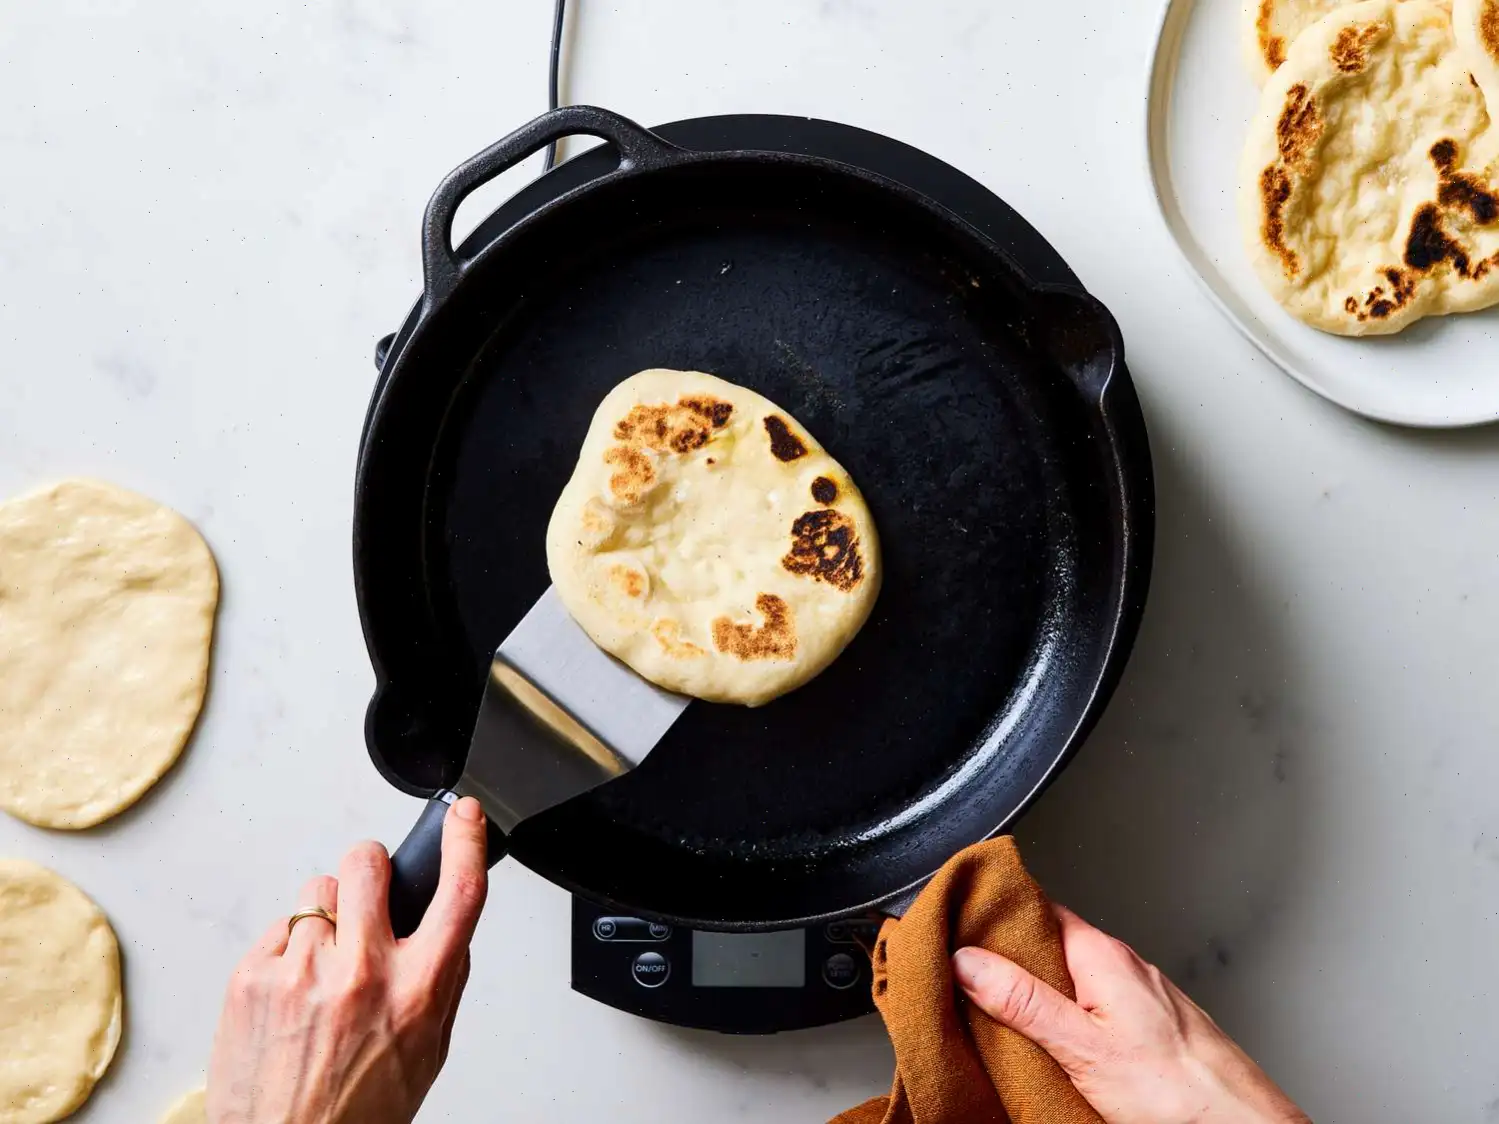
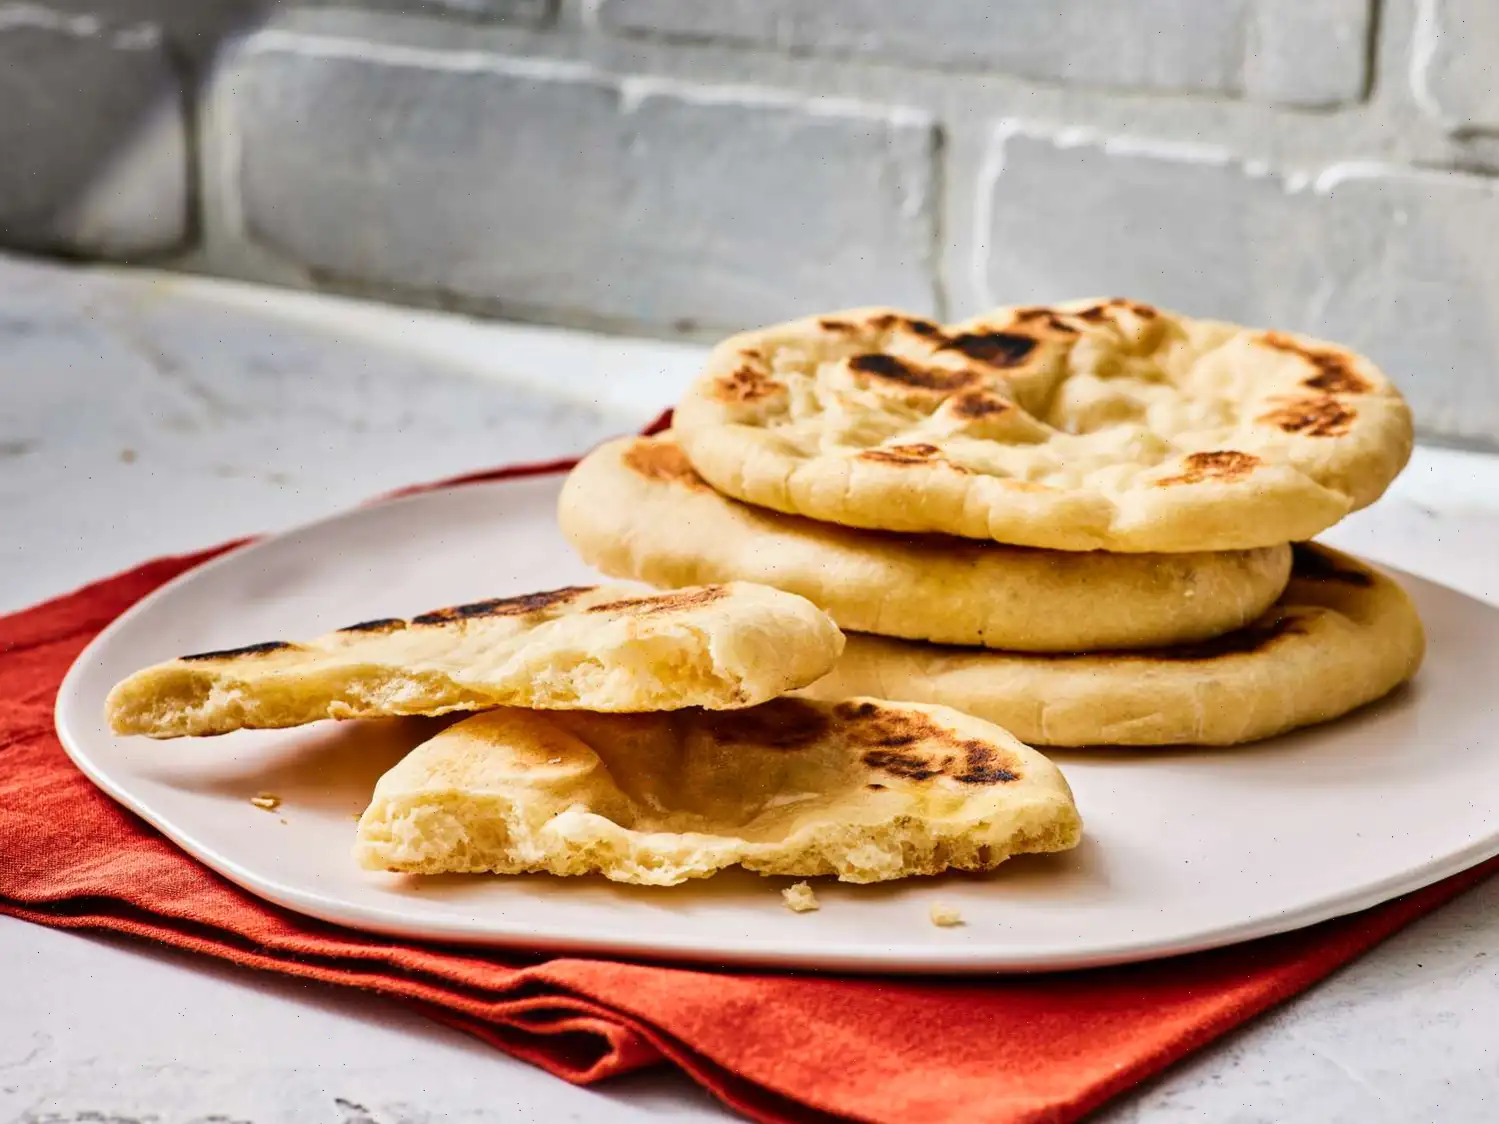
- Calienta una sartn de hierro fundido con cucharadita de aceite de oliva a fuego medio-alto. Coloca un disco de masa en la sartn caliente y cocina durante 30 segundos. Luego, voltea y cocina por 1 a 2 minutos. Dale vuelta de nuevo y cocina por 1-2 minutos ms hasta que ambos lados estn dorados.
- Durante la coccin, el pan comenzar a hincharse y llenarse de aire caliente. Puedes presionar ligeramente la masa con una esptula o un pao limpio para ayudar a que se forme un bolsillo.
- Coloca los panes cocidos en un plato. Cuando estn lo suficientemente fros para manejar, corta por la mitad y abre el bolsillo interior para rellenar al gusto.
Informacin Nutricional (por porcin):
- Caloras: 187
- Grasas Totales: 4 g (5%)
- Grasas Saturadas: 1 g (3%)
- Sodio: 511 mg (22%)
- Carbohidratos Totales: 33 g (12%)
- Fibra Diettica: 1 g (5%)
- Azcares Totales: 0 g
- Protena: 5 g (10%)
- Calcio: 8 mg (1%)
- Hierro: 2 mg (12%)
- Potasio: 64 mg (1%)
Los valores diarios estn basados en una dieta de 2,000 caloras. Tus valores diarios pueden ser ms altos o bajos segn tus necesidades calricas.
Si ests siguiendo una dieta mdica restrictiva, consulta con tu mdico o nutricionista antes de preparar esta receta para su consumo personal.
Puedes escuchar esta receta en formato de audio de IA. Simplemente haz clic en el botón de reproducción a continuación para escuchar el contenido en el formato que mejor te convenga. ¡Es una excelente manera de absorber información sobre la marcha!
Preguntas frecuentes sobre Receta de pan de pita casero
Compartir
Comentarios
Kathy
10/06/2025 01:52:54 PM
Casi perfecto a la primera. Vi el video después y entendí por qué tenía que usar un cuchillo para hacer los bolsillos. Si no aplastas las burbujas, no se forma bien el hueco. Usé una sartén eléctrica a 400 grados como alternativa. Dejé reposar la masa en el horno a 100 grados durante 2 horas. Se doró más rápido que en las instrucciones, me guié por el color. El sabor es tan bueno que le puse un poco de mantequilla y fue un snack delicioso.


 audio version


CookGuide es tu guía culinaria para descubrir nuevos sabores y cocinar con confianza. Encuentra recetas de confianza, consejos prácticos e inspiración tanto para cocinas domésticas como profesionales.
Cualquier copia, distribución o uso de los materiales de este servicio sin autorización está estrictamente prohibido. Las infracciones serán procesadas según la legislación aplicable y pueden dar lugar a responsabilidades civiles y penales.
© Guía de cocina Studio 2026 | Cookies | Política de PrivacidadEncuentra la receta perfecta con IA. Solo introduce los ingredientes y deja que Cook te guíe hacia la magia.