
Receta de Manicotti para Preparar con Anticipación
Esta receta de manicotti que se puede preparar con antelación es perfecta para noches de semana ocupadas o cuando quieres impresionar a tus invitados con una deliciosa comida italiana. Relleno de queso ricotta cremoso y cubierto con salsa marinara, este plato seguro será un éxito con todos en la mesa. Además, puedes prepararlo con antelación y hornearlo cuando estés listo para comer. ¡Disfruta de este plato italiano clásico sin tanto lío!
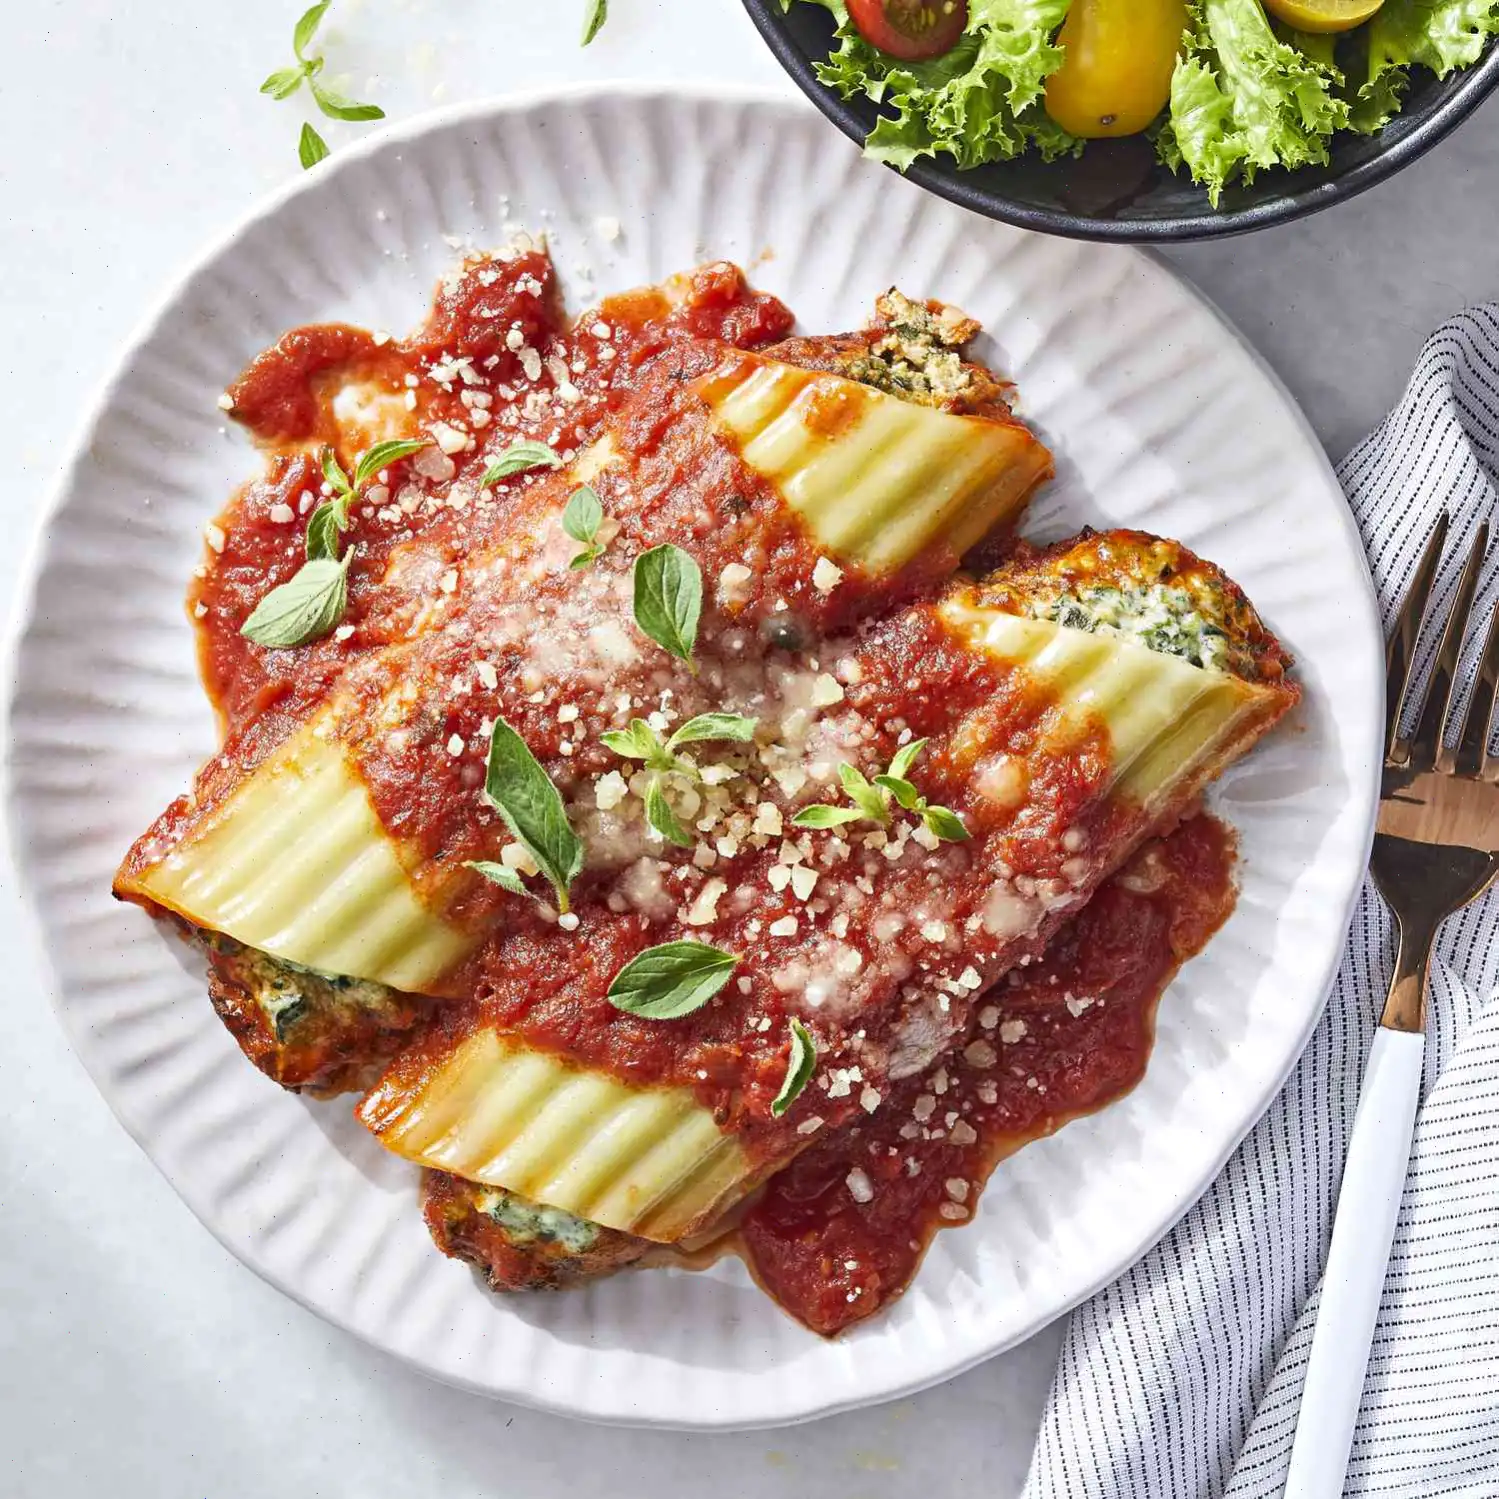
Manicotti de Espinaca y Ricotta
Este delicioso plato de manicotti relleno de ricotta y espinaca es perfecto para una comida reconfortante. A continuacin, te mostramos cmo prepararlo paso a paso.
Ingredientes:
- 1 taza de queso ricotta
- 2 huevos grandes
- 1 paquete (280g) de espinaca congelada picada, descongelada y escurrida
- 1 taza de queso mozzarella rallado
- taza de queso parmesano rallado, dividido
- 1 cucharadas de azcar blanca
- cucharadita de sal
- cucharadita de pimienta negra molida
- 12 tubos de manicotti
- 1 frasco (900g) de salsa de espagueti
Instrucciones:
- En un bol mediano, mezcla el queso ricotta con los huevos hasta que obtengas una mezcla homognea.
- Agrega la espinaca descongelada, el queso mozzarella rallado, de taza del queso parmesano, el azcar, la sal y la pimienta negra. Remueve bien para que todos los ingredientes se integren de manera uniforme.
- Rellena con cuidado los tubos de manicotti crudos con la mezcla de ricotta y espinaca, asegurndote de que queden bien llenos.
- En una fuente para hornear de tamao mediano, vierte taza de salsa de espagueti y distribyela bien en el fondo.
- Coloca los manicotti rellenos en una sola capa sobre la salsa en la fuente.
- Vierte el resto de la salsa de espagueti sobre los manicotti, asegurndote de cubrirlos completamente.
- Cubre la fuente con papel de aluminio y refrigrala durante al menos 8 horas, o preferentemente toda la noche, para que los sabores se integren bien.
- Precalienta el horno a 200C (400F) antes de hornear.
- Retira la fuente del refrigerador y hornea, cubierta, durante 40 minutos.
- Pasados los 40 minutos, destapa la fuente, espolvorea el queso parmesano restante sobre los manicotti y hornea durante otros 15 minutos, o hasta que el queso est dorado y burbujeante.
Valores nutricionales (por porcin, basados en 6 porciones por receta):
- Caloras: 507
- Grasas totales: 19g (24% VD)
- Grasas saturadas: 10g (48% VD)
- Colesterol: 112mg (37% VD)
- Sodio: 1058mg (46% VD)
- Carbohidratos totales: 56g (20% VD)
- Fibra diettica: 6g (23% VD)
- Azcares totales: 18g
- Protenas: 29g (58% VD)
- Vitamina C: 6mg (6% VD)
- Calcio: 589mg (45% VD)
- Hierro: 4mg (21% VD)
- Potasio: 864mg (18% VD)
Ahora puedes disfrutar de un delicioso manicotti de espinaca y ricotta, una receta que te cautivar con su sabor y textura cremosa!
El manicotti anticipado es un plato que encapsula la esencia reconfortante de la cocina italiana. Rellenado con una rica mezcla de ricotta, espinacas y mozzarella, cubierto con una sabrosa salsa de espaguetis, esta receta no solo satisface tu hambre, sino que tambin hace la preparacin de las comidas ms conveniente. Perfecto para noches ocupadas entre semana o grandes reuniones familiares, puede prepararse con antelacin y hornearse justo antes de servir. Pero, de dnde proviene este plato y cmo se diferencia de otros favoritos de la pasta italiana?
Historia del Manicotti
El origen del manicotti se remonta al sur de Italia, aunque se ha popularizado en todo el mundo. La palabra manicotti literalmente se traduce como "manguitos" en italiano, refirindose a la pasta grande en forma de tubo que define el plato. Tradicionalmente, el manicotti se haca como una manera de aprovechar los sobrantes, especialmente los rellenos de queso y carne, envueltos en pasta y cubiertos con salsa. Se convirti en un alimento bsico de la cocina italoamericana a principios del siglo XX, especialmente en las comunidades italianas en los Estados Unidos. La versin anticipada de manicotti, que permite preparar el plato un da antes de servir, es una adaptacin moderna que encaja perfectamente en hogares ocupados.
Variaciones Regionales
El manicotti, aunque universalmente querido, puede variar considerablemente dependiendo de la regin de Italia o de las tradiciones familiares. En Italia, particularmente en regiones como Npoles y Sicilia, los platos de pasta rellena, como el manicotti, suelen hacerse con una variedad de rellenos que incluyen ricotta, espinacas e incluso carne molida. Sin embargo, en los Estados Unidos, muchas recetas optan por un relleno solo de queso, lo que lo hace ms ligero y ms adecuado para los vegetarianos. Aunque el uso de espinacas es popular, a veces se omite o se reemplaza con otras verduras, y la salsa vara desde una simple marinara hasta un rag ms complejo a base de carne.
Cmo se Diferencia de Platos Similares?
El manicotti comparte similitudes con otros platos de pasta rellena, como los canelones y la lasaa. Sin embargo, la diferencia clave radica en la forma y la preparacin. Mientras que los canelones tambin son tubos grandes de pasta, a menudo se rellenan con carne molida o ricotta y espinacas antes de ser cubiertos con salsa y horneados. El manicotti, por otro lado, es tpicamente ms grande y tiene una proporcin de relleno a pasta ms prominente. Adems, la lasaa se hace apilando capas de pasta con relleno y salsa, mientras que el manicotti consiste en tubos de pasta individualmente rellenos. La versin anticipada del manicotti ofrece una comodidad nica, ya que el plato puede prepararse con antelacin y guardarse en el refrigerador, lo que lo convierte en una excelente opcin para cocineros ocupados.
Dnde se Sirve Tpicamente el Manicotti Anticipado?
El manicotti anticipado es un plato muy querido en los hogares italoamericanos, servido a menudo durante reuniones familiares, festividades y comidas especiales. Es una eleccin popular para las cenas de los domingos, potlucks e incluso ocasiones especiales como el Da de Accin de Gracias o la Navidad. La belleza de este plato radica en su versatilidad: puede prepararse con antelacin y servirse en cualquier momento. Se acompaa bien con una simple ensalada y pan de ajo, convirtindolo en una comida completa que satisface a todos. Adems, el plato se encuentra a menudo en los restaurantes italianos, especialmente aquellos que sirven comidas familiares y abundantes.
Datos Interesantes sobre el Manicotti
- En los Estados Unidos, el manicotti se populariz a mediados del siglo XX como un plato conveniente y anticipado que poda prepararse con antelacin para familias ocupadas.
- Los tubos de pasta usados para el manicotti suelen ser ms grandes que los de los canelones, lo que les permite contener ms relleno.
- Muchas familias italoamericanas tienen su propia versin del manicotti, con rellenos que van desde solo queso hasta versiones ms contundentes con salchicha o carne molida.
- Aunque el plato se sirve a menudo con salsa marinara, algunas variaciones incluyen salsa bechamel, dndole una textura cremosa y rica.
- El manicotti se hace con frecuencia como un plato "anticipado", lo que significa que puede prepararse la noche anterior y guardarse en el refrigerador hasta que est listo para hornear, lo que lo convierte en una opcin ideal para la preparacin de comidas.
El manicotti anticipado es ms que solo una comida; es un sabor de la tradicin con la conveniencia moderna. Ya sea que busques hacer la cena ms fcil durante la semana o ests preparando una fiesta para las fiestas, este plato seguramente ser un xito entre la multitud.
Puedes escuchar esta receta en formato de audio de IA. Simplemente haz clic en el botón de reproducción a continuación para escuchar el contenido en el formato que mejor te convenga. ¡Es una excelente manera de absorber información sobre la marcha!
Preguntas frecuentes sobre Receta de Manicotti para Preparar con Anticipación
Compartir
Comentarios
Scott Davis
02/19/2023 03:01:09 PM
Hice una doble porción para una comida compartida y fue un éxito total. No quedó ni un bocado para llevar. Sin embargo, la espinaca congelada no quedó tan bien, sabía un poco a hierbas con muchos tallos. Esta noche probé con espinaca fresca, cortando los tallos y cocinándola en sartén seca. Usé mi propia salsa de espagueti con salchicha italiana. ¿El resultado? ¡Bastante bueno! 👍
Jack Martinez
02/20/2025 05:27:47 AM
Probé el paquete de Manicotti Orgánico Rienzi de 8 oz para la receta y funcionó maravillosamente. Sobró un poco de mezcla, pero no fue problema. Incluso usé una bolsa grande tipo Ziploc para rellenar fácilmente. Después de refrigerarlo 6 horas, lo horneé por una hora y el resultado fue fantástico. ¡Gracias por la excelente receta!
Carolyn Harris
02/01/2025 03:07:36 PM
Me encanta el manicotti y estoy feliz de haber encontrado una forma de disfrutarlo entre semana. Esta receta casi alcanza la perfección. Solo sugeriría reducir o eliminar el azúcar, ya que me pareció un poco dulce. Añadir un diente de ajo triturado realzaría los sabores. Usar una bolsa Ziploc para rellenar fue mucho más fácil, ¡gran consejo!
Carolyn White
08/19/2023 11:29:34 AM
Agregué carne molida cocida a la salsa. En lugar de refrigerar por 8 horas, solo lo hice por 4, quizá por eso las conchas quedaron un poco duras. Aun así, fue rápido y fácil de preparar, y mis amigos lo disfrutaron completamente y lo terminaron todo.
Ronald Garcia
05/17/2025 11:12:35 PM
Fue la primera vez que probé esta receta y la seguí al pie de la letra (aunque usé más salsa según las recomendaciones de los comentarios). Opté por usar una bolsa Ziploc grande para rellenar, lo que fue efectivo pero requirió coordinación para dominarlo. ¡Mi familia disfrutó mucho el platillo y espero prepararlo nuevamente!
Amy Harris
10/27/2024 10:41:21 PM
¡Me encantó esta receta! Fue rápida, sencilla y muy sabrosa, además de que la limpieza fue fácil. Sin duda volveré a prepararla.


 audio version


CookGuide es tu guía culinaria para descubrir nuevos sabores y cocinar con confianza. Encuentra recetas de confianza, consejos prácticos e inspiración tanto para cocinas domésticas como profesionales.
Cualquier copia, distribución o uso de los materiales de este servicio sin autorización está estrictamente prohibido. Las infracciones serán procesadas según la legislación aplicable y pueden dar lugar a responsabilidades civiles y penales.
© Guía de cocina Studio 2026 | Cookies | Política de PrivacidadEncuentra la receta perfecta con IA. Solo introduce los ingredientes y deja que Cook te guíe hacia la magia.