
Receta de Manzanas Caramelizadas
Las manzanas con caramelo son un dulce clásico de otoño, perfecto para calmar el antojo de algo dulce. Esta receta es fácil de hacer y solo necesitas unos pocos ingredientes simples. Sigue estos pasos para preparar deliciosas manzanas con caramelo que seguro triunfarán en cualquier reunión.
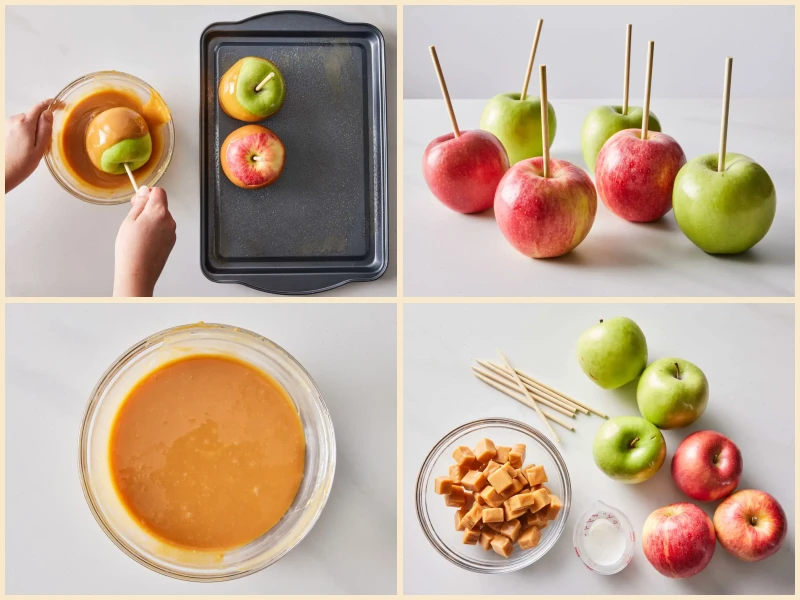
Ingredientes
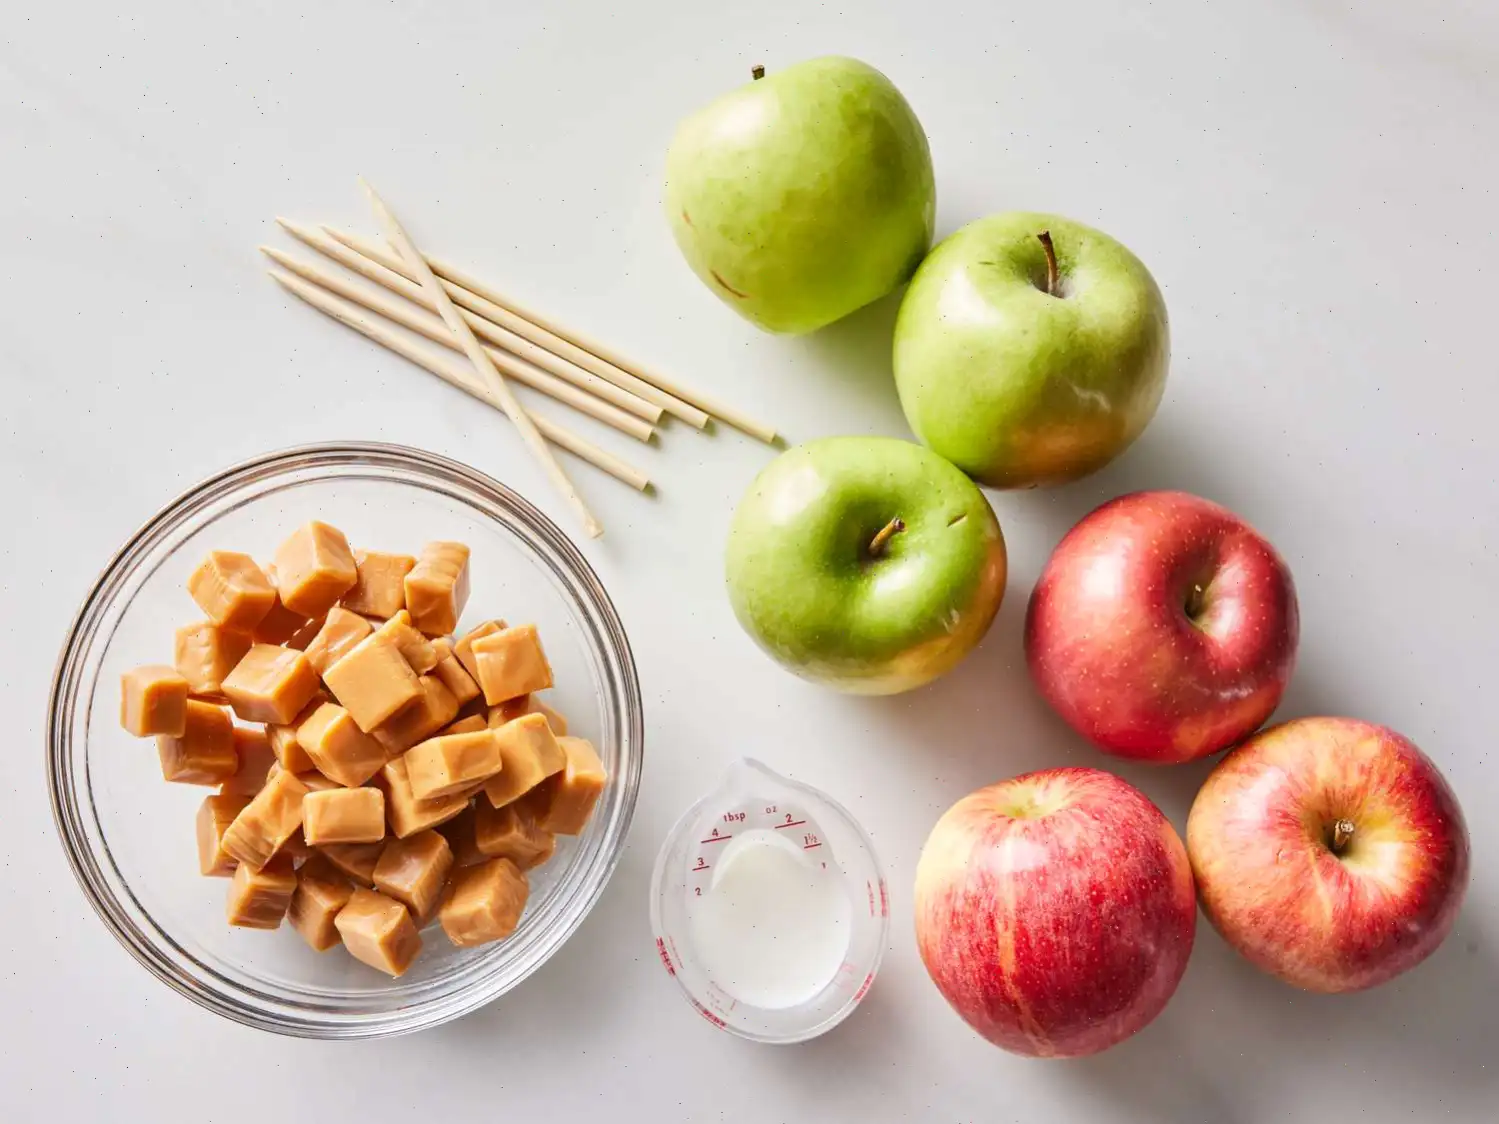
- 6 manzanas firmes, por ejemplo Granny Smith
- 6 palitos de madera para manualidades
- Aerosol antiadherente para cocinar
- 1 paquete de 400 g de caramelos envueltos individualmente, sin envoltorio
- 2 cucharadas de leche
Preparacin Paso a Paso
- Rene todos los ingredientes necesarios antes de comenzar.
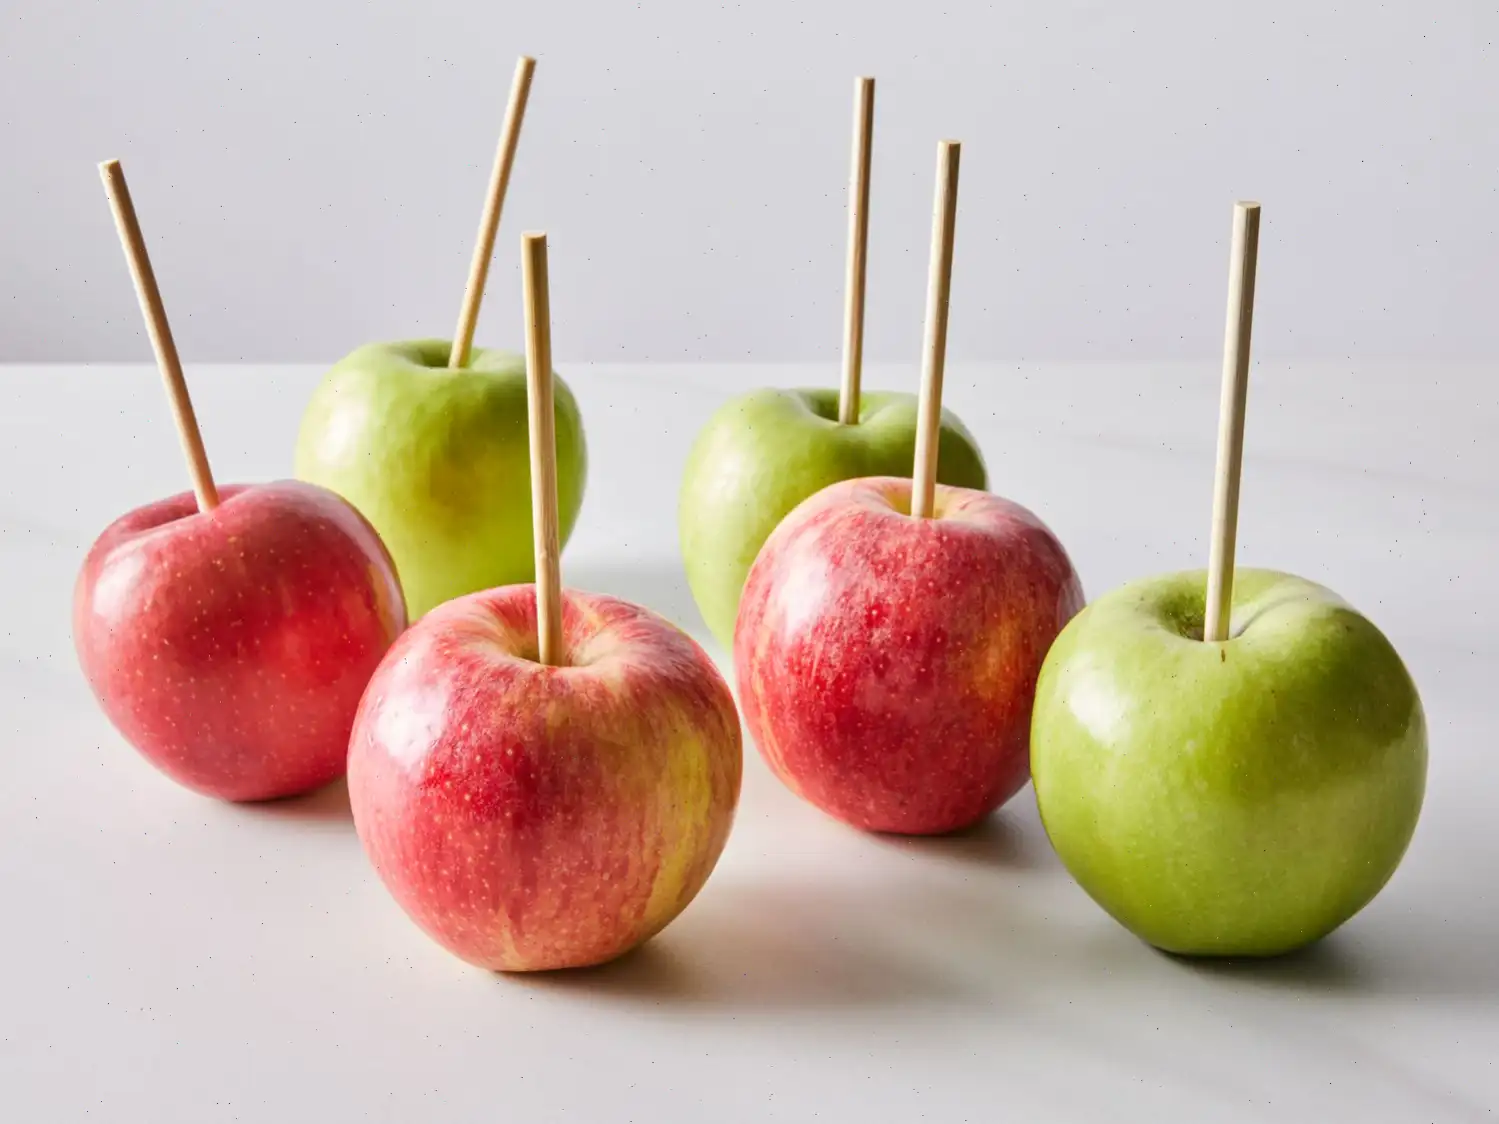
- Quita el tallo de cada manzana e inserta un palito de madera en la parte superior para facilitar su manejo.
- Roca una bandeja de horno con aceite en aerosol para que las manzanas no se peguen.
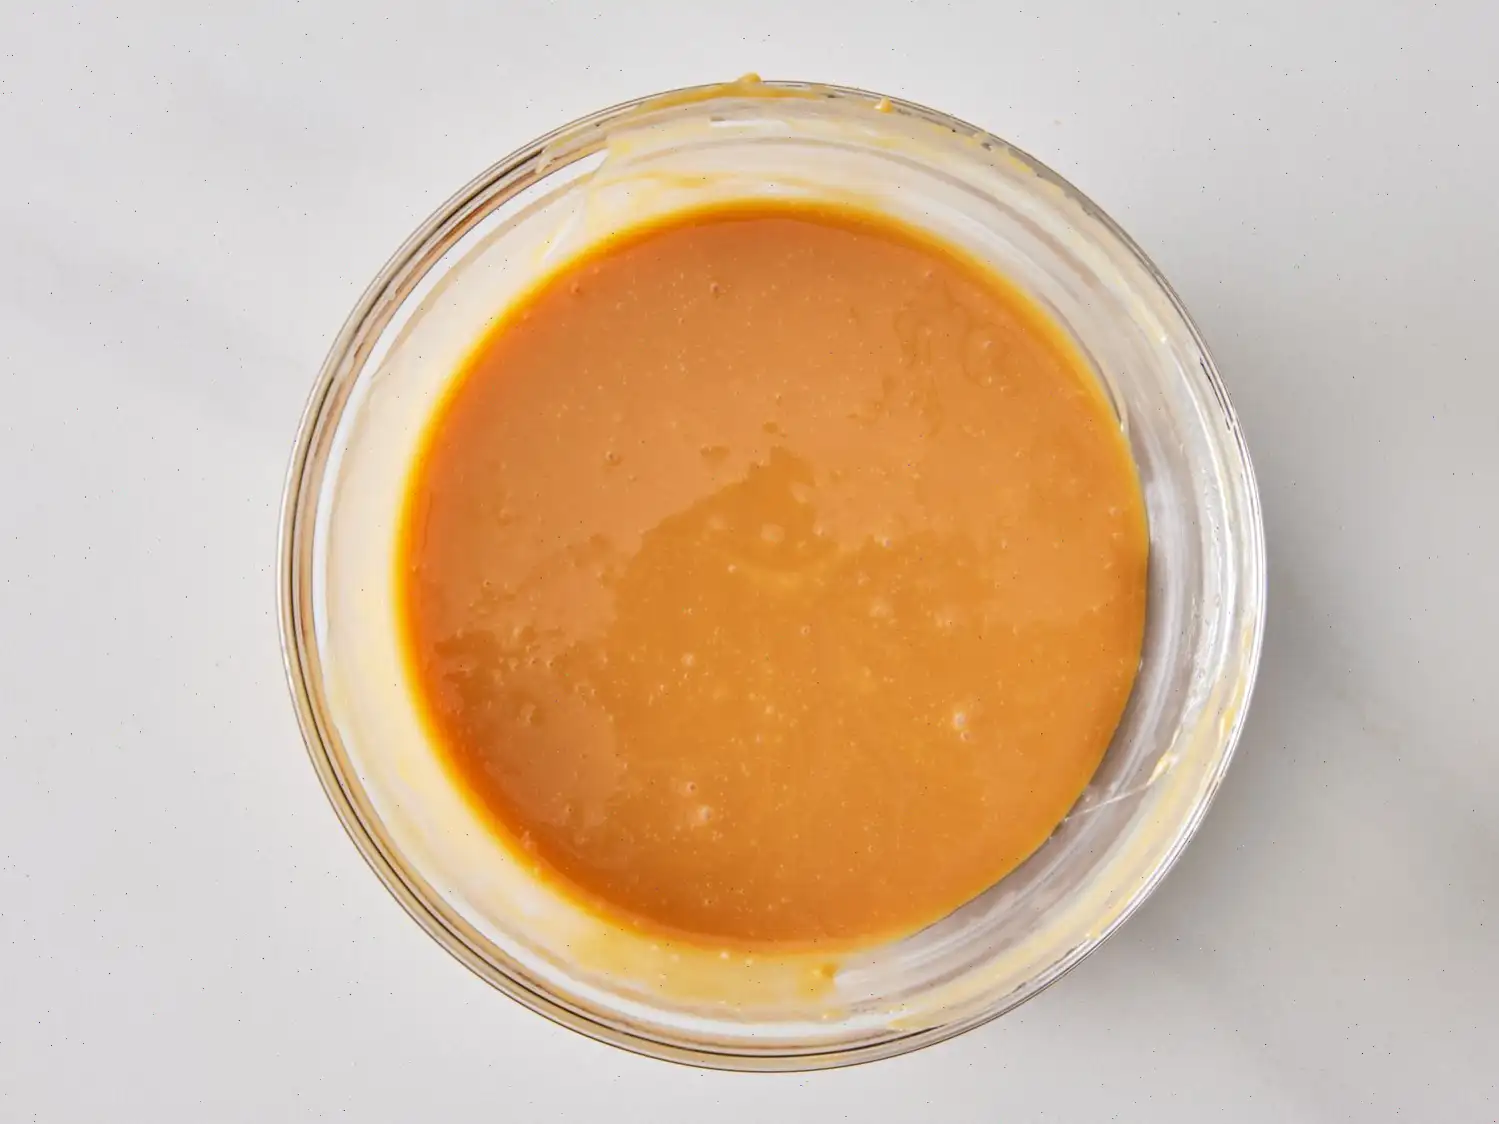
- Coloca los caramelos junto con la leche en un recipiente apto para microondas. Calienta durante 2 minutos, removiendo a mitad del tiempo. Deja que repose un momento antes de usar.
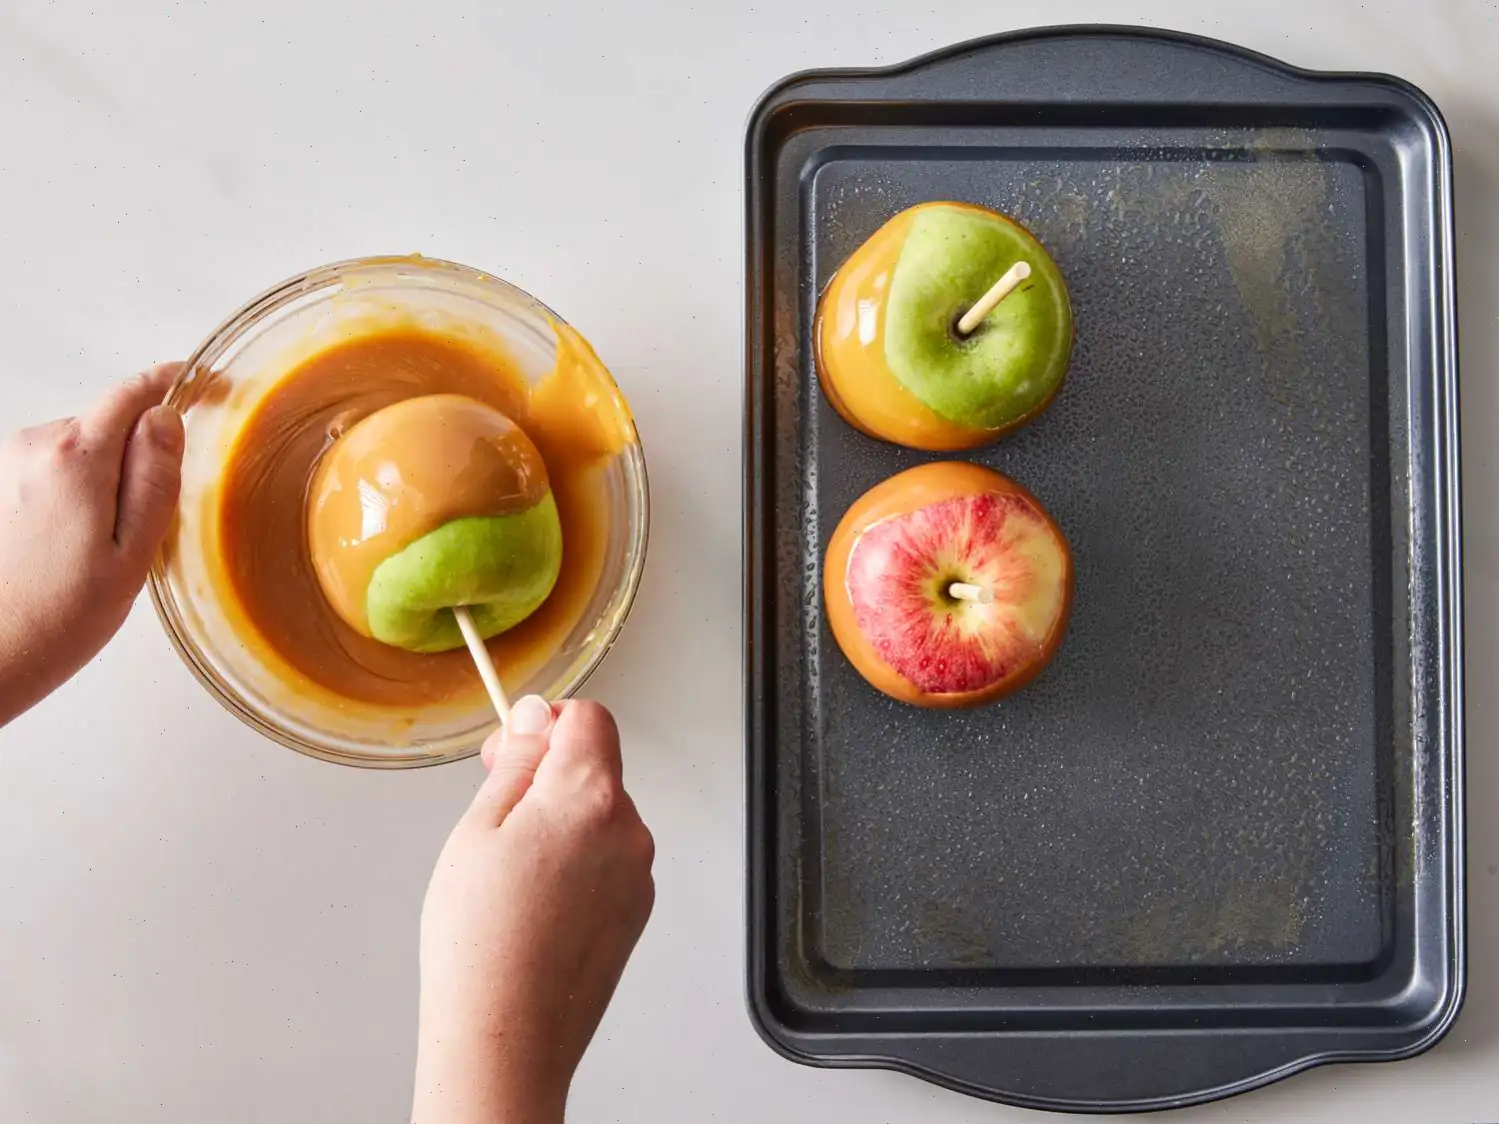
- Inmediatamente, sumerge cada manzana en el caramelo caliente hasta cubrirla completamente.
- Deposita las manzanas acarameladas sobre la bandeja preparada y deja que el caramelo se enfre y endurezca.
Consejos para un Resultado Perfecto
- Para que el caramelo se adhiera mejor, elimina la cera de la superficie de las manzanas. Remjalas unos segundos en agua caliente con unas gotas de limn, frota suavemente y seca completamente.
- Escoge manzanas cidas como Granny Smith para equilibrar la dulzura del caramelo. Variedades como Honeycrisp, Gala o Fuji tambin funcionan muy bien.
- Evita manzanas blandas como Red Delicious o McIntosh, ya que podran no soportar el recubrimiento de caramelo.
Opciones de Decoracin
- Frutos secos picados (nueces o pecanas)
- Chispas de colores
- Chocolate derretido, ya sea blanco o con leche
- Pedacitos de barras de chocolate (por ejemplo, Heath o Reeses)
- Galletas Oreo trituradas
- Coco tostado en hojuelas
Almacenamiento
Despus de que el caramelo se haya enfriado, guarda las manzanas en un recipiente hermtico dentro del refrigerador. Se conservan hasta dos semanas. Para regalar, envulvelas en celofn y aade un lazo decorativo.
Informacin Nutricional (por porcin)
- Caloras: 350
- Grasas totales: 6 g (7% VD)
- Grasas saturadas: 2 g (9% VD)
- Colesterol: 5 mg (2% VD)
- Sodio: 166 mg (7% VD)
- Carbohidratos totales: 76 g (28% VD)
- Fibra diettica: 4 g (16% VD)
- Azcares totales: 62 g
- Protenas: 4 g (7% VD)
- Vitamina C: 9 mg (10% VD)
- Calcio: 108 mg (8% VD)
- Hierro: 0 mg (2% VD)
- Potasio: 343 mg (7% VD)
Los valores diarios porcentuales estn basados en una dieta de 2.000 caloras. Tus necesidades pueden variar segn tu consumo energtico.
Origen e Historia de las Manzanas Caramelizadas
Las manzanas caramelizadas son un dulce muy querido, especialmente asociado con la temporada de otoo y, en particular, con Halloween. La tradicin de cubrir manzanas con caramelo comenz en Estados Unidos en la dcada de 1950. Se populariz cuando un fabricante de golosinas, Dan Walker, cre la manzana caramelizada por accidente mientras experimentaba con caramelo sobrante. Esta creacin accidental se hizo rpidamente popular gracias a la deliciosa combinacin del caramelo dulce y pegajoso con la manzana crujiente.
A lo largo de los aos, la manzana caramelizada se ha convertido en un postre clsico de otoo, presente en ferias, carnavales y fiestas de Halloween.
Variaciones Regionales
Aunque las manzanas caramelizadas son comunes en todo Estados Unidos, son especialmente populares en regiones con fuerte cosecha de otoo, como el Medio Oeste y el Noreste. En estas reas, la temporada de cosecha de manzanas coincide con las celebraciones de Halloween, haciendo de las manzanas caramelizadas un dulce natural para esta poca.
Existen variaciones regionales que incluyen toppings como nueces trituradas, chispas de colores o chocolate. Por ejemplo, en Nueva Inglaterra es comn encontrar manzanas caramelizadas con nueces pecanas picadas, mientras que en el sur de Estados Unidos se puede aadir una pizca de sal marina para resaltar el contraste de sabores.
Diferencias con Postres Similares
Las manzanas caramelizadas a menudo se comparan con otros postres cubiertos de caramelo o toffee, pero se destacan por su simplicidad y textura nica. Las manzanas de toffee, originarias del Reino Unido, tienen una capa ms dura y crujiente, mientras que las manzanas caramelizadas usan un caramelo ms suave y pegajoso.
El contraste entre la textura del caramelo y la acidez de la manzana crea un equilibrio de sabores que las manzanas de toffee no ofrecen. Adems, las manzanas caramelizadas se sirven tradicionalmente en un palito, lo que las hace fciles de comer como snack porttil, a diferencia de otros postres que requieren cuchillo y tenedor.
Dnde Servir Manzanas Caramelizadas
Son un dulce popular en festivales de otoo, fiestas de Halloween y reuniones al aire libre. Se encuentran frecuentemente en ferias agrcolas o estatales, donde se venden junto a otras golosinas clsicas como algodn de azcar y palomitas de maz.
Tambin forman parte de las tradiciones familiares de otoo, con personas preparndolas en casa como actividad divertida. Adems, son un regalo comn durante la temporada navidea, envueltas en celofn y con un lazo festivo, ofreciendo un presente dulce y pensado con cario.
Datos Curiosos sobre las Manzanas Caramelizadas
- Las primeras manzanas caramelizadas se hicieron con caramelo casero, antes de que existieran los caramelos empaquetados que usamos hoy.
- Los caramelos empaquetados, que simplificaron el proceso, se introdujeron en la dcada de 1970.
- Las variedades de manzana no se eligen al azar: las Granny Smith son las ms populares por su acidez, que contrasta perfectamente con la dulzura del caramelo.
- Se pueden personalizar con una infinidad de toppings: desde nueces trituradas y trozos de dulces hasta chispas de colores y chocolate derretido.
Preguntas frecuentes sobre Receta de Manzanas Caramelizadas
Compartir
Comentarios
Maria Evans
03/17/2025 02:02:42 AM
Esta vez hice solo 3 manzanas en lugar de seis. Algunos revisores sugirieron dejar reposar el caramelo 5 minutos después de calentarlo. Yo probé y me funcionó mejor esperar solo 1 minuto. Usé solo 200 g de caramelo y noté que si lo dejaba más tiempo, se volvía demasiado espeso. También sugiero sumergir las manzanas en agua hirviendo para quitar la cera.
Justin Walker
11/09/2024 03:52:08 AM
Mi hijo de 10 años y yo nos divertimos mucho haciendo varias tandas de manzanas caramelizadas. Antes de empezar, leí algunos comentarios que destacaban puntos importantes: 1) En lugar de comprar caramelo caro de la marca alemana, usar el más económico de la compañía que también vende la caja azul de mac & cheese. Se derrite mejor y no se desliza lentamente como el alemán. 2) Hervir agua para quitar fácilmente la cera de las manzanas, luego lavarlas con jabón y secarlas. 3) Mientras se derrite el caramelo, mantener las manzanas en el refrigerador. 4) Dejar que el caramelo se enfríe y espese un poco antes de cubrir las manzanas. 5) Aunque uses papel encerado, también rocía antiadherente porque el caramelo tiende a pegarse. Fue un poco complicado comer las "imperfecciones", pero en general fue una experiencia muy divertida. ¡Disfruten haciendo sus propias manzanas caramelizadas!
Benjamin Hernandez
08/27/2022 06:40:44 PM
La clave para que el caramelo se adhiera a la manzana es conseguir la consistencia correcta. Debe ser espeso y pegajoso. Usé una cacerola pequeña en la estufa y recomiendo dejar que el caramelo espese bastante. Si queda demasiado espeso, solo aumenta el calor. Al cubrir la manzana, la giraba en varias direcciones para que quedara uniforme. Dejé que se enfriara antes de colocarla sobre el papel encerado. El resultado fue visualmente atractivo y delicioso.
Adam Hill
04/18/2025 01:43:23 PM
Hoy hice manzanas caramelizadas por primera vez y este método de hacer caramelo fue muy fácil. Seguí los consejos de otros: herví brevemente las manzanas, quité la cera, las congelé unos minutos, las limpié de nuevo y luego inserté los palitos. Un consejo útil es sumergir todas las manzanas en el caramelo antes de añadir los toppings. Dejando enfriar el caramelo primero, evitamos que se resbalen los toppings.
Tyler Davis
01/02/2023 10:56:27 AM
¡Equilibrio perfecto de leche y caramelo, logrando la textura ideal para sumergir! Derretí los caramelos 2 minutos y luego dejé reposar unos minutos antes de cubrir las manzanas. Lavarlas bien para quitar la cera fue clave. Una manzana la cubrí con Oreo trituradas, otra con Butterfinger picado y otra con pretzels picados. Los toppings se adhirieron perfectamente. Muy satisfecho con el resultado y sé que mi esposo también lo estará al volver del trabajo.
Richard Martin
05/19/2023 11:48:58 AM
¡Increíble! Caramelo, leche y microondas… ¿cómo fallar con eso? Hice una tanda para mis compañeros y les encantó. Algunas las cubrí con cacahuate y otras con una capa de mantequilla de maní casera. Idealmente, las manzanas van al congelador, pero yo las dejé media hora antes de refrigerarlas toda la noche. Gracias por compartir esta receta fácil, ¡mi primer intento fue un éxito!


 audio version


CookGuide es tu guía culinaria para descubrir nuevos sabores y cocinar con confianza. Encuentra recetas de confianza, consejos prácticos e inspiración tanto para cocinas domésticas como profesionales.
Cualquier copia, distribución o uso de los materiales de este servicio sin autorización está estrictamente prohibido. Las infracciones serán procesadas según la legislación aplicable y pueden dar lugar a responsabilidades civiles y penales.
© Guía de cocina Studio 2026 | Cookies | Política de PrivacidadEncuentra la receta perfecta con IA. Solo introduce los ingredientes y deja que Cook te guíe hacia la magia.