
Receta de la Frambuesa Imitadora en Marcha
Disfruta de lo delicioso de estos Raspberry Rallies caseros con esta receta fácil. Estos dulces agridulces son perfectos para cualquier ocasión y seguro que calman tus antojos. ¡Disfruta de la combinación de frambuesa y galleta en cada bocado!
Ingredientes
Para las galletas:
- 2 tazas de frambuesas liofilizadas (aproximadamente 35 g)
- 3/4 taza de mantequilla sin sal, suavizada a temperatura ambiente
- 1 taza de azcar granulada
- 1 huevo grande, a temperatura ambiente
- 1 cucharadita de extracto puro de vainilla
- 1 1/2 tazas de harina de trigo todo uso, ms un poco para espolvorear
- 1 cucharadita de polvo de hornear
- 1/8 cucharadita de sal kosher
Para el glaseado de chocolate:
- 3 tazas de chispas de chocolate semidulce
- 1/4 taza de aceite de coco
Instrucciones
Paso 1: Pulverizar las frambuesas
Procesa las frambuesas liofilizadas hasta obtener un polvo fino. Tamiza aproximadamente 1/2 taza para separar las semillas y guarda el polvo en un bol mediano. Reserva los restos para decorar las galletas ms tarde.
Paso 2: Batir mantequilla y azcar
En un mezclador con pala, bate la mantequilla suavizada a velocidad media durante un minuto hasta que est cremosa. Aade poco a poco el azcar y contina batiendo de 2 a 3 minutos hasta lograr una mezcla esponjosa. Raspa los bordes del bol para integrar todo de manera uniforme.
Paso 3: Incorporar huevo y vainilla
Agrega el huevo y el extracto de vainilla a la mezcla de mantequilla y bate solo hasta combinar, alrededor de 30 segundos. La textura debe quedar brillante y suave.
Paso 4: Mezclar ingredientes secos
En otro recipiente, combina la harina, el polvo de hornear, la sal y el polvo de frambuesa. Integra lentamente estos ingredientes al batido de mantequilla a baja velocidad hasta que casi estn completamente mezclados. Raspa los bordes y mezcla 30 segundos ms para asegurar uniformidad.
Paso 5: Formar y enfriar la masa
Divide la masa en dos partes. Sobre papel pergamino ligeramente enharinado, extiende cada porcin formando un crculo de 15 cm. Espolvorea un poco de harina encima, cubre con otro papel y aplana hasta un grosor de 6 mm. Refrigera por 1 hora hasta que la masa est firme.
Paso 6: Cortar las galletas
Precalienta el horno a 175C y cubre bandejas con papel pergamino. Usa un cortador redondo de 5 cm para formar las galletas. Colcalas en la bandeja dejando 2,5 cm de espacio entre ellas. Repite con la masa restante.
Paso 7: Hornear
Hornea las galletas de 8 a 10 minutos hasta que los bordes se doren ligeramente. Gira las bandejas a mitad de coccin para lograr un horneado parejo. Deja enfriar 5 minutos en la bandeja y luego transfiere a una rejilla hasta que estn completamente fras, unos 15 minutos.
Paso 8: Derretir chocolate
Coloca las chispas de chocolate y el aceite de coco en un recipiente apto para microondas. Calienta en intervalos de 30 segundos, removiendo entre cada intervalo hasta que el chocolate est completamente fundido y sin grumos.
Paso 9: Baar las galletas
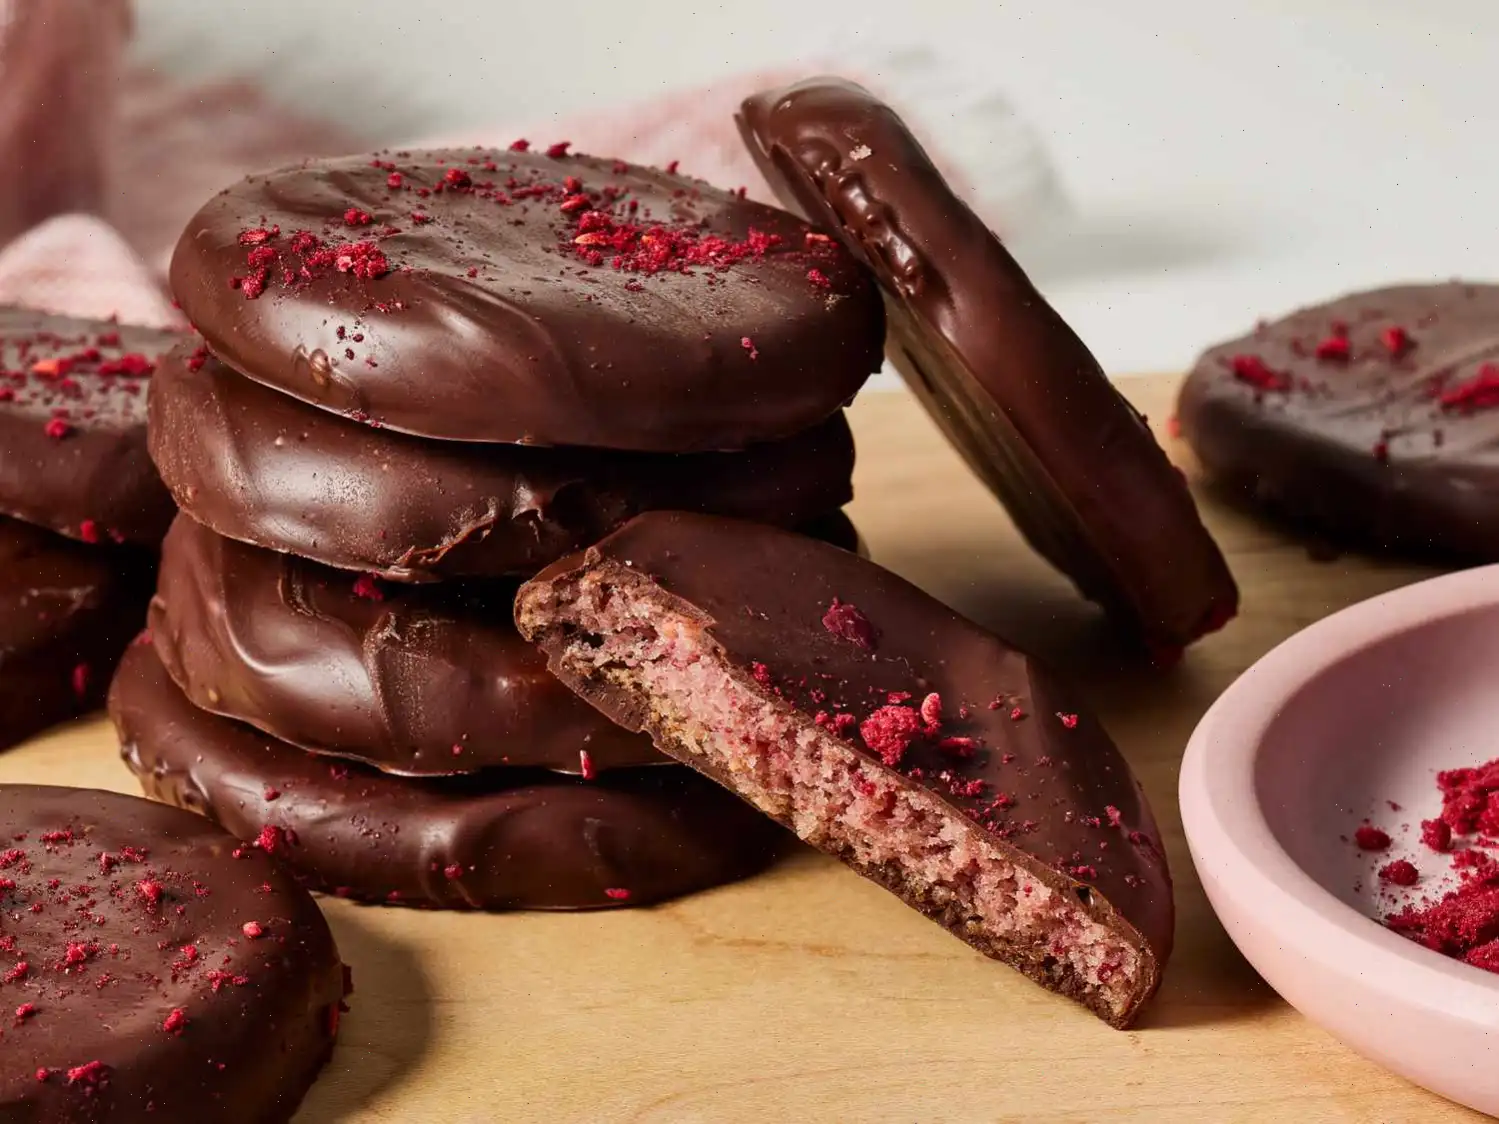
Sumrgelas una a una en el chocolate usando un tenedor para cubrirlas uniformemente. Sacude el exceso y coloca sobre una rejilla encima de papel encerado. Espolvorea con los restos de frambuesa mientras el chocolate an est blando.
Paso 10: Endurecer chocolate
Lleva las galletas al refrigerador por 15 minutos hasta que el chocolate se endurezca. Se pueden disfrutar inmediatamente o guardar en un recipiente hermtico hasta por 7 das.
Informacin nutricional (por galleta)
- Caloras: 170
- Grasa total: 10 g (13%)
- Grasa saturada: 7 g (33%)
- Colesterol: 16 mg (5%)
- Sodio: 29 mg (1%)
- Carbohidratos totales: 20 g (7%)
- Fibra diettica: 1 g (4%)
- Azcares totales: 15 g
- Protenas: 1 g (3%)
- Vitamina C: 7 mg (8%)
- Calcio: 16 mg (1%)
- Hierro: 1 mg (5%)
- Potasio: 77 mg (2%)
La Historia Detrs de las Galletas Raspberry Rallies
Las Raspberry Rallies, popularizadas por las Girl Scouts, rpidamente se convirtieron en una galleta muy querida debido a su rica cobertura de chocolate y su centro afrutado de frambuesa. La galleta original fue introducida a principios de los aos 2000 como parte de la lnea anual de golosinas exclusivas de las Girl Scouts. Inspiradas por la creciente tendencia de combinar sabores de frutas cidas con chocolate, las Raspberry Rallies conquistaron los corazones tanto de los jvenes como de los adultos fanticos de las galletas. La creacin de estas galletas tena como objetivo ofrecer un giro ms sofisticado a las tradicionales galletas de chocolate, mantenindolas divertidas y accesibles.
Caractersticas Regionales
Si bien las Raspberry Rallies estn ampliamente disponibles en todo Estados Unidos, en ocasiones surgen variaciones regionales. En el Medio Oeste, los panaderos a menudo enfatizan una base de galleta ligeramente ms suave para complementar la cobertura de chocolate. En contraste, las versiones de la Costa Oeste tienden a resaltar un sabor ms intenso de frambuesa, a veces utilizando bayas liofilizadas localmente para aportar frescura. A pesar de estas sutiles diferencias, la combinacin definitoria de chocolate y frambuesa permanece consistente en todo el pas.
Cmo Se Diferencian de Otras Galletas Similares?
Las Raspberry Rallies se distinguen de otras galletas baadas en chocolate, como las Thin Mints o las Tagalongs, gracias a su relleno afrutado. A diferencia de las Thin Mints, que son crujientes y con sabor a menta, o de las Tagalongs, que tienen una capa de mantequilla de man, las Raspberry Rallies combinan frambuesas cidas y sabrosas con un rico chocolate derretido. Esto crea un equilibrio distintivo entre lo dulce y lo cido, lo que hace que la galleta sea nica tanto en sabor como en textura.
Dnde Se Suelen Servir?
Estas galletas no solo son un elemento bsico en las ventas de las Girl Scouts, sino que tambin se sirven comnmente en fiestas, ventas de repostera y reuniones navideas. Debido a su llamativo adorno de frambuesa y su elegante cobertura de chocolate, las Raspberry Rallies a menudo se presentan en bandejas de postres o cestas de regalos. Tambin son una opcin popular para el t de la tarde o los descansos para el caf, aadiendo un toque colorido y sabroso a la mesa.
Datos Interesantes
A pesar de su apariencia moderna, las Raspberry Rallies siguen un proceso tradicional de elaboracin de galletas, combinando mantequilla, azcar y harina antes de aadir las frambuesas liofilizadas. La liofilizacin conserva el sabor cido de la frambuesa mientras mantiene una textura ligera y aireada. Otro dato curioso es que la cobertura de chocolate no solo realza el sabor, sino que tambin acta como una capa protectora, manteniendo la galleta fresca por ms tiempo. Adems, estas galletas se pueden personalizar en casa, permitiendo que los panaderos experimenten con chocolate negro, con leche o blanco para la cobertura, lo que las hace verstiles para cualquier ocasin.
Preguntas frecuentes sobre Receta de la Frambuesa Imitadora en Marcha
Compartir

 audio version


CookGuide es tu guía culinaria para descubrir nuevos sabores y cocinar con confianza. Encuentra recetas de confianza, consejos prácticos e inspiración tanto para cocinas domésticas como profesionales.
Cualquier copia, distribución o uso de los materiales de este servicio sin autorización está estrictamente prohibido. Las infracciones serán procesadas según la legislación aplicable y pueden dar lugar a responsabilidades civiles y penales.
© Guía de cocina Studio 2026 | Cookies | Política de PrivacidadEncuentra la receta perfecta con IA. Solo introduce los ingredientes y deja que Cook te guíe hacia la magia.