
Panecillos de cena en sartén con crema agria y cebollín
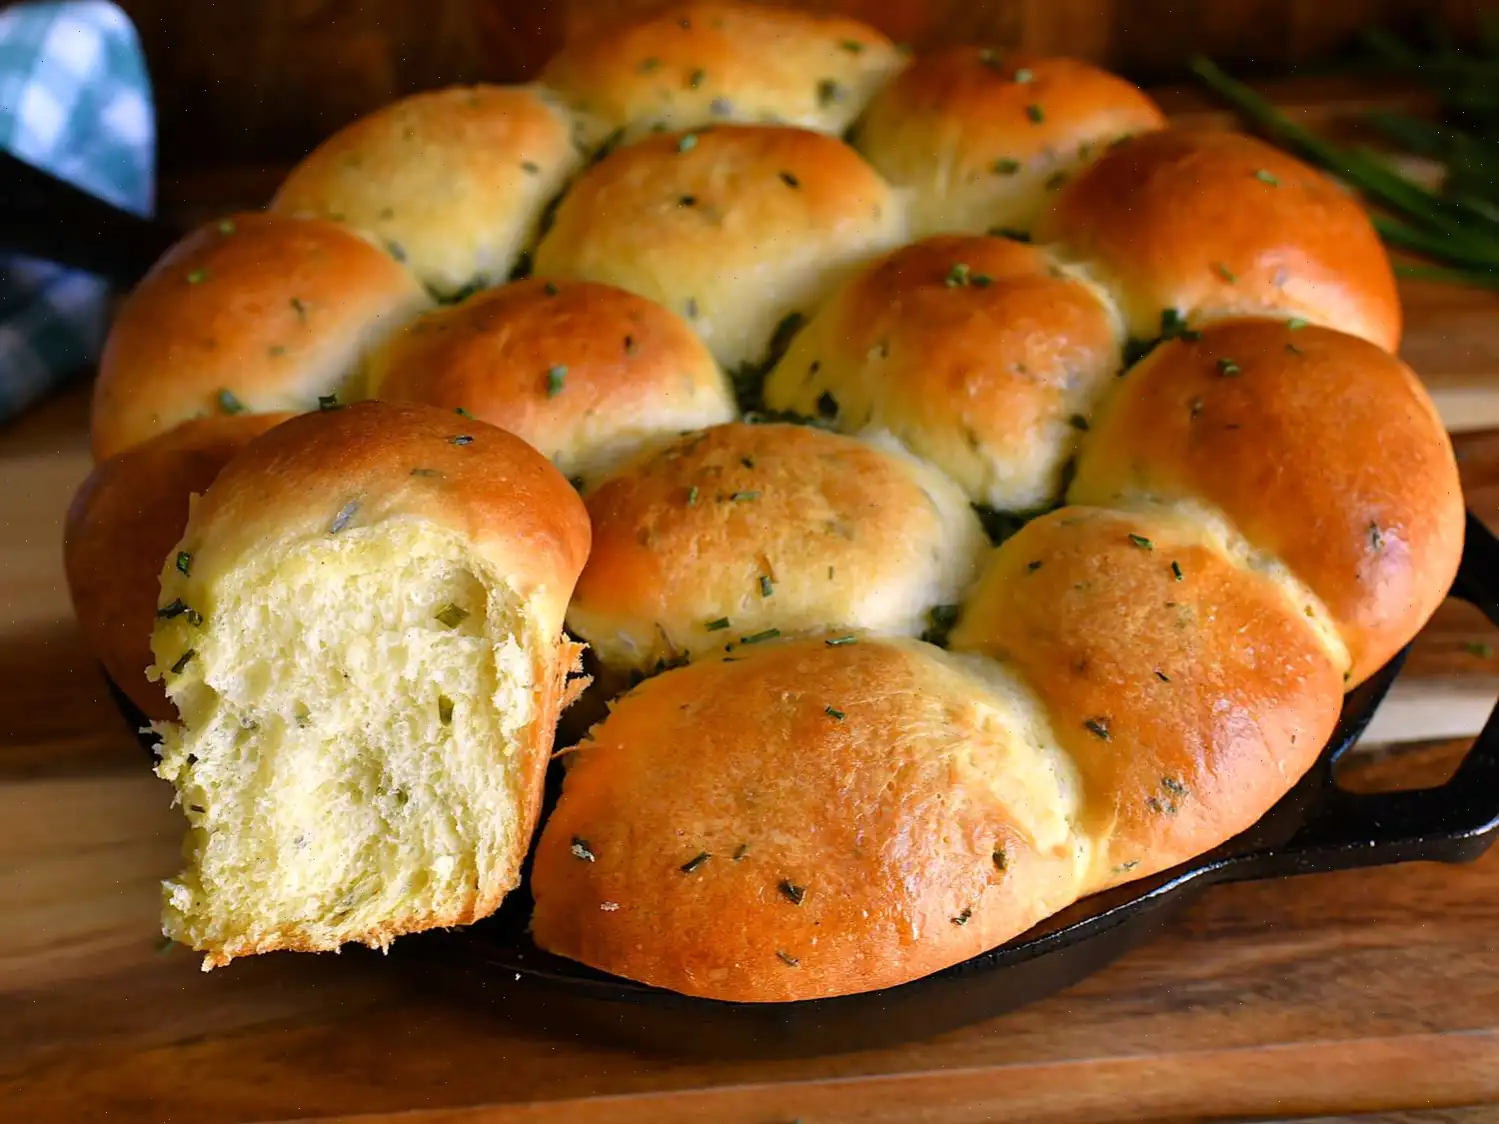
Los panecillos de crema agria y cebollín en sartén son esponjosos, sabrosos y perfectos para cualquier comida. Estos panecillos fáciles de hacer se hornean en una sartén, lo que les da una corteza crujiente y un centro suave. Con la crema agria tangy y el cebollín fresco, estos panecillos seguramente serán un éxito en tu próxima cena o reunión familiar. Disfrútalos calientes con un poco de mantequilla para un acompañante delicioso que a todos les encantará.
Ingredientes
- 1/2 taza de leche entera, calentada a 120130F (4954C)
- Un pequeo pellizco de azcar granulada
- 2 1/2 cucharaditas de levadura de accin rpida
- 3 1/2 a 4 tazas de harina de trigo, ms un poco ms para amasar
- 1/4 taza de azcar granulada
- 3 cucharadas de cebollinos secos, y un poco ms para decorar
- 1 3/4 cucharaditas de sal fina
- 1/2 cucharadita de ajo en polvo
- 1/4 cucharadita de pimienta negra molida
- 1 taza de crema agria, a temperatura ambiente
- 5 cucharadas de aceite de oliva extra virgen, ms un poco ms para engrasar
- 2 huevos grandes, a temperatura ambiente
Instrucciones
- En un recipiente pequeo, mezcle la leche tibia, el azcar y la levadura. Deje reposar en un lugar clido durante 5 minutos hasta que se forme espuma en la superficie.
- En un bol grande, combine 2 tazas de harina con 1/4 de taza de azcar, los cebollinos secos, la sal, el ajo en polvo y la pimienta. Revuelva bien hasta que todos los ingredientes estn bien integrados.
- Agregue la mezcla de levadura, la crema agria, el aceite de oliva y los huevos a los ingredientes secos. Mezcle todo hasta obtener una masa homognea.
- Incorpore gradualmente el resto de la harina, de 1 a 1 1/2 tazas, hasta que la masa se despegue de los bordes del bol y forme una bola suave.
- Espolvoree ligeramente una superficie limpia con harina y amase la masa durante unos 1015 minutos, hasta que se vuelva suave y elstica. Si la masa se pega, agregue ms harina. Cubra la masa y djela reposar durante 10 minutos.
- Mientras la masa reposa, unte ligeramente con aceite de oliva una sartn de hierro fundido de 10 pulgadas. Divida la masa en 14 partes iguales y forme bolitas suaves con cada una.
- Coloque los panecillos en la sartn, distribuyndolos de forma que 10 queden en el borde exterior y 4 en el centro. Los panecillos deben estar ligeramente tocndose pero sin apretarse.
- Cubra la sartn con plstico engrasado y deje reposar en un lugar clido y libre de corrientes de aire durante 12 horas, hasta que los panecillos dupliquen su tamao.
- Precaliente el horno a 350F (180C). Retire el plstico y hornee los panecillos durante 2530 minutos, hasta que estn dorados y suenen huecos al tocarlos.
- Si lo desea, pincele la parte superior de los panecillos con ms aceite de oliva o mantequilla derretida y espolvoree con cebollinos adicionales. Deje enfriar un poco antes de disfrutar.
Consejos del chef
- Si usa levadura tradicional en lugar de levadura de accin rpida, caliente la leche solo hasta 110F (43C).
- Los cebollinos frescos pueden sustituir a los secos para obtener un sabor ms intenso.
- Si prefiere un sabor ms rico, puede reemplazar el aceite de oliva por mantequilla.
Informacin nutricional (por panecillo)
- Caloras: 562
- Grasas totales: 10g
- Grasas saturadas: 3g
- Colesterol: 37mg
- Sodio: 286mg
- Carbohidratos: 101g
- Fibra: 4g
- Azcares: 5g
- Protenas: 15g
- Calcio: 50mg
- Hierro: 6mg
- Potasio: 185mg
Los panecillos de sartn con cebollino y crema agria son una versin moderna de los tradicionales panecillos de levadura americanos, combinando una textura suave y esponjosa con el sutil sabor cido de la crema agria y el delicado aroma del cebollino. El origen de estos panecillos se remonta a las tradiciones de panadera casera de mediados del siglo XX en los Estados Unidos, cuando los cocineros comenzaron a experimentar con la enriquecida de las masas usando productos lcteos como crema agria, yogur o suero de leche. Esta innovacin form parte de un movimiento ms amplio para crear panes ms ricos y sabrosos que pudieran complementar tanto las comidas cotidianas como las ocasiones festivas.
Variaciones Regionales y Preferencias
Aunque estos panecillos son ampliamente populares en los Estados Unidos, las variaciones regionales reflejan a menudo los ingredientes locales y las tcnicas de coccin. En el Medio Oeste, los panaderos tienden a usar crema agria entera y cebollino fresco, destacando una textura hmeda y densa, ideal para cenas familiares abundantes. En cambio, en las regiones costeras, a veces se sustituye el aceite de oliva por mantequilla e incorporan hierbas como el perejil o el tomillo junto con el cebollino, creando panecillos ms ligeros con sutiles influencias mediterrneas. El uso de una sartn de hierro fundido es especialmente comn en las cocinas del sur, ya que promueve un dorado uniforme y una corteza ligeramente crujiente, mientras mantiene un interior suave.
Caractersticas Distintivas Comparadas con Otros Panes Similares
Estos panecillos de sartn se diferencian de los panecillos tradicionales principalmente debido a la adicin de crema agria, que no solo mejora el sabor, sino que tambin crea una miga tierna. A diferencia de la brioche o el challah, que dependen en gran medida de la mantequilla y los huevos para su riqueza, los panecillos de crema agria y cebollino logran una suavidad delicada sin ser excesivamente dulces. La incorporacin de cebollino aporta un toque sabroso que los distingue de los panecillos simples o ligeramente endulzados. Adems, al hornear en una sartn de hierro fundido, los panecillos se elevan juntos, lo que da lugar a capas que se pueden separar fcilmente, con un exterior dorado y ligeramente texturizado, una experiencia distinta de los panecillos horneados individualmente en una bandeja de horno.
Dnde Se Suelen Servir
Estos panecillos son un acompaamiento verstil adecuado para una variedad de comidas. A menudo se sirven junto a sopas contundentes, carnes asadas y festines navideos, donde su sabor mantecoso y cido complementa los platos principales salados. Muchas familias tambin los disfrutan en el brunch, acompandolos con huevos, salmn ahumado o untables de queso. Debido a su presentacin atractiva de capas que se pueden separar y su aromtico topping, son una opcin favorita para reuniones informales, fiestas y cenas de domingo, lo que los convierte en una adicin tanto funcional como festiva a cualquier mesa.
Datos Interesantes y Perspectivas Culinarias
Un aspecto fascinante de estos panecillos es el papel que juega la crema agria en la masa de levadura. Su acidez fortalece ligeramente la red de gluten, creando una masa ms suave y elstica, al mismo tiempo que mejora sutilmente el proceso de fermentacin. Otro dato curioso es que el uso de la sartn de hierro fundido fue originalmente una eleccin prctica: distribuye el calor de manera uniforme y ayuda a que los panecillos se cocinen de manera homognea, lo cual era particularmente til antes de que los hornos modernos se volvieran estndar. Algunos panaderos caseros incluso experimentan aadiendo pequeas cantidades de queso rallado o ajo a la masa, lo que le da una profundidad sabrosa que distingue an ms estos panecillos de otros panes de levadura. Finalmente, aunque el cebollino es tradicional, sustituciones como las cebollas de verdeo o hierbas frescas pueden adaptar la receta a los gustos locales sin sacrificar su textura y suavidad caractersticas.
Preguntas frecuentes sobre Panecillos de cena en sartén con crema agria y cebollín
Compartir
Comentarios
Eric Anderson
10/26/2022 03:35:12 PM
Soy relativamente nuevo en la panadería de pan, pero decidí probar esta receta y ¡no podría estar más feliz con el resultado! Estos panecillos fueron un éxito con todos. El toque de crema agria le dio un sabor ácido delicioso que realmente elevó el sabor. Opté por usar mi batidora de pie con el gancho de masa en lugar de amasar a mano, lo que hizo el proceso mucho más fácil: la masa estuvo lista en solo 7-8 minutos en la configuración más baja. Tuve que cambiar a una sartén de hierro fundido más grande, ya que la receta no cabía en una sartén de 10 pulgadas, pero resultaron hermosos (ver foto). ¡Definitivamente es una receta para guardar!


 audio version


CookGuide es tu guía culinaria para descubrir nuevos sabores y cocinar con confianza. Encuentra recetas de confianza, consejos prácticos e inspiración tanto para cocinas domésticas como profesionales.
Cualquier copia, distribución o uso de los materiales de este servicio sin autorización está estrictamente prohibido. Las infracciones serán procesadas según la legislación aplicable y pueden dar lugar a responsabilidades civiles y penales.
© Guía de cocina Studio 2026 | Cookies | Política de PrivacidadEncuentra la receta perfecta con IA. Solo introduce los ingredientes y deja que Cook te guíe hacia la magia.