
Receta de galletas con huella dactilar
En un bol grande, bate la mantequilla con el azúcar hasta que quede suave y esponjosa. Agrega el extracto de vainilla y mezcla bien. Poco a poco añade la harina y la sal, mezclando hasta que todo esté bien integrado. Forma bolitas de masa de 2,5 cm y colócalas en una bandeja para hornear. Usa tu pulgar para hacer un huequito en el centro de cada galleta. Rellena cada huequito con tu mermelada favorita. Hornea a 175 °C durante 12-15 minutos, o hasta que los bordes estén ligeramente dorados. Deja enfriar antes de servir. ¡Disfruta estas deliciosas galletas con un vaso de leche o una taza de té!


Estas galletas combinan la suavidad de la mantequilla con un toque crujiente de nueces y un centro de mermelada frutal. Son perfectas para sorprender a cualquier invitado y su preparacin es ms sencilla de lo que parece.
Ingredientes
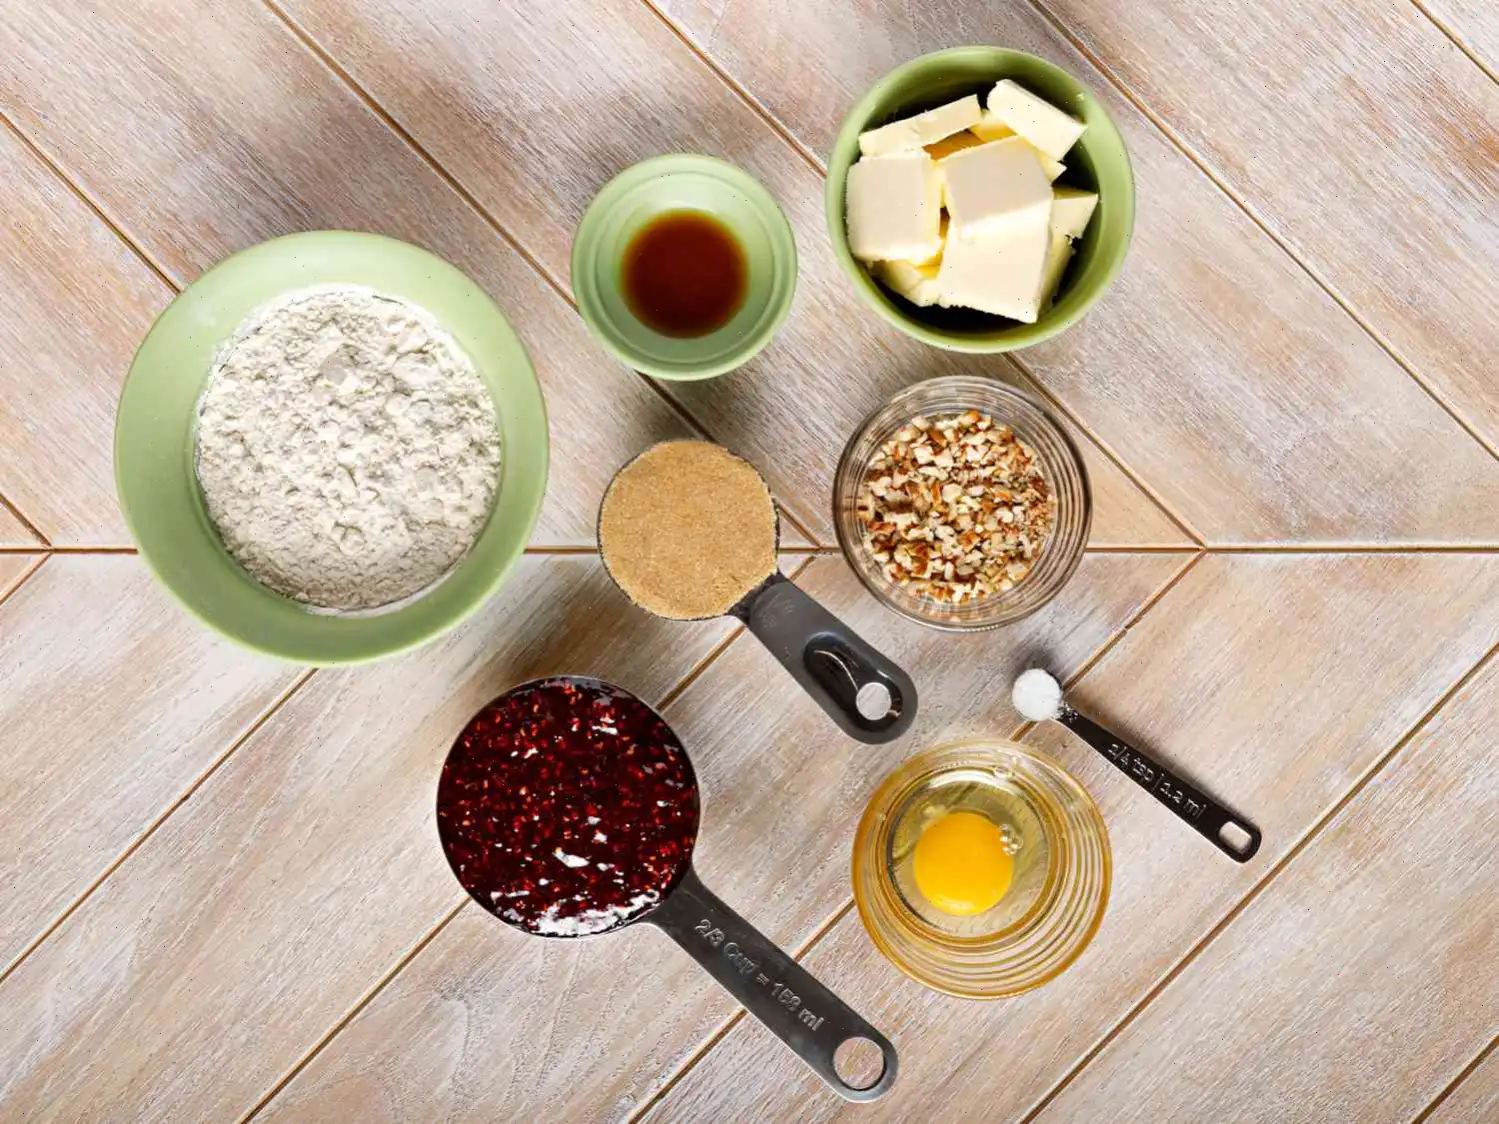
- 1 huevo grande, separado en clara y yema
- taza de mantequilla a temperatura ambiente
- taza de azcar moreno compacta
- 1 taza de harina de trigo
- cucharadita de extracto de vainilla
- cucharadita de sal
- taza de nueces finamente picadas (pueden sustituirse por almendras, pecanas o avellanas)
- taza de mermelada al gusto (fresa, albaricoque, frambuesa, ruibarbo o mora)
Instrucciones
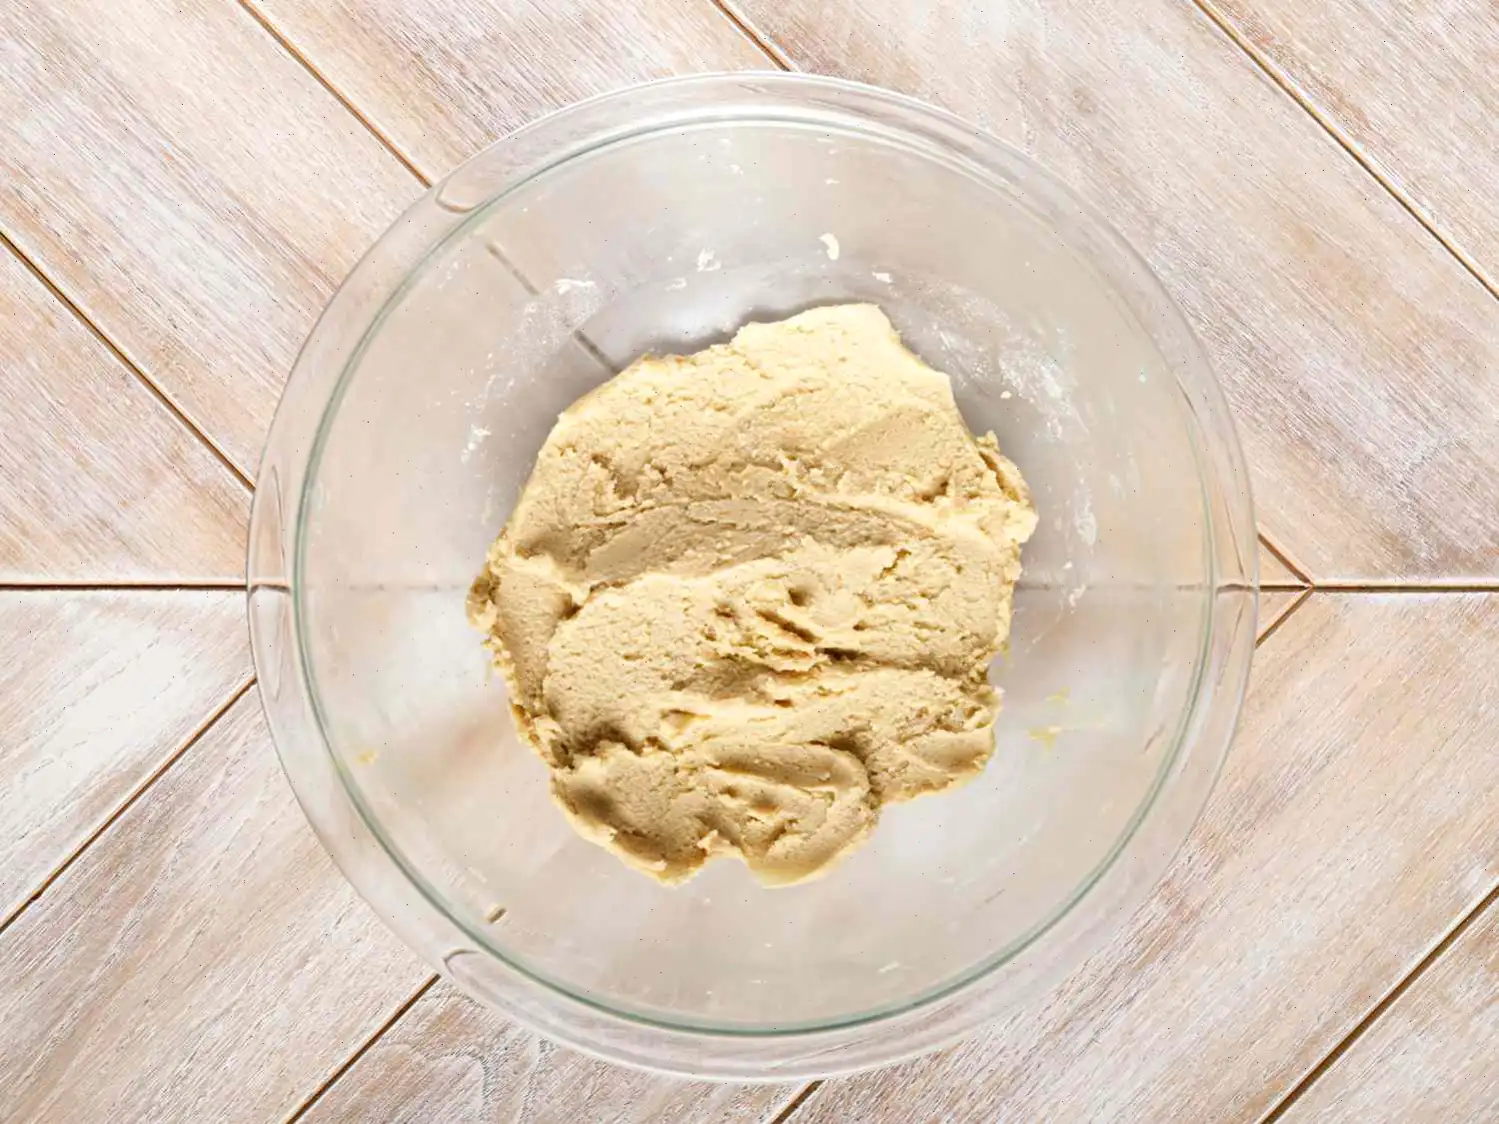
Paso 1: Preparar la masa
En un bol grande, bate la mantequilla con el azcar moreno y la yema de huevo hasta obtener una mezcla cremosa y ligera, aproximadamente 2 minutos. Agrega la harina, la vainilla y la sal, mezclando hasta conseguir una masa uniforme y suave.
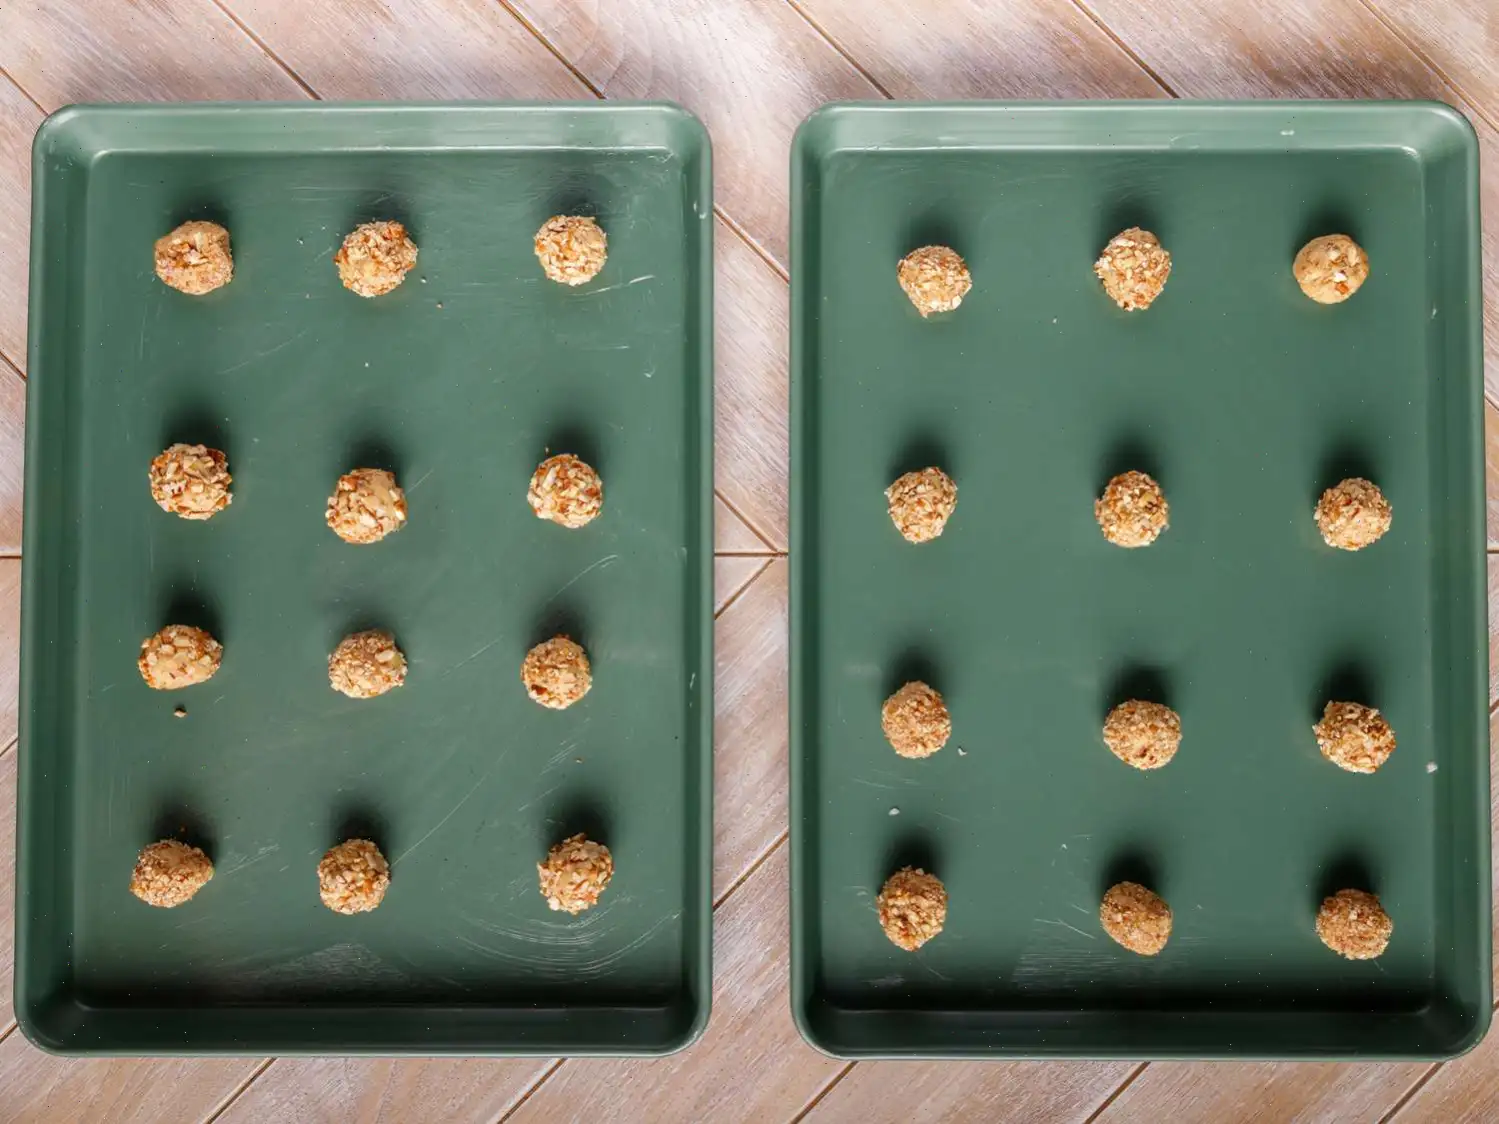
Paso 2: Formar las bolitas
Divide la masa en porciones de aproximadamente 4 cm de dimetro y forma bolitas con las manos, procurando que sean del mismo tamao.
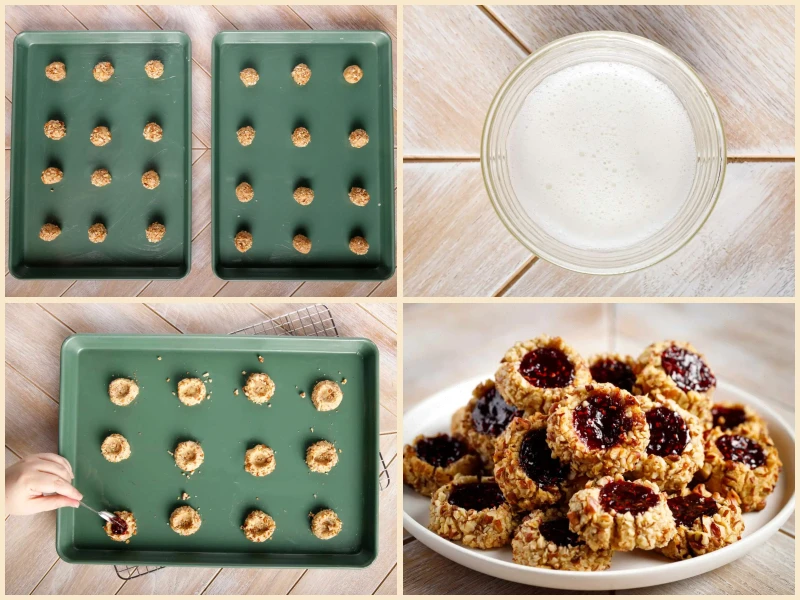
Paso 3: Cubrir con nueces
Bate la clara de huevo hasta que haga espuma ligera. Coloca las nueces picadas en un plato separado. Pasa cada bolita por la clara y luego rebzala en las nueces, asegurando que queden bien cubiertas.
Paso 4: Hornear ligeramente
Ubica las bolitas en una bandeja engrasada dejando unos 5 cm de separacin. Hornea a 150C durante 5 minutos, hasta que comiencen a inflarse ligeramente.
Paso 5: Hacer la huella
Con el pulgar o el dorso de una cuchara de madera, presiona suavemente el centro de cada galleta para crear un hueco.
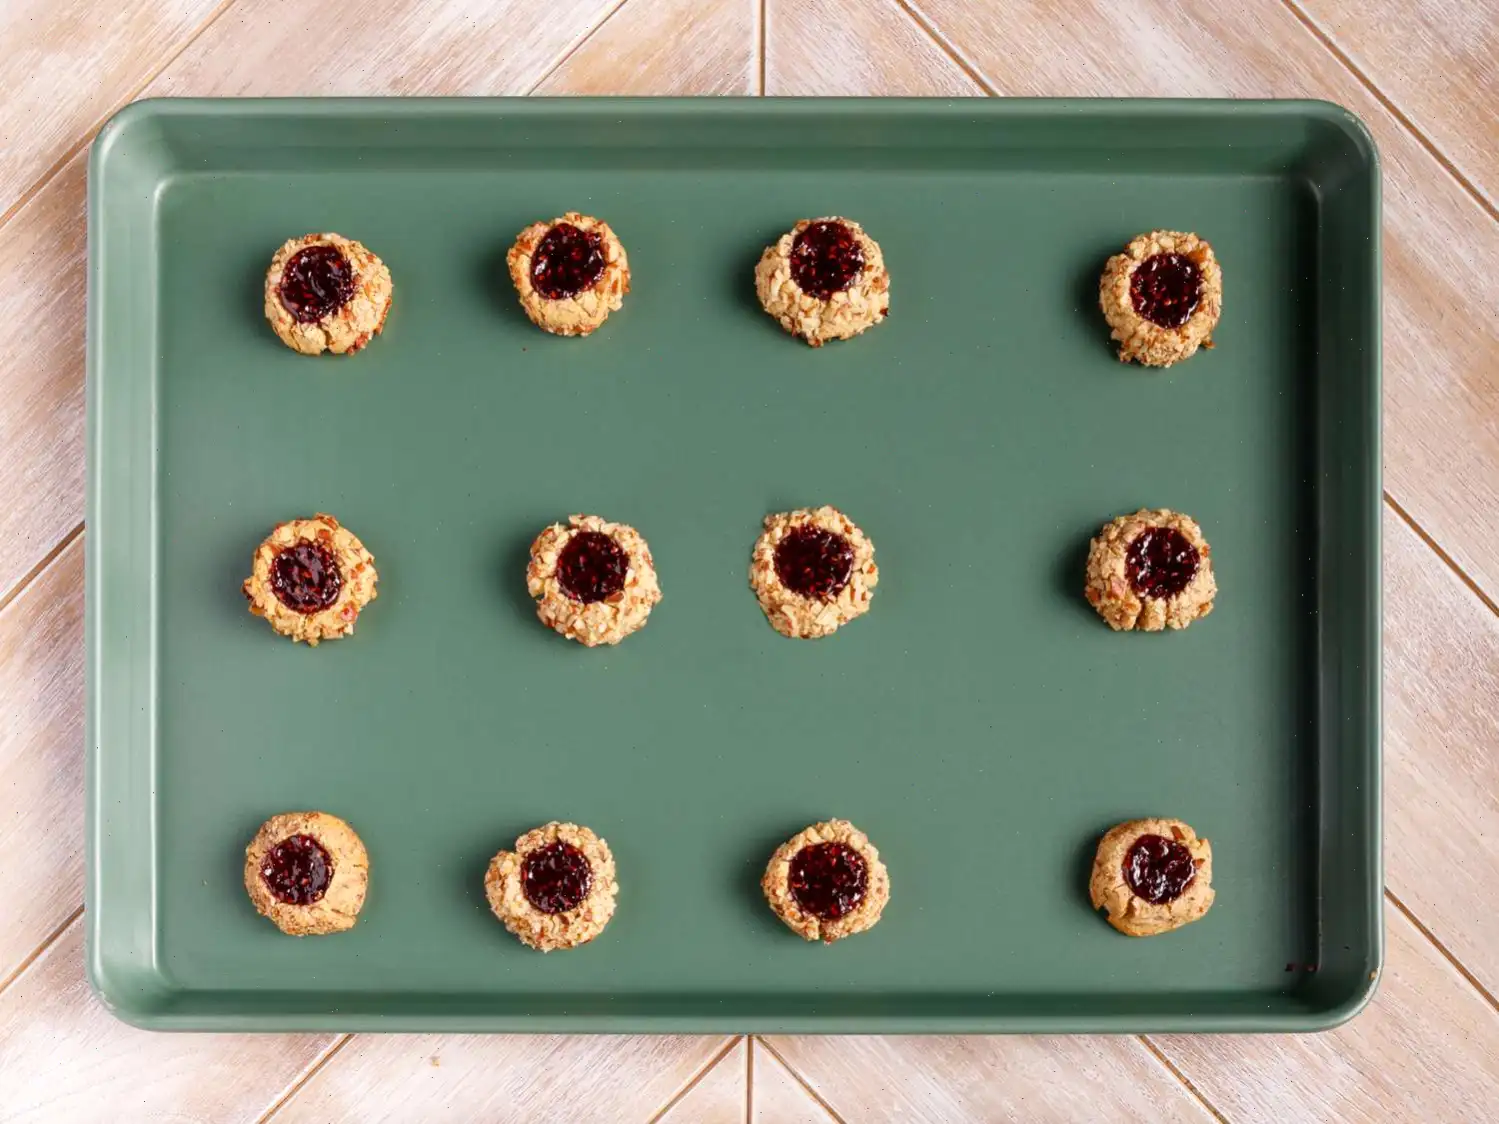
Paso 6: Rellenar con mermelada
Llena cada hueco con la mermelada elegida, asegurndote de que llegue hasta el borde.
Paso 7: Hornear nuevamente
Regresa las galletas al horno y cuece por 8 minutos ms o hasta que estn doradas y firmes al tacto. Retira del horno y deja reposar unos minutos.
Paso 8: Enfriar
Traslada las galletas a una rejilla para que se enfren por completo antes de servirlas o guardarlas.
Almacenamiento
Guarda las galletas en un recipiente hermtico una vez que estn completamente fras. Se conservan a temperatura ambiente hasta una semana.
Congelacin
Tambin se pueden congelar antes de aadir la mermelada. Forma las bolitas, hornea ligeramente, presiona el centro y deja enfriar. Colcalas en una bandeja para congelar y, tras unas horas, psalas a un recipiente o bolsa apta para congelador. Se conservan hasta dos meses. Cuando quieras disfrutarlas, desconglalas en el refrigerador y aade la mermelada antes del horneado final.
Consejos de la Comunidad
- Us mantequilla irlandesa y mermeladas de frambuesa negra y fresa. Se han convertido en mis galletas favoritas! Sarah
- Reemplac las nueces por coco tostado por alergias y us frambuesa para el relleno. Quedaron espectaculares! Stacey
- Intent hacerlas con chocolates en lugar de mermelada y tambin quedaron deliciosas. GIMLIEN
Informacin Nutricional (por galleta)
- Caloras: 96
- Grasa total: 5 g (6% VD)
- Grasa saturada: 3 g (13% VD)
- Colesterol: 18 mg (6% VD)
- Sodio: 59 mg (3% VD)
- Carbohidratos: 12 g (4% VD)
- Fibra diettica: 0 g (1% VD)
- Azcares: 6 g
- Protenas: 1 g (2% VD)
- Vitamina C: 1 mg (1% VD)
- Calcio: 8 mg (1% VD)
- Hierro: 0 mg (2% VD)
- Potasio: 25 mg (1% VD)
Las galletas thumbprint, con su delicada textura mantequillosa, recubrimiento crujiente de nuez y relleno de mermelada afrutada, son un dulce querido en todo el mundo. Estas galletas no solo son deliciosas, sino que tambin ocupan un lugar especial en las tradiciones y reuniones festivas. Vamos a profundizar en su historia, variaciones regionales y por qu se destacan entre otras galletas.
Historia de las Galletas Thumbprint
El origen de las galletas thumbprint se remonta a Escandinavia, especficamente a Suecia, donde las galletas se conocen como "Hallongrottor", que significa "cuevas de frambuesa". El nombre hace referencia a la hendidura dejada en el centro de la galleta, que generalmente se rellena con mermelada de frutas, como frambuesa o fresa. La tradicin de hacer estas galletas se ha extendido por toda Europa y Amrica del Norte, donde son especialmente populares durante la temporada navidea. En Estados Unidos, las galletas thumbprint suelen aparecer en las bandejas de galletas de Navidad, apreciadas por su versatilidad y simplicidad.
Variaciones Regionales
Si bien las galletas thumbprint se disfrutan a nivel mundial, sus rellenos y preparaciones varan segn la regin. En Escandinavia, el relleno clsico es generalmente mermelada de frambuesa o fresa, reflejando la abundancia de estas frutas en la regin. Sin embargo, en los Estados Unidos, las personas a menudo son creativas con los rellenos, utilizando desde mermeladas de albaricoque hasta ganache de chocolate. En algunas partes de Europa, las galletas se preparan con una capa de pasta de almendra o una espolvoreada de azcar glas, lo que les aade riqueza y sabor. Adems de estas variaciones, el tipo de nueces utilizado para recubrir la masa tambin difiere. Mientras que las nueces son la opcin ms comn, algunas regiones optan por avellanas o incluso almendras, que aportan sabores nicos a la galleta.
Diferencias con Galletas Similares
A simple vista, las galletas thumbprint pueden parecer similares a otras galletas rellenas, como las galletas de mantequilla o las galletas sndwich. Sin embargo, la caracterstica distintiva de las galletas thumbprint es la hendidura caracterstica en el centro, que se hace usando el pulgar o la parte posterior de una cuchara antes de hornear. Esta hendidura es lo que da a las galletas thumbprint su nombre y las distingue de otras galletas que podran ser simplemente planas o rellenas sin una forma especfica. Adems, las galletas thumbprint a menudo se enrollan en nueces picadas, lo que les da textura y un crujido delicioso, mientras que muchas otras galletas se espolvorean con azcar o se cubren con harina.
Dnde Se Suelen Servir las Galletas Thumbprint
Las galletas thumbprint son populares durante la temporada navidea, especialmente en Navidad. A menudo aparecen en bandejas de galletas junto a otros dulces clsicos como los hombres de jengibre y las galletas de azcar. Sin embargo, estas galletas tambin se disfrutan durante todo el ao, ya que sus ingredientes simples las hacen perfectas para cualquier ocasin. Las puedes encontrar en reuniones familiares, ventas de pasteles o como un dulce acompaante para una taza de t o caf. Su versatilidad tambin las convierte en una excelente opcin para aquellos que quieren experimentar con diferentes rellenos, convirtindolas en una opcin ideal para fiestas, picnics o meriendas.
Datos Interesantes sobre las Galletas Thumbprint
- En algunas tradiciones, la hendidura del pulgar se dice que simboliza una "cueva" o un "nido", representando calor y confort.
- Las galletas thumbprint son una de las galletas ms fciles de personalizar. Puedes usar cualquier tipo de mermelada, desde la clsica de fresa hasta sabores ms exticos como crema de limn o maracuy.
- Dependiendo de la receta, estas galletas suelen ser sin gluten, lo que las convierte en una excelente opcin para quienes tienen restricciones dietticas.
- Se cree que las galletas thumbprint se originaron a fines del siglo XVIII en Europa y, desde entonces, han evolucionado hasta convertirse en el dulce familiar que conocemos hoy.
Puedes escuchar esta receta en formato de audio de IA. Simplemente haz clic en el botón de reproducción a continuación para escuchar el contenido en el formato que mejor te convenga. ¡Es una excelente manera de absorber información sobre la marcha!
Preguntas frecuentes sobre Receta de galletas con huella dactilar
Compartir
Comentarios
DSRTBLND43
10/06/2025 01:52:54 PM
Le doy 5 estrellas aunque, como mencioné antes, necesita algunos ajustes. No es muy dulce, ahí es donde entra la mermelada, así que tomen eso en cuenta al elegir el relleno, que realmente las hace buenas. Seguí las instrucciones al pie de la letra, PERO aumenté el tiempo de horneado a 15 minutos, lo que hace una gran diferencia. No subí la temperatura ya que esta galleta necesita cocerse lentamente para que la mermelada no se desborde. Es poca cantidad, así que recomiendo cuadruplicarla. Una gran galleta navideña. No necesité enfriar la masa. Esto será un clásico de Navidad.
PoliteSpud9446
12/08/2024 03:34:00 PM
Gracias a todos los que ajustaron esta receta. Es maravillosa, pero estoy de acuerdo: la temperatura y los tiempos de cocción están mal; también se necesita una galleta más pequeña, más nueces y me salté el paso laborioso y desordenado de rebozar la masa en clara de huevo y luego en nueces. Añadí las nueces directamente a la masa. Horneé a 350°F por 10 minutos, luego rellené y horneé otros 10 minutos: perfecto. Me pregunto si sería mejor dejarlas reposar antes de rellenarlas. Algunas se desmoronaron. Doblada la receta, reduje el tamaño de las bolas y obtuve unas 32. Deliciosas, gracias por la receta.
Kathy E Morris
12/02/2019 04:14:08 AM
Hice galletas mini y las pasé por azúcar blanca (seguí otra sugerencia). También las horneé por 12 minutos la segunda vez; parecían crudas después de 8 minutos. Me encantó la combinación de clara de huevo y azúcar, agregando un toque de merengue encima.


 audio version


CookGuide es tu guía culinaria para descubrir nuevos sabores y cocinar con confianza. Encuentra recetas de confianza, consejos prácticos e inspiración tanto para cocinas domésticas como profesionales.
Cualquier copia, distribución o uso de los materiales de este servicio sin autorización está estrictamente prohibido. Las infracciones serán procesadas según la legislación aplicable y pueden dar lugar a responsabilidades civiles y penales.
© Guía de cocina Studio 2026 | Cookies | Política de PrivacidadEncuentra la receta perfecta con IA. Solo introduce los ingredientes y deja que Cook te guíe hacia la magia.