
Receta de Chi Chi Dango
Chi Chi Dango es un postre hawaiano muy popular hecho con mochiko (harina de arroz dulce), azúcar, leche de coco y colorante alimentario. Estos dulces masticables y dulces son perfectos para picar o como un postre ligero. ¡Sigue esta receta sencilla para hacer tu propio Chi Chi Dango delicioso en casa!


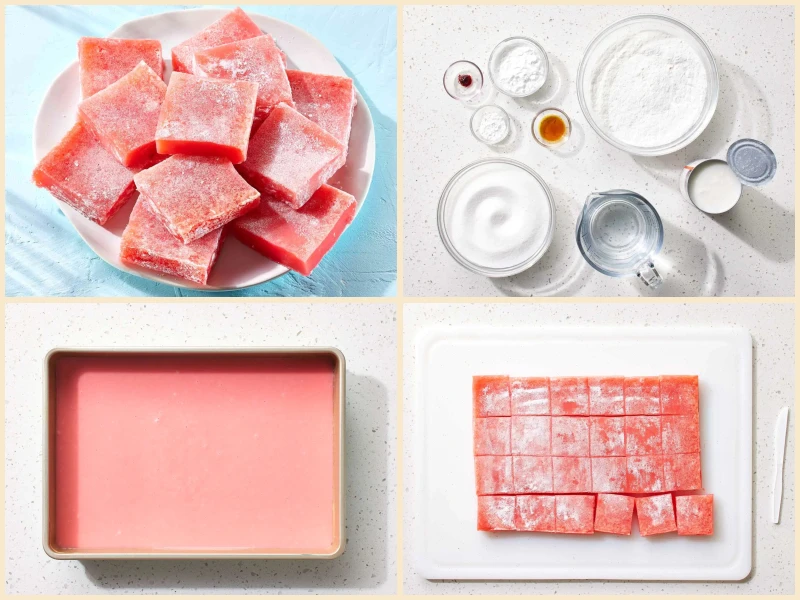
Ingredientes:
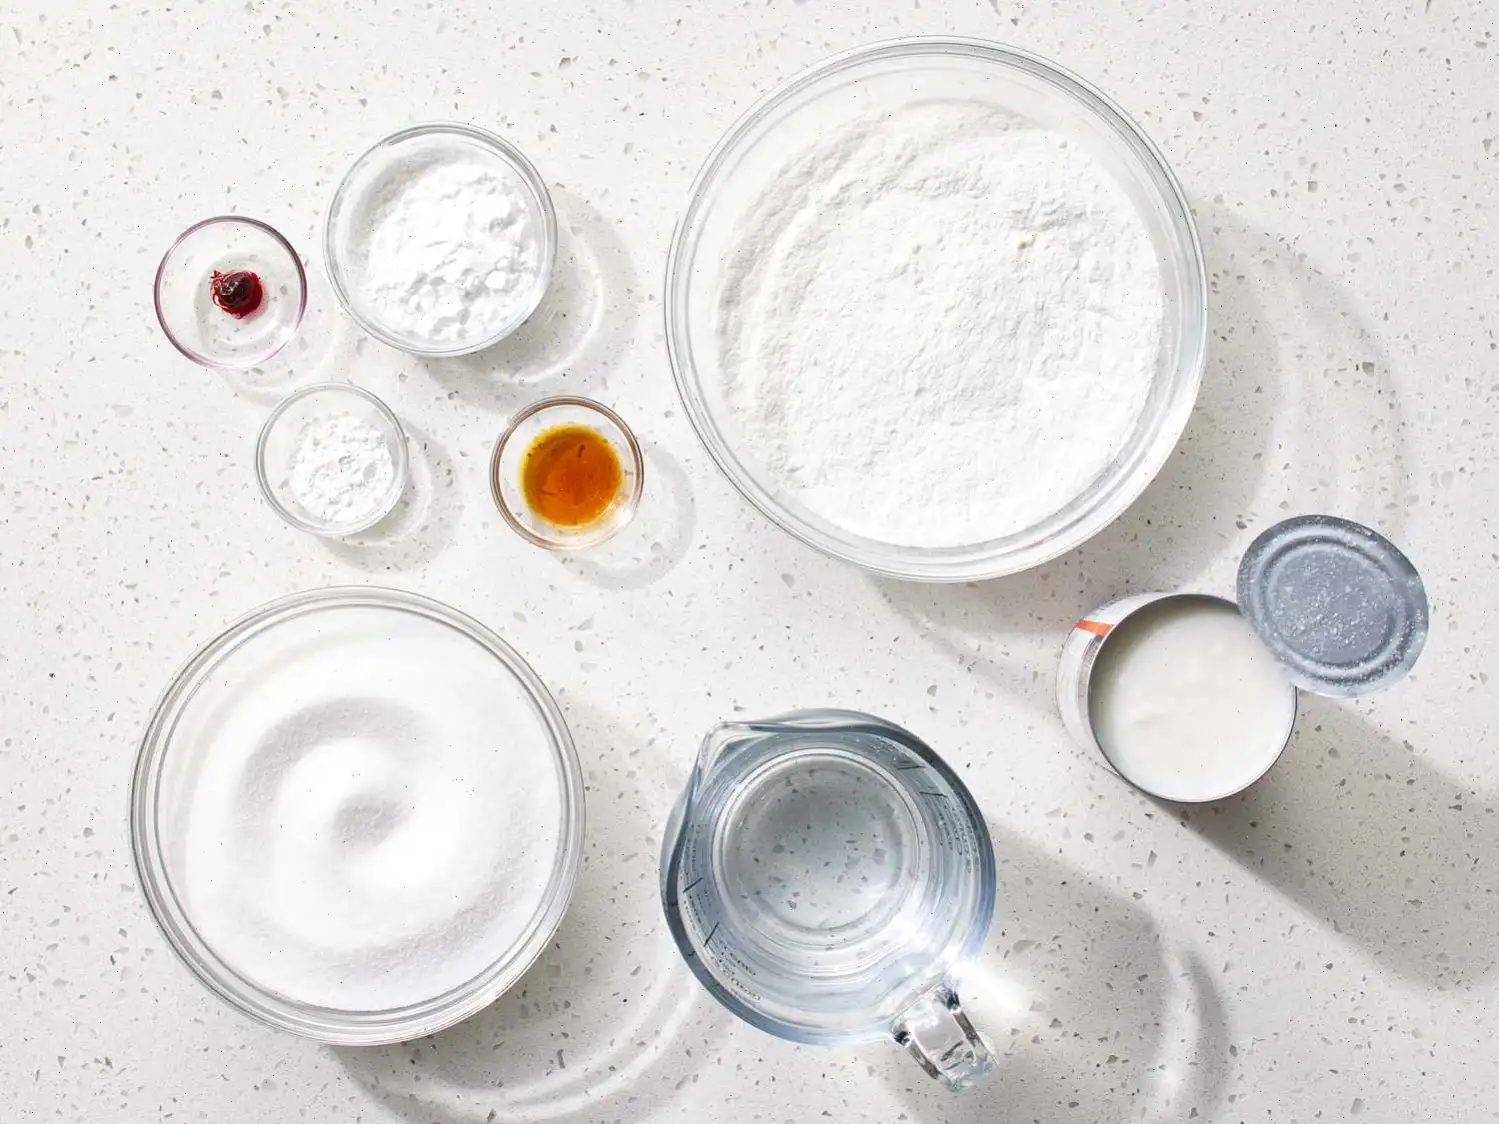
- Aceite en aerosol para cocinar
- 450 gramos de mochiko (harina de arroz glutinoso)
- 2 tazas de azcar blanca
- 1 cucharadita de polvo de hornear
- 2 tazas de agua
- 1 lata (400 gramos) de leche de coco
- 1 cucharadita de extracto de vainilla
- cucharadita de colorante rojo
- taza de almidn de papa (o la cantidad necesaria)
Instrucciones:
- Preparacin inicial: Asegrate de tener todos los ingredientes a la mano antes de comenzar a cocinar.
- Precalienta el horno: Ajusta la temperatura a 175C (350F) y unta con spray antiadherente una bandeja de horno de 23x33 cm (9x13 pulgadas).
- Mezcla los ingredientes secos: En un bol grande, combina el mochiko, el azcar y el polvo de hornear. Remueve bien hasta que todo est perfectamente integrado.
- Prepara la mezcla lquida: En un recipiente aparte, mezcla el agua, la leche de coco, el extracto de vainilla y el colorante rojo. Mezcla hasta que se disuelva completamente el colorante.
- Unir los ingredientes: Vierte poco a poco la mezcla lquida sobre los ingredientes secos, batiendo constantemente para evitar grumos. Contina mezclando hasta obtener una masa suave y homognea.
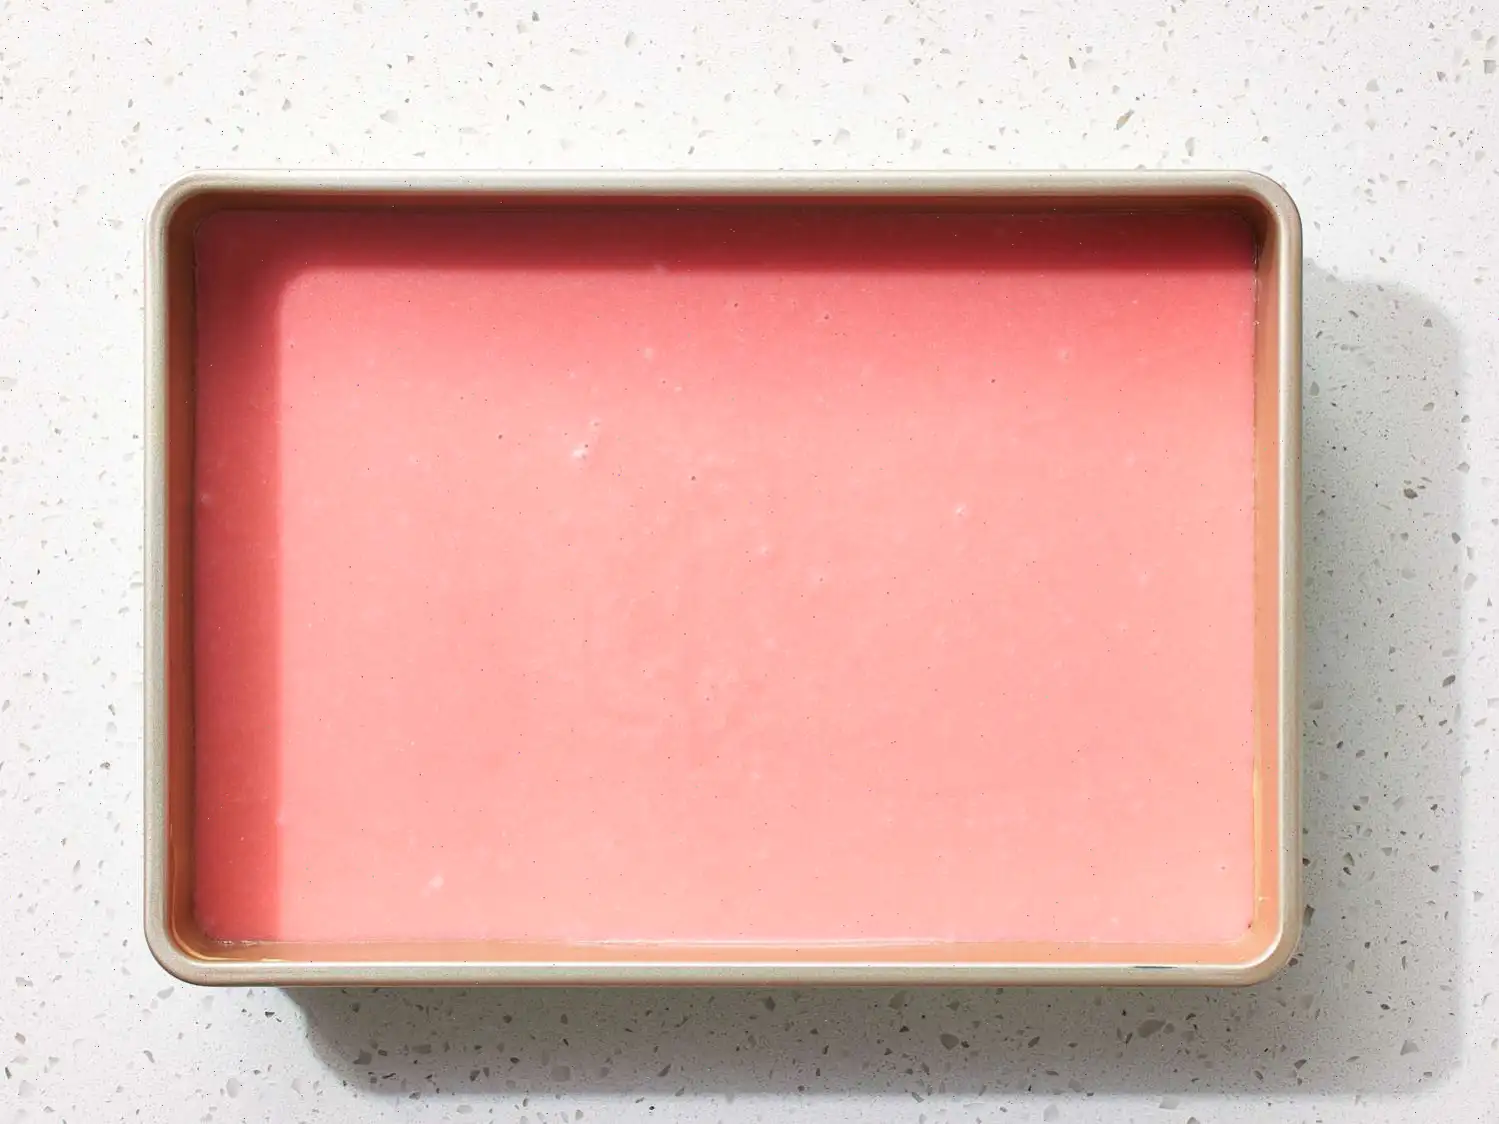
- Hornear: Coloca la mezcla en la bandeja previamente preparada y cbrela con papel aluminio. Introduce en el horno y cocina durante 1 hora. Cuando est listo, scalo del horno y djalo enfriar durante 30 minutos a 1 hora.
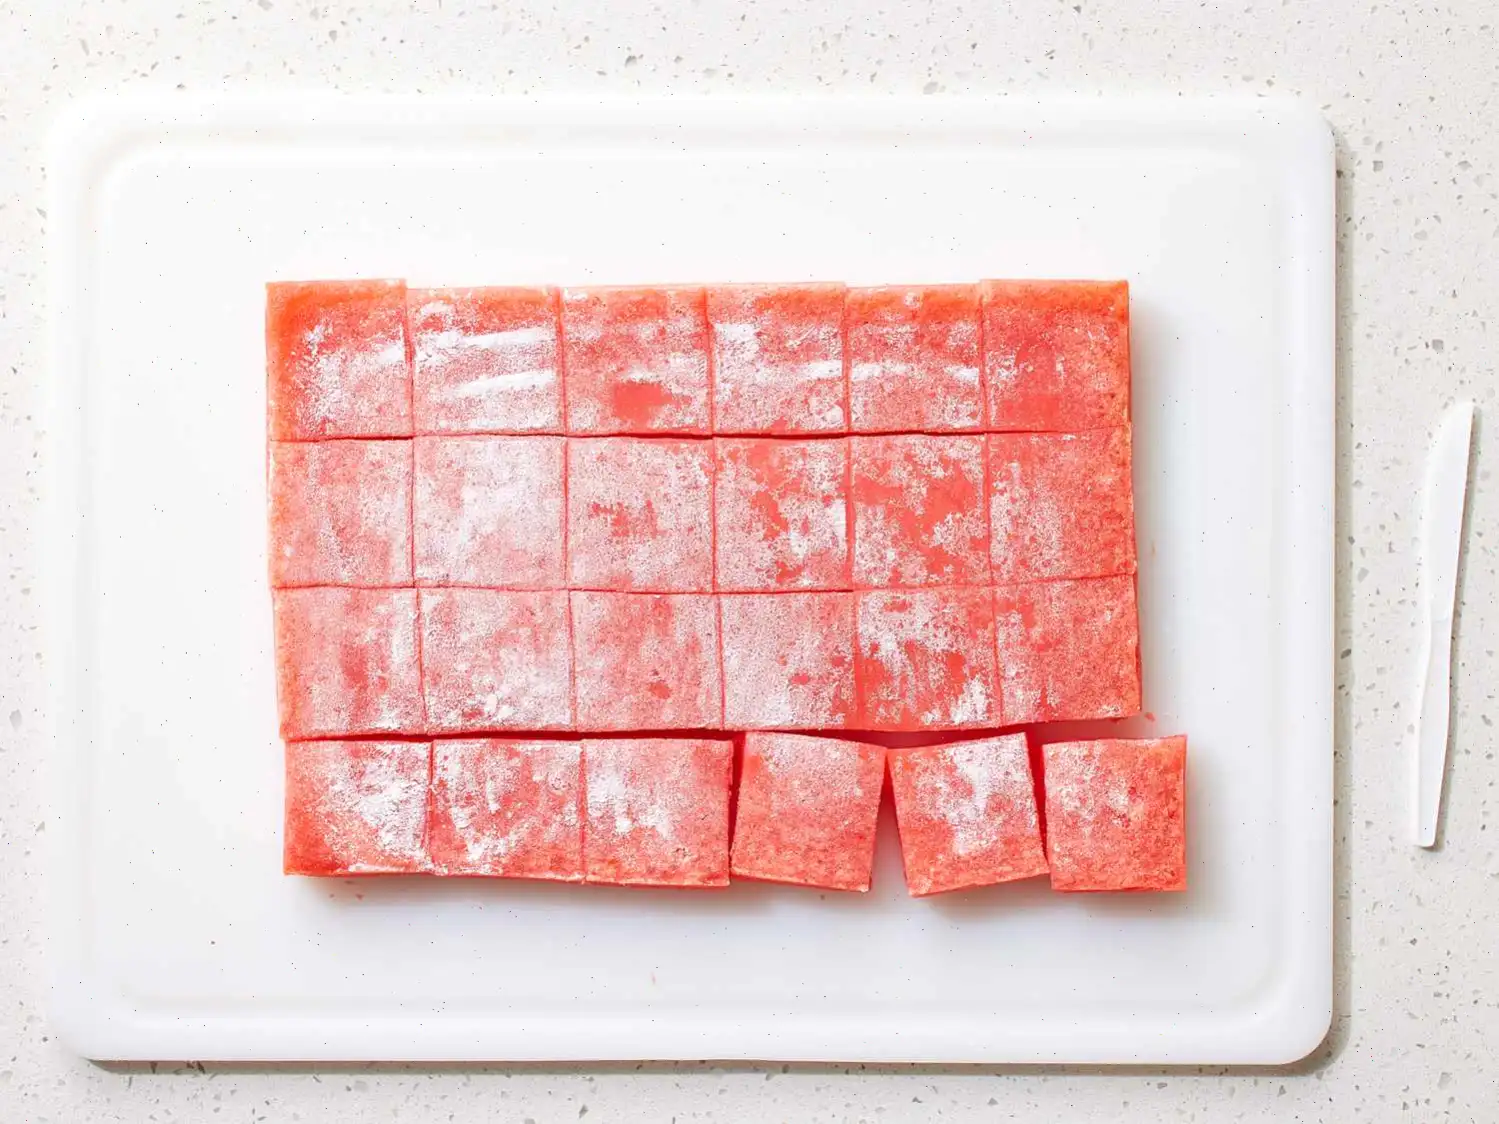
- Preparar la superficie de trabajo: Espolvorea un poco de almidn de papa sobre una superficie limpia. Voltea la bandeja con cuidado sobre la superficie espolvoreada y retira el dango.
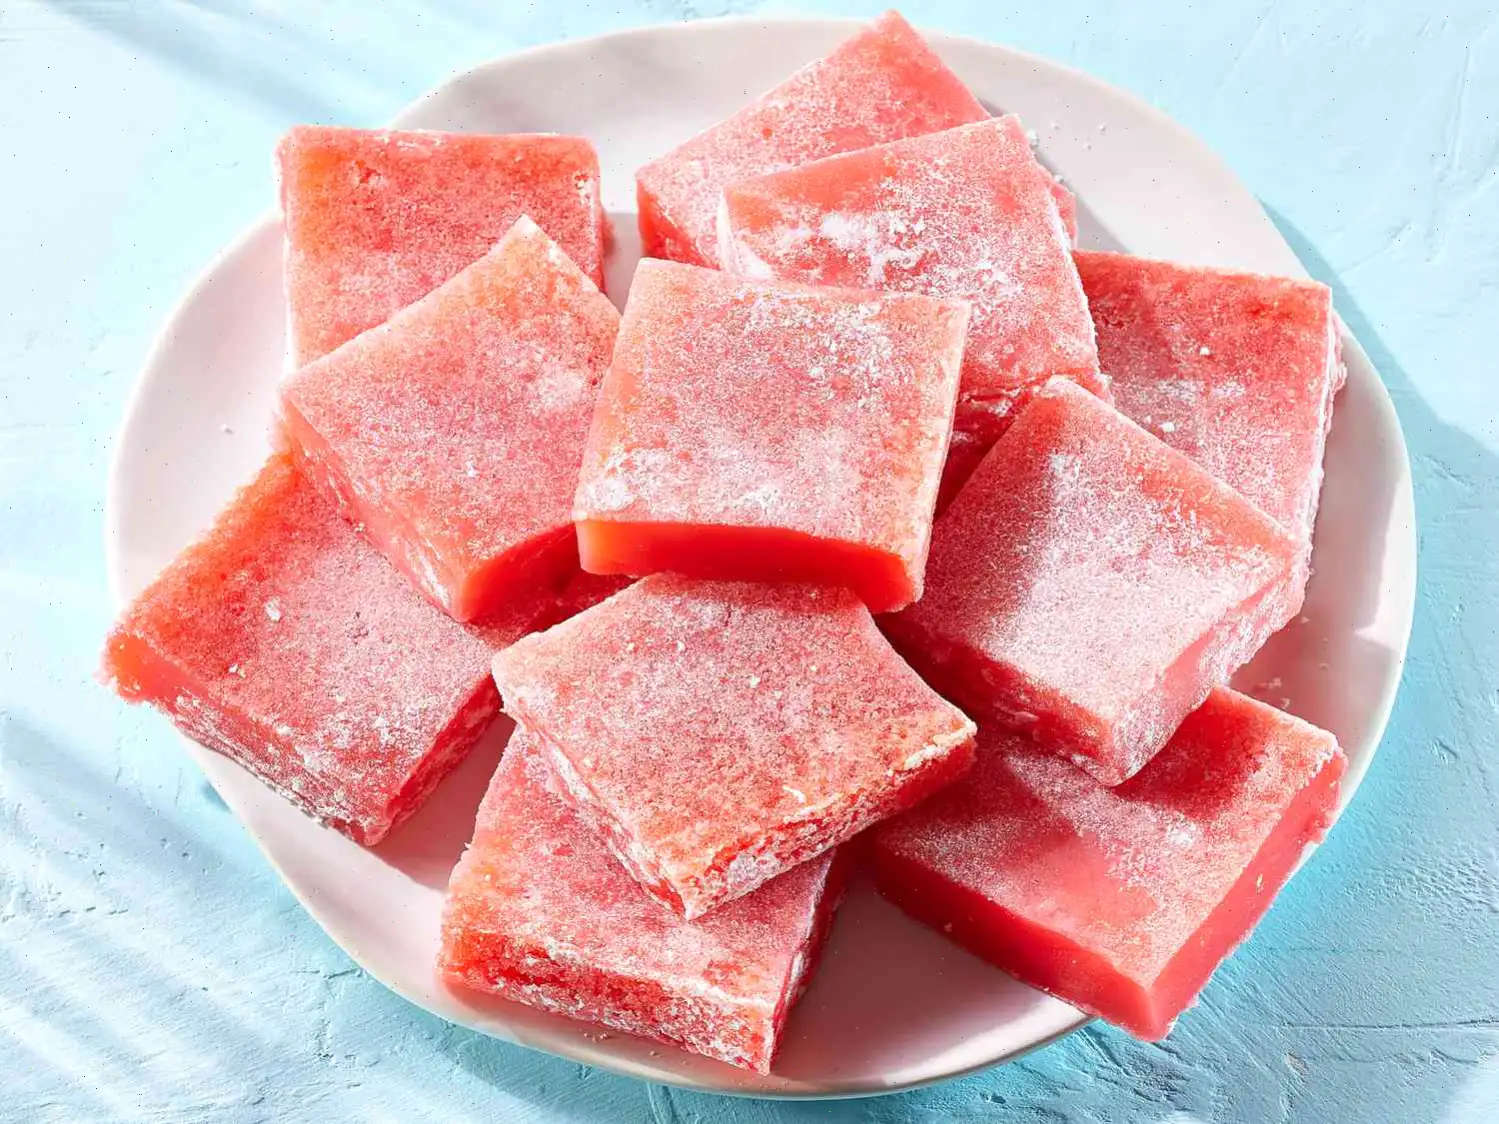
- Cortar el dango: Utiliza un cuchillo de plstico para cortar el dango en 36 piezas cuadradas, teniendo cuidado de no daar su textura pegajosa.
Consejo:
El dango de mochiko puede ser pegajoso al momento de cortarlo. Usar un cuchillo de plstico facilitar esta tarea.
Informacin Nutricional (por porcin):
- Caloras: 125 kcal
- Grasas: 3g (3% del valor diario recomendado)
- Grasas Saturadas: 2g (11% del valor diario recomendado)
- Sodio: 12mg (1% del valor diario recomendado)
- Carbohidratos Totales: 25g (9% del valor diario recomendado)
- Fibra Diettica: 0g (1% del valor diario recomendado)
- Protenas: 1g (2% del valor diario recomendado)
- Calcio: 10mg (1% del valor diario recomendado)
- Hierro: 0mg (2% del valor diario recomendado)
- Potasio: 34mg (1% del valor diario recomendado)
*Los valores diarios de referencia estn basados en una dieta de 2,000 caloras. Estos valores pueden variar segn las necesidades calricas de cada persona.
Preguntas frecuentes sobre Receta de Chi Chi Dango
Compartir
Comentarios
Aaron Jones
12/13/2023 11:16:52 PM
Intenté replicar el mochi de Menchie's con un toque de fresa usando 2 tazas de azúcar y 4 cucharaditas de gelatina de fresa. Después de hornear durante 1 hora y dejarlo reposar 15 minutos más en el horno, dejé el mochi toda la noche en la encimera. La textura quedó perfecta, pero cortarlo fue un poco desordenado. Cubrí el mochi con almidón de papa, lo corté en tiras con un cortador de pizza y luego en cubos con tijeras de cocina. La receta produjo una gran cantidad, suficiente para llenar una bolsa Ziploc de un galón con una sola bandeja de 9x13. La consistencia era suave y no demasiado dulce. Sorprendentemente, no tenía sabor a coco a pesar de mis dudas, probablemente por la gelatina de fresa.
James King
05/19/2024 11:13:53 AM
Esta receta de mochi es fenomenal, ¡permite experimentar con diferentes colores y sabores! He probado con té verde, fresa, limón, melón, canela, cappuccino y chocolate, y todas las versiones quedaron muy bien. El proceso es muy simple: mezclar todo en un procesador de alimentos durante 10-15 segundos y verter en un molde ligeramente engrasado. Para un giro especial, sustituye la mitad de la leche de coco por crema batida vegetal. Consejos: a) hornear al baño maría para evitar bordes duros. b) Dejar enfriar al menos 2 horas o toda la noche antes de desmoldar. c) Usar un cuchillo de plástico para cortar fácilmente. d) Tostar el almidón sin aceite y enfriar antes de usar. e) Sacudir el exceso de almidón en un colador grande. ¡Excelente receta!
Gregory Nelson
03/11/2025 02:19:56 PM
¡Simple y práctico! He preparado esta receta para muchas fiestas y siempre ha sido un éxito. Sigo las instrucciones al pie de la letra y a veces mezclo todo en un solo recipiente cuando tengo prisa. Puedes sustituir el almidón de papa por un poco de harina de mochiko. Es mejor preparar la noche anterior para que se enfríe y se asiente bien. Cortar con un cuchillo de plástico facilita el proceso. Cortar en cuadrados o rectángulos y espolvorear con más mochiko. ¡Disfruta! :-)


 audio version


CookGuide es tu guía culinaria para descubrir nuevos sabores y cocinar con confianza. Encuentra recetas de confianza, consejos prácticos e inspiración tanto para cocinas domésticas como profesionales.
Cualquier copia, distribución o uso de los materiales de este servicio sin autorización está estrictamente prohibido. Las infracciones serán procesadas según la legislación aplicable y pueden dar lugar a responsabilidades civiles y penales.
© Guía de cocina Studio 2026 | Cookies | Política de PrivacidadEncuentra la receta perfecta con IA. Solo introduce los ingredientes y deja que Cook te guíe hacia la magia.