
Receta de Mochi en Microondas
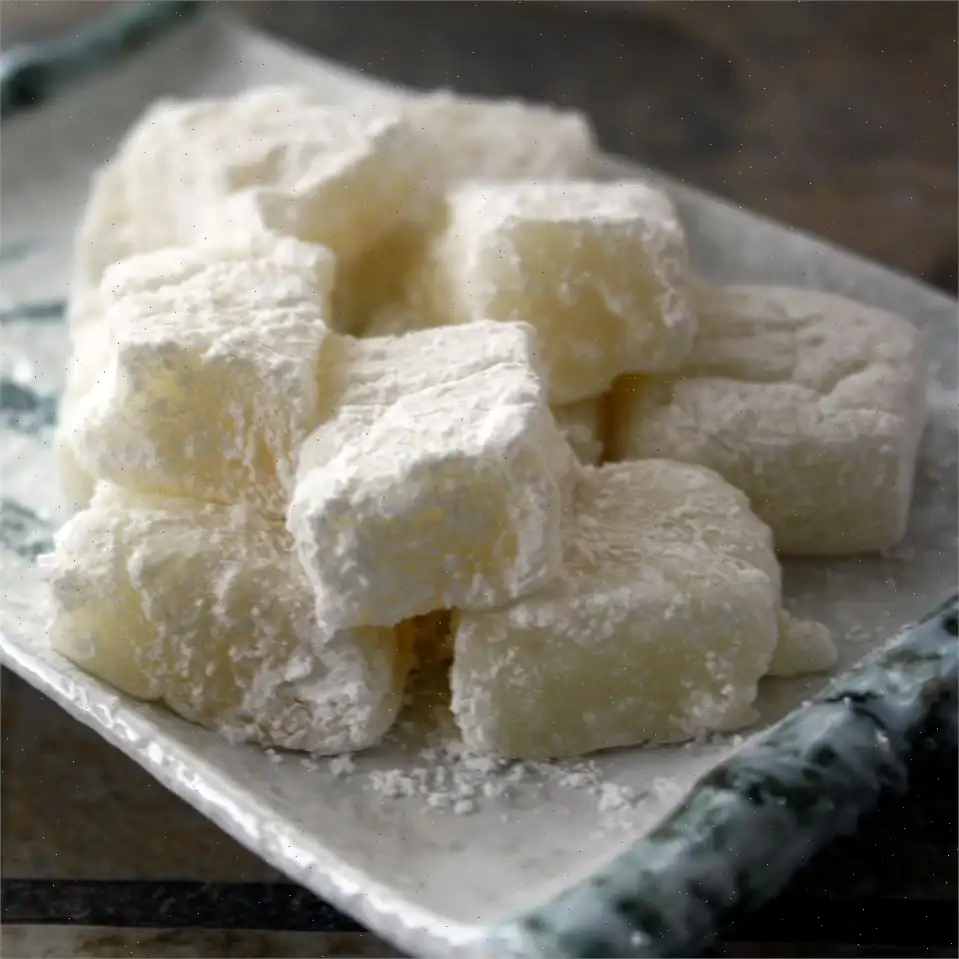
Receta de Mochi en Microondas El mochi es un pastel de arroz japonés, dulce y masticable. Hacer mochi en el microondas es rápido y fácil. Con solo unos pocos ingredientes simples, puedes disfrutar de este delicioso postre en muy poco tiempo. Sigue esta receta para hacer tu propio mochi en microondas en casa.
Rendimiento: 25 porciones
Ingredientes:
- 1 tazas de mochiko (harina de arroz glutinoso)
- 1 tazas de agua
- 1 tazas de azcar blanca, dividida
- 2 gotas de vinagre blanco destilado
- taza de almidn de papa
- cucharadita de sal
Instrucciones:
- En un bol mediano, combina el mochiko, el agua y 1 taza de azcar. Mezcla bien hasta obtener una consistencia uniforme.
- Aade las 2 gotas de vinagre blanco y mezcla nuevamente para suavizar la textura de la mezcla.
- Coloca la mezcla en un recipiente apto para microondas y cbrelo de manera suelta con papel film.
- Introduce el recipiente en el microondas y cocina a mxima potencia durante 8 a 10 minutos, o hasta que la mezcla se haya cuajado por completo.
- Saca el recipiente del microondas y deja enfriar el mochi hasta que est lo suficientemente fro como para manipularlo.
- En un recipiente pequeo, mezcla el resto del azcar ( de taza), el almidn de papa y la sal.
- Cuando el mochi haya enfriado lo suficiente, colcalo sobre una lmina de plstico. Usando un cuchillo de plstico o madera (evita usar cuchillos metlicos para evitar que se pegue), corta el mochi en 25 piezas iguales.
- Envuelve cada pedazo de mochi en la mezcla de almidn de papa para cubrirlo completamente.
Datos Nutricionales (por porcin):
- Caloras: 83
- Grasas: 0g
- Carbohidratos: 20g
- Protenas: 1g
- Sodio: 24mg
- Fibra: 0g
- Azcares Totales: 10g
- Calcio: 2mg
- Hierro: 0mg
- Potasio: 8mg
* Los valores diarios recomendados se basan en una dieta de 2,000 caloras. Tus necesidades calricas pueden ser ms altas o bajas dependiendo de tu situacin.
** La informacin nutricional no est disponible para todos los ingredientes. La cantidad est basada en los datos nutricionales disponibles.
Origen del Mochi
El mochi, un dulce tradicional japons hecho de arroz glutinoso, ha sido un elemento central de la cultura japonesa durante siglos. Sus orgenes se remontan al perodo Jomon (alrededor del 10.000 a.C.), donde se utilizaba en ceremonias religiosas y como ofrenda a los dioses. Se elabora machacando arroz al vapor hasta obtener una masa pegajosa y elstica, un proceso que ha permanecido prcticamente sin cambios hasta hoy.
Con el tiempo, surgieron distintas variaciones del mochi, convirtindose en un smbolo de prosperidad, salud y longevidad. Actualmente, se disfruta durante las celebraciones de Ao Nuevo, festivales tradicionales y como comida callejera popular en Japn.
Diferencias Regionales
Aunque el mochi se consume en todo Japn, existen variaciones regionales que distinguen su sabor y preparacin. Por ejemplo:
- En Kioto se encuentra el "yatsuhashi", un mochi aromatizado con canela, generalmente servido como un dulce fino y crujiente.
- En Okinawa, el "kibi mochi" se endulza con azcar morena o se recubre con harina de soja tostada.
Los ingredientes y la textura tambin cambian segn la regin, incorporando a veces leche de coco o polvo de t verde para un sabor ms distintivo. Esta receta de mochi al microondas simplifica el proceso, hacindolo accesible para cualquiera sin necesidad de herramientas especiales como el mortero o el mazo.
Diferencias con Otros Postres
Aunque el mochi puede parecerse a otros postres de arroz como el tteok coreano o el niangao chino, se diferencia por su textura y preparacin. A diferencia del tteok, que se cocina al vapor o hervido, el mochi tradicional se machaca hasta obtener una masa pegajosa y elstica.
Esta receta de mochi al microondas elimina la laboriosa necesidad de machacar, pero conserva la textura caracterstica y masticable del mochi tradicional. Adems, el mochi no suele ser tan dulce como otros pasteles de arroz, permitiendo que el sabor natural del arroz resalte, especialmente cuando se acompaa con rellenos como pasta de frijol rojo o frutas frescas.
Dnde se Sirve el Mochi
En Japn, el mochi se disfruta durante todo el ao, pero es especialmente importante durante el Ao Nuevo (Oshogatsu), cuando se utiliza en platos como el ozoni, una sopa con mochi. Tambin es comn en el festival anual mochi-tsuki, donde las familias se renen para machacar arroz y preparar mochi.
El mochi tambin se encuentra en puestos callejeros, relleno de pasta de frijol rojo (anko) o en forma de "mochi ice cream", una fusin moderna del mochi tradicional con helado occidental. Fuera de Japn, el mochi gana popularidad en mercados asiticos y ms all, apareciendo como postre congelado, snack o en creaciones innovadoras como donuts de mochi.
Curiosidades del Mochi
- En Japn, el arte de hacer mochi es una tradicin seria. Eventos como el mochi-tsuki son reuniones sociales que fortalecen la comunidad y simbolizan unin y colaboracin.
- El mochi de Ao Nuevo se asocia con la longevidad. Comer mochi en esta fecha se considera un deseo de buena salud y larga vida, por eso forma parte de la primera comida del ao.
- El mochi puede ser peligroso si no se mastica correctamente. Su textura pegajosa y densa puede causar atragantamiento, especialmente en personas mayores, por lo que se recomienda tomar bocados pequeos y masticar bien.
- Las versiones modernas del mochi son muy verstiles. Desde frutas y helados hasta ingredientes salados como queso o kimchi picante, hay infinitas posibilidades para innovar.
Conclusin
Ya sea que seas amante de los dulces japoneses tradicionales o busques una receta fcil y divertida, el mochi al microondas es una forma deliciosa y accesible de disfrutar este icnico dulce. Con pocos ingredientes y un microondas, puedes recrear la textura suave y masticable que hace nico al mochi. Anmate a experimentar con distintos rellenos y sabores para hacerlo completamente tuyo!
Preguntas frecuentes sobre Receta de Mochi en Microondas
Compartir
Comentarios
Kathleen Allen
11/20/2022 01:58:06 PM
Descubrí que usar agua hirviendo con harina de arroz y azúcar daba mejores resultados al hacer esta receta por segunda vez. Añadí 2 cucharaditas adicionales de agua para asegurar que la harina y el azúcar se disolvieran completamente. Omitir el vinagre, como otros sugirieron, fue una buena decisión. Para evitar que se secara, lo microondas por solo 6 minutos. Después de enfriar el mochi, preparé una mezcla de 1 taza de coco, 1/8 de taza (o menos) de azúcar y una pizca de sal, que encontré suficiente dulce. Aplané el mochi como un panqueque, añadí una cantidad moderada de mantequilla de maní crujiente, lo doblé por la mitad y lo enrollé en forma de bola. No usar almidón también fue una preferencia, ya que lo hacía demasiado seco la primera vez.
Karen Torres
12/24/2024 12:40:23 AM
He hecho esta receta dos veces. La primera vez seguí las instrucciones originales y rellené los cuadrados con pasta de frijol rojo o helado, y estuvo bien. Hoy decidí variar usando leche de coco y añadiendo dos cucharadas de cacao en polvo y una cucharadita de vainilla. Tras cocinarlo 8 minutos, enrollé el mochi en una mezcla de coco y azúcar glas, y rellené los cuadrados con pasta de frijol rojo o albaricoque seco. El sabor a chocolate era sutil, la textura suave y los rellenos deliciosos. Usar papel pergamino en el recipiente y en la tabla ayudó a evitar que se pegara. En general, disfruto la receta y sugeriría añadir más sabores. La leche de coco realmente eleva el plato. Desde entonces, la he hecho dos veces más, pero esta vez sustituí la mitad del azúcar con un paquete de gelatina de fresa. Esto dio color y sabor distintivo. Corté el mochi en cuadrados y los cubrí con azúcar glas. Con la gelatina, el tiempo de cocción puede necesitar extenderse porque el centro quedó muy pegajoso. Aun así, el sabor fue excelente.
Patrick Flores
08/16/2022 03:53:00 AM
¡Excelente receta base para preparar mochi de coco! Hice ajustes para replicar el mochi fresco de la panadería que tanto me gusta. La textura quedó muy similar. Obtuve unas 12 bolas medianas-grandes rellenas usando esta receta. Usar solo 1/3 de taza de azúcar funcionó bien y sustituí 1/2 taza de agua por crema de coco enlatada. También mezclé 2 cucharadas de leche de coco en polvo con la harina de arroz. Enrollé las bolas en coco rallado para más sabor. Esta receta me ahorró un viaje de 50 millas a la panadería, ¡así que considero un éxito! Coincido en reducir el azúcar: el mochi no suele ser demasiado dulce. Cocinar en intervalos de 2 minutos y microondas por 6 minutos totales (tengo microondas de 900 vatios) funcionó perfecto.


 audio version

CookGuide es tu guía culinaria para descubrir nuevos sabores y cocinar con confianza. Encuentra recetas de confianza, consejos prácticos e inspiración tanto para cocinas domésticas como profesionales.
Cualquier copia, distribución o uso de los materiales de este servicio sin autorización está estrictamente prohibido. Las infracciones serán procesadas según la legislación aplicable y pueden dar lugar a responsabilidades civiles y penales.
© Guía de cocina Studio 2026 | Cookies | Política de PrivacidadEncuentra la receta perfecta con IA. Solo introduce los ingredientes y deja que Cook te guíe hacia la magia.