
Easy Baked Chicken Tenders Recipe

If you're looking for a quick and healthy dinner option that kids will love, these baked chicken tenders are the perfect choice. This easy recipe is a lighter alternative to deep-fried chicken and doesn't require much effort. Skip the fast food and enjoy this simple, delicious meal that will please even the pickiest eaters at your table.
Why Bake Chicken Tenders?
Baking chicken tenders instead of frying them has multiple benefits. For one, youll use much less oil, making it a healthier option. Additionally, this method is super easy to execute, and cleanup is a breeze. No need for heavy frying equipment just your oven!
How to Bake Chicken Tenders:
Making baked chicken tenders is easier than you think. Follow these simple steps, and you'll have a tasty dinner in under 30 minutes!
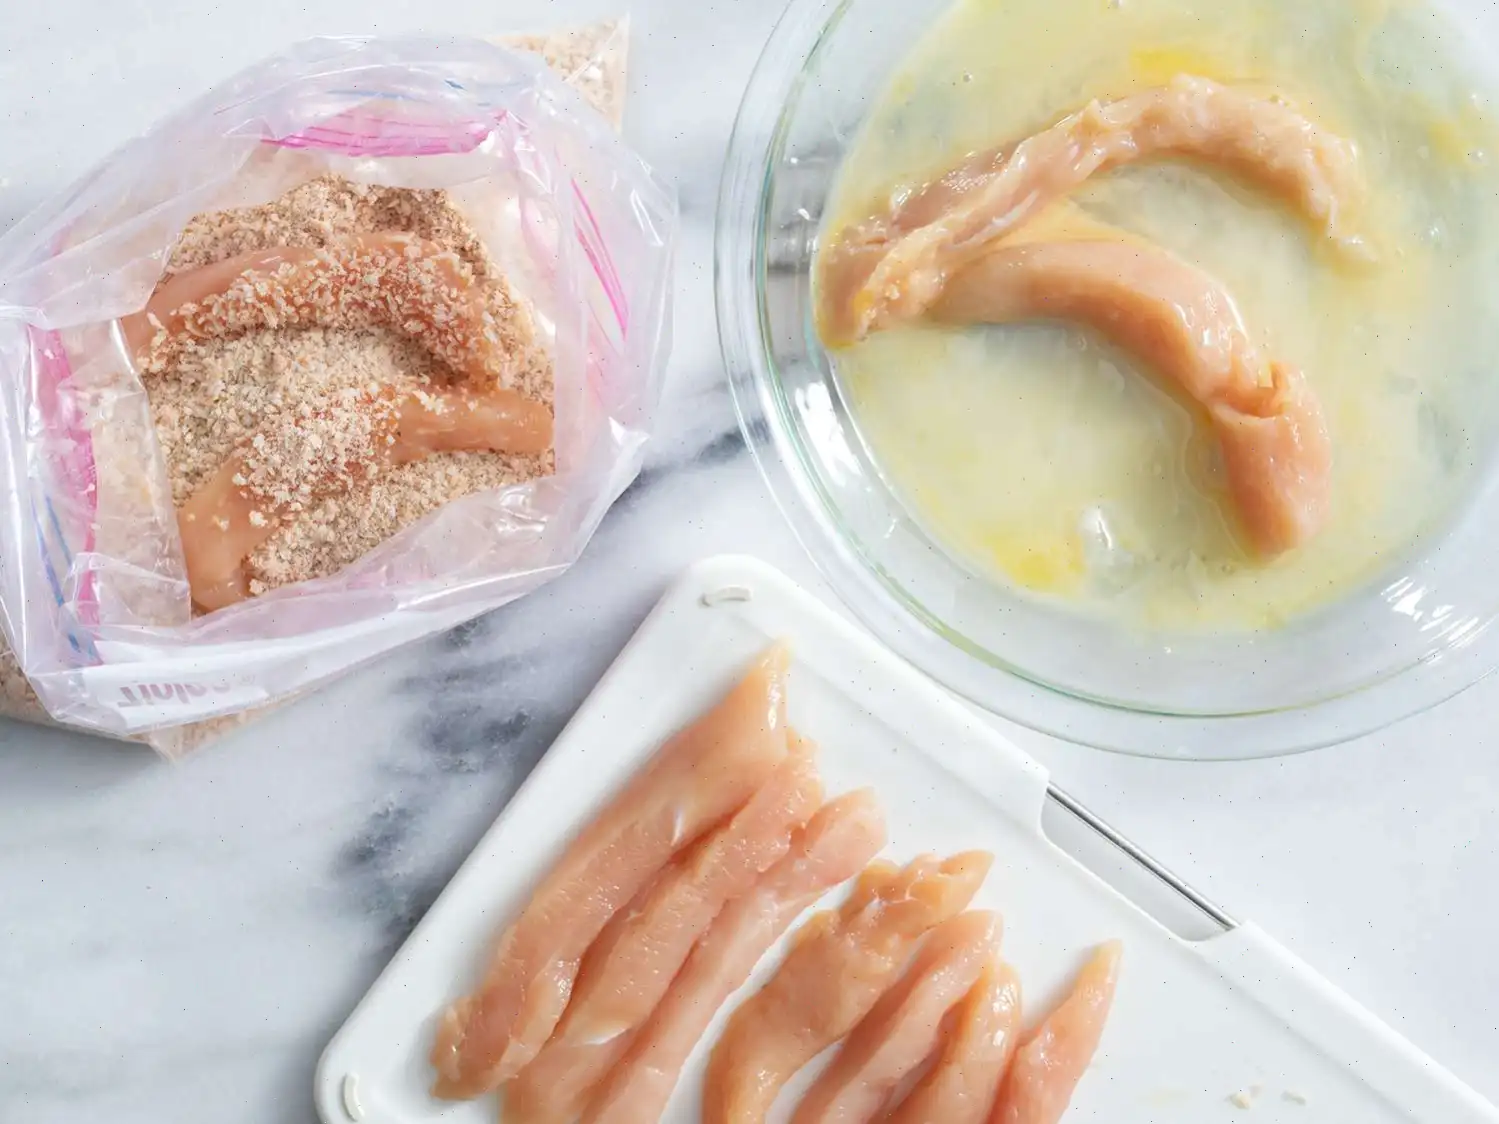
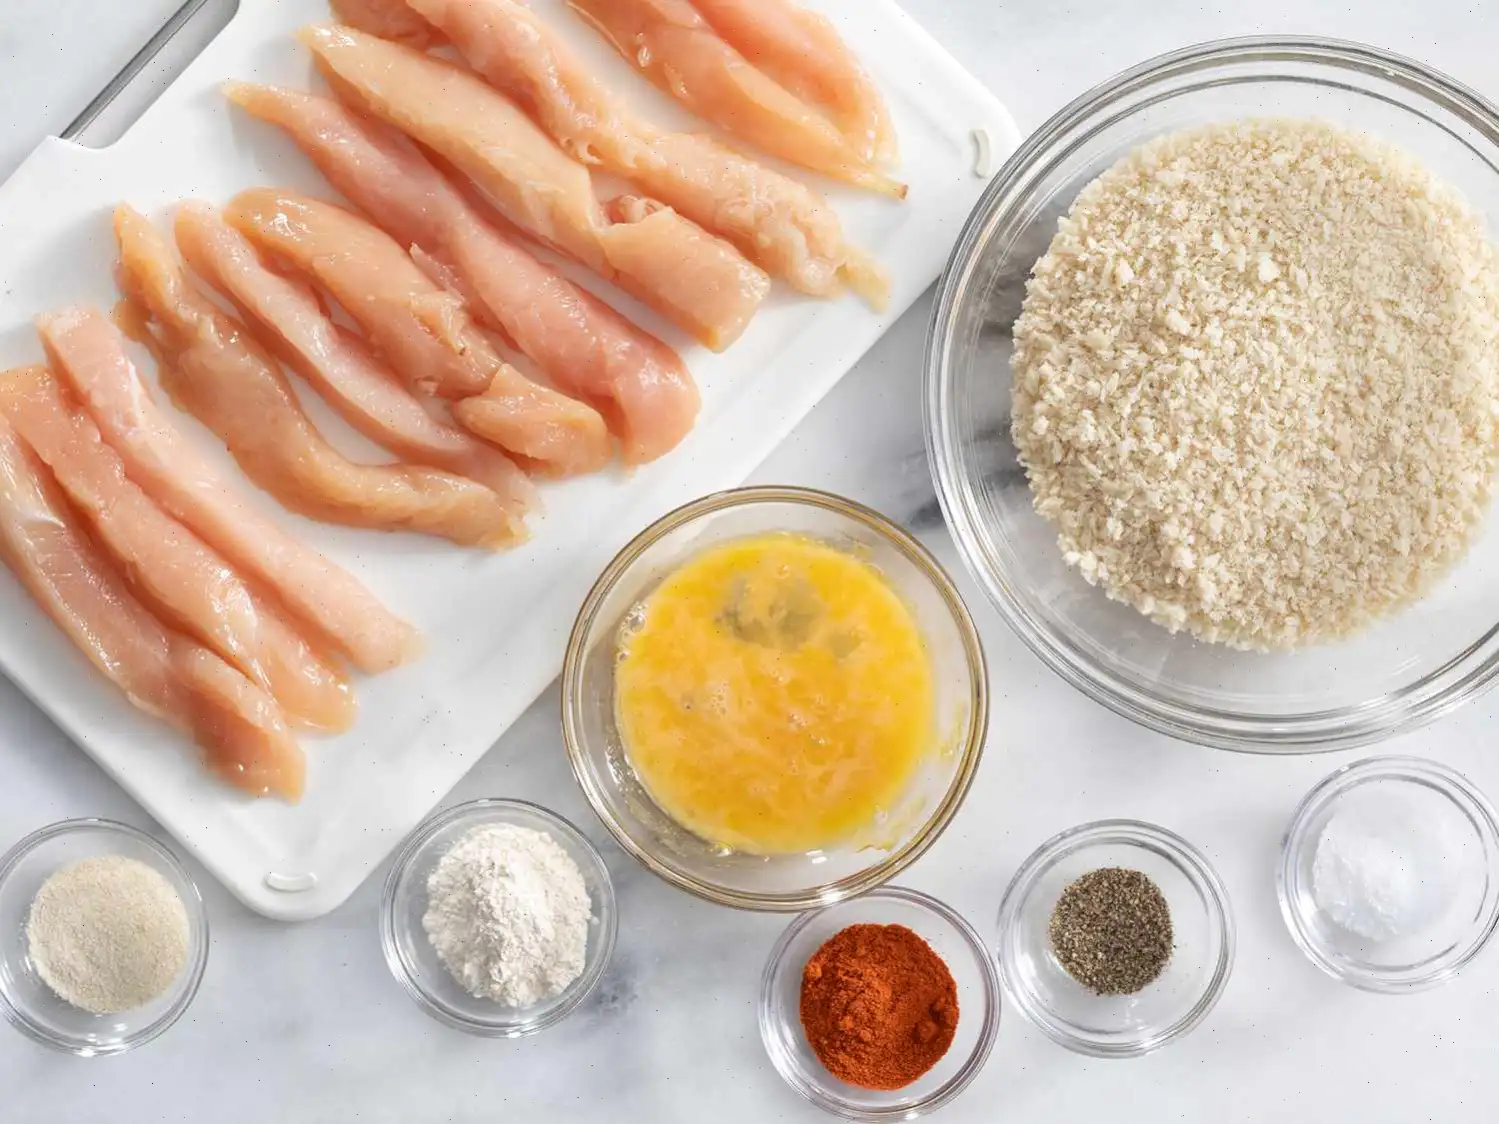
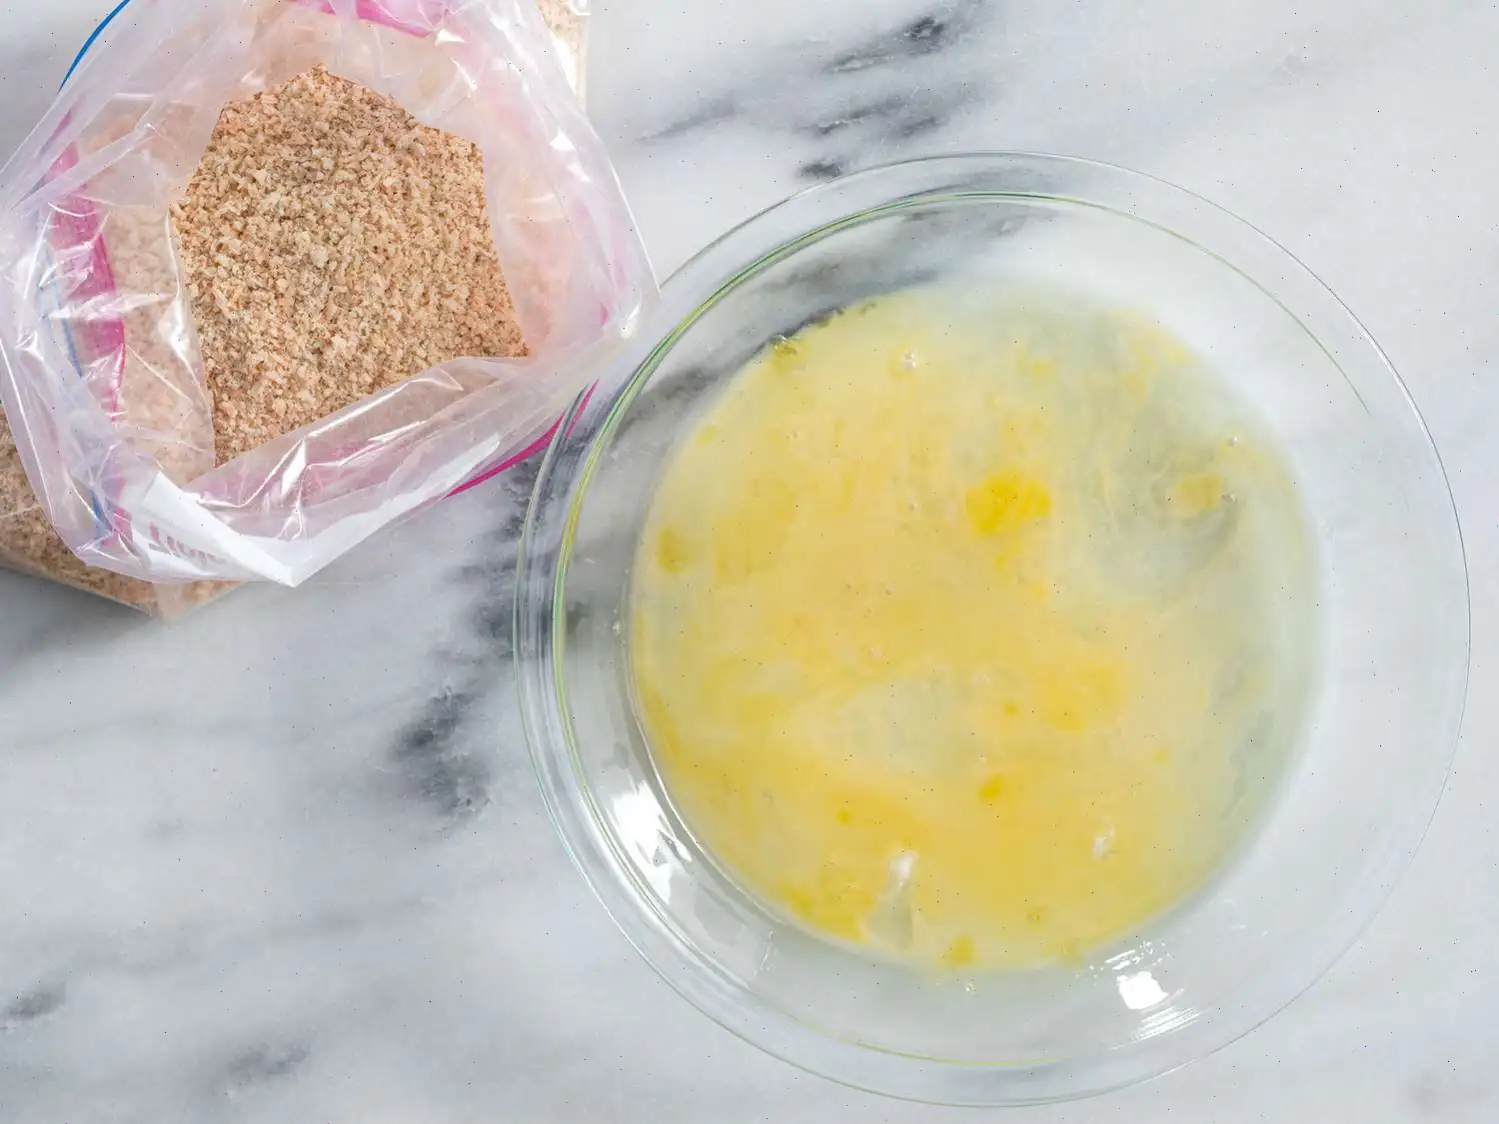
- Prepare the Breading: Crack a whole egg into a shallow dish. In a zip-top bag, combine panko breadcrumbs, garlic powder, onion powder, paprika, salt, and pepper. Seal the bag and shake it to mix everything well.
- Dredge the Chicken: Dip each chicken tender into the egg, coating both sides. Then, place the chicken into the zip-top bag, seal it, and shake to evenly coat the chicken with the breadcrumb mixture. Arrange the coated tenders on a baking sheet lined with foil. Repeat this process for all chicken pieces.
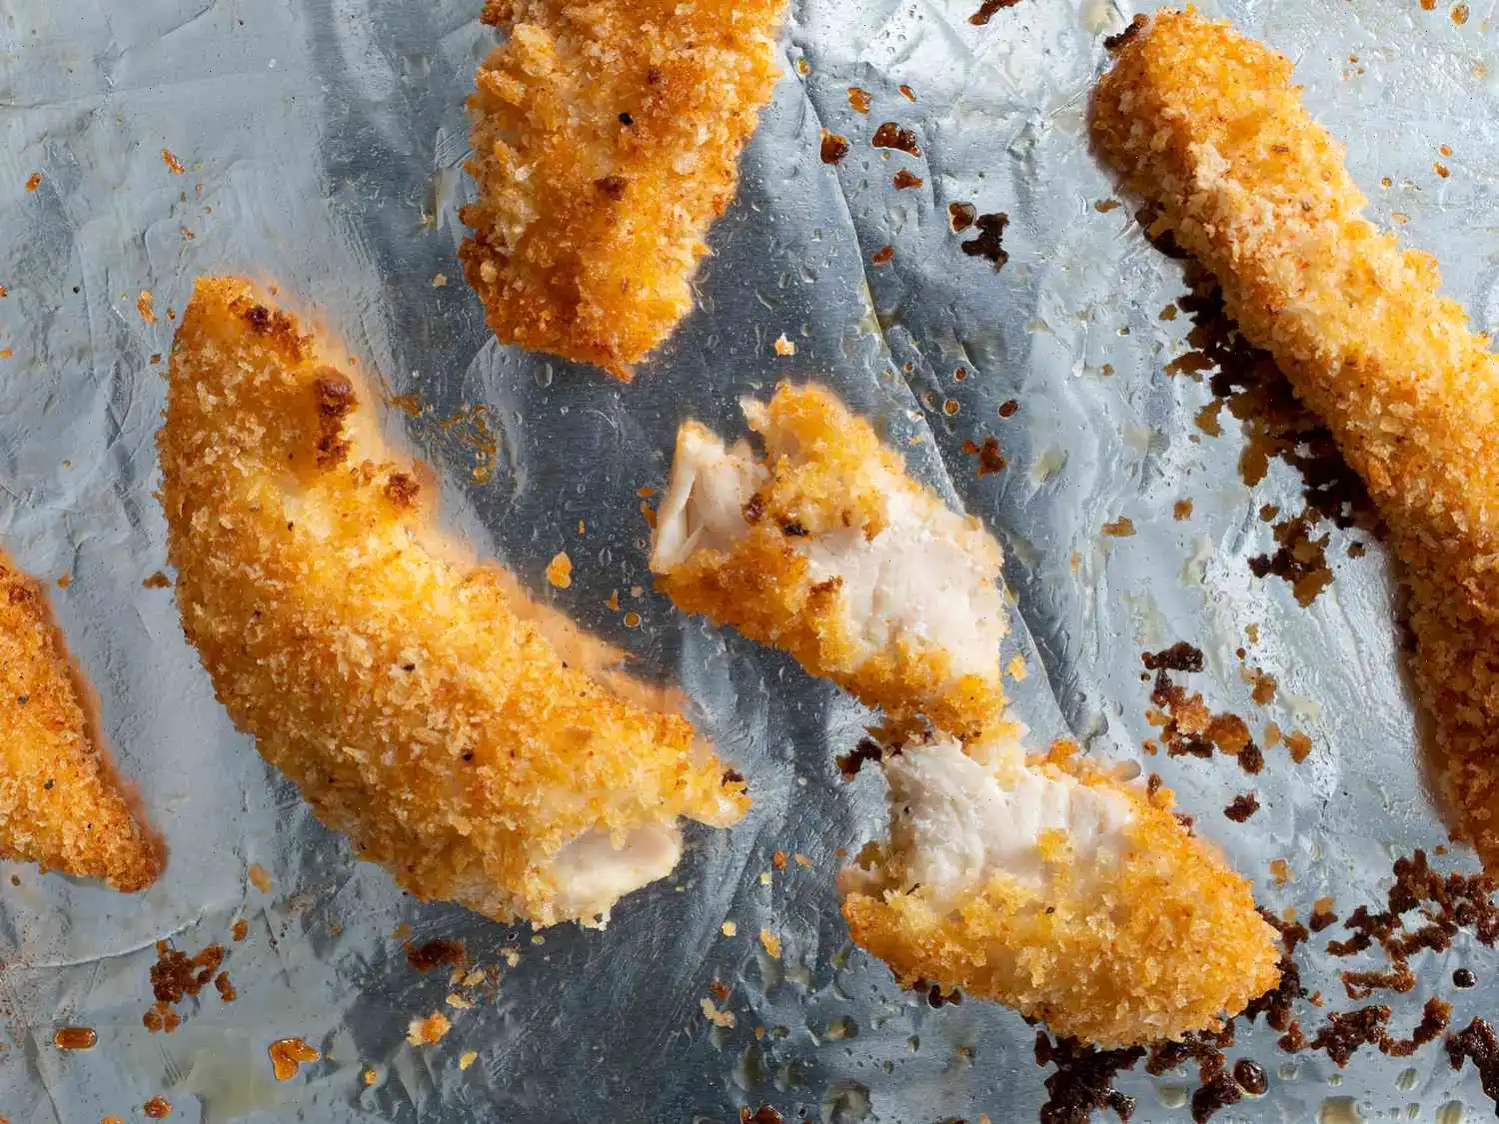
- Spray and Bake: Lightly spray the chicken tenders with cooking spray. Place the baking sheet in the preheated oven and bake the chicken at 450F (230C) for about 7 minutes on one side. Flip the tenders over and bake for another 7 minutes until they are no longer pink inside.
- Broil for Extra Crunch: After baking, switch your oven to broil. Place the rack about 6 inches from the heat source, and broil the chicken tenders for 1-2 minutes to get that crispy, golden finish.
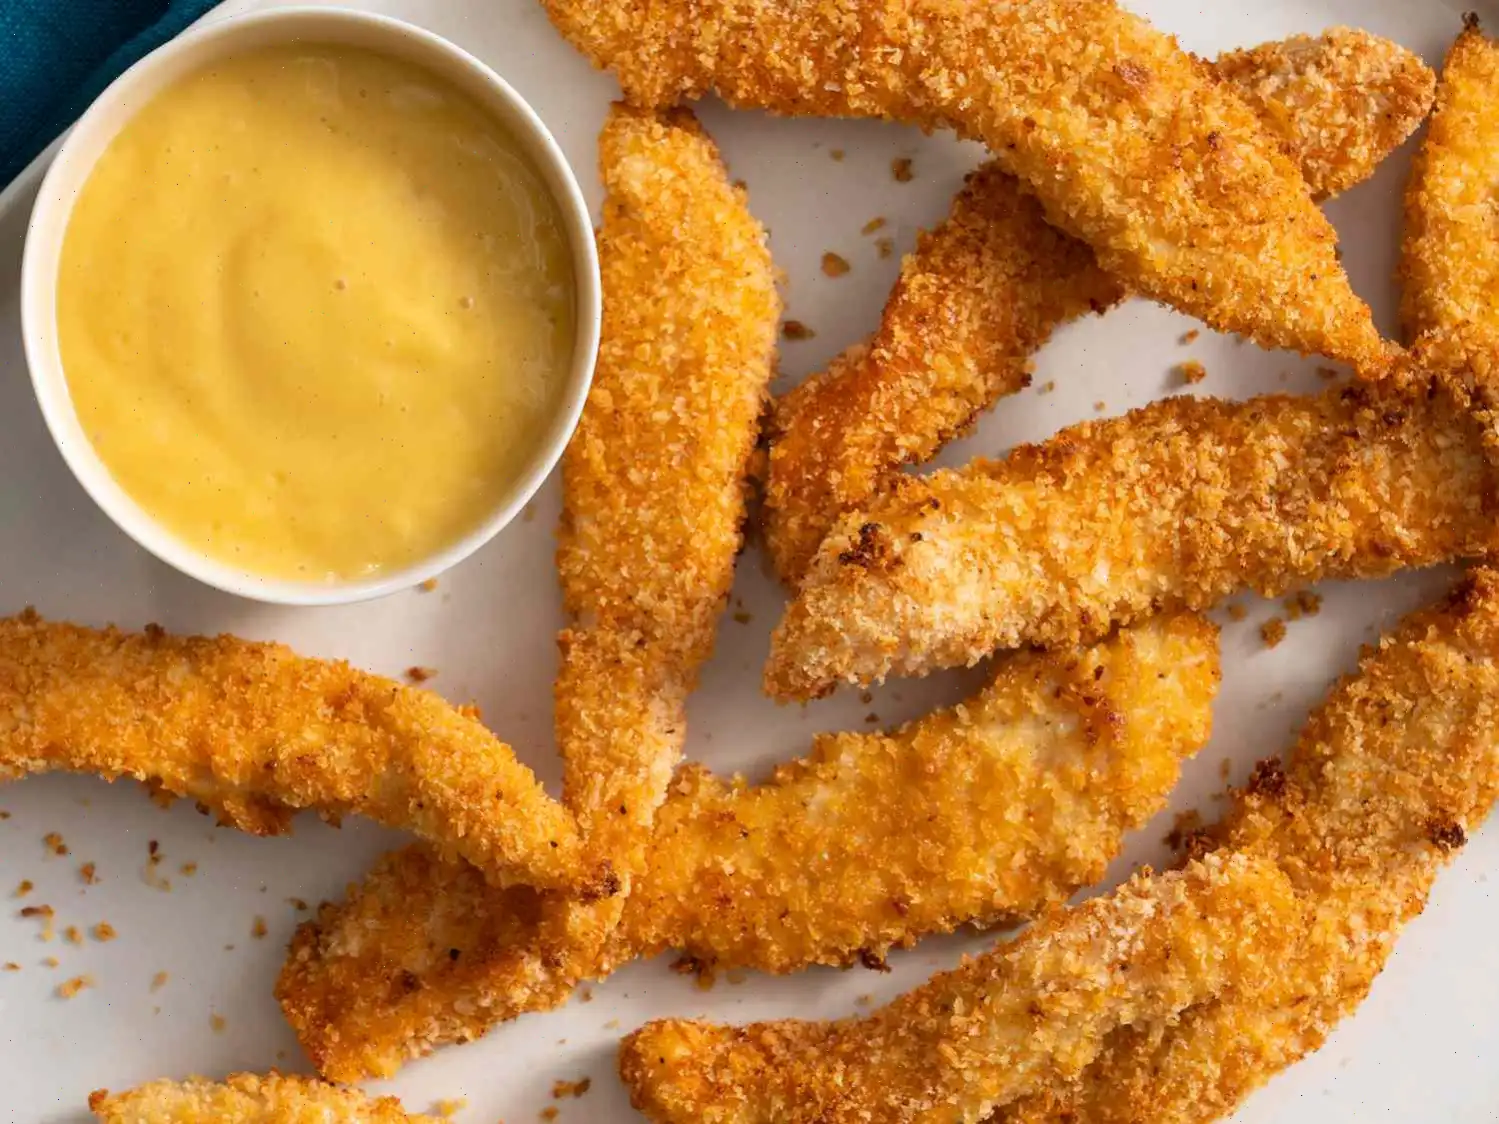
- Serve and Enjoy: Remove the chicken tenders from the oven and serve them hot with your favorite dipping sauces.
How Long to Bake Chicken Tenders:
These chicken tenders will be perfectly cooked in just under 20 minutes at 450F. To ensure they're done, check that the juices run clear and an instant-read thermometer inserted into the center reads at least 165F.
Dipping Sauces for Baked Chicken Tenders:
No chicken tender is complete without a delicious dipping sauce. Here are a few options that are sure to impress:
- Homemade Ketchup
- Yummy Honey Mustard Dipping Sauce
- Comeback Sauce
- Popular BBQ Sauce
- Southwest Dipping Sauce
For even more ideas, explore our full collection of sauces and condiments.
What to Serve with Baked Chicken Tenders:
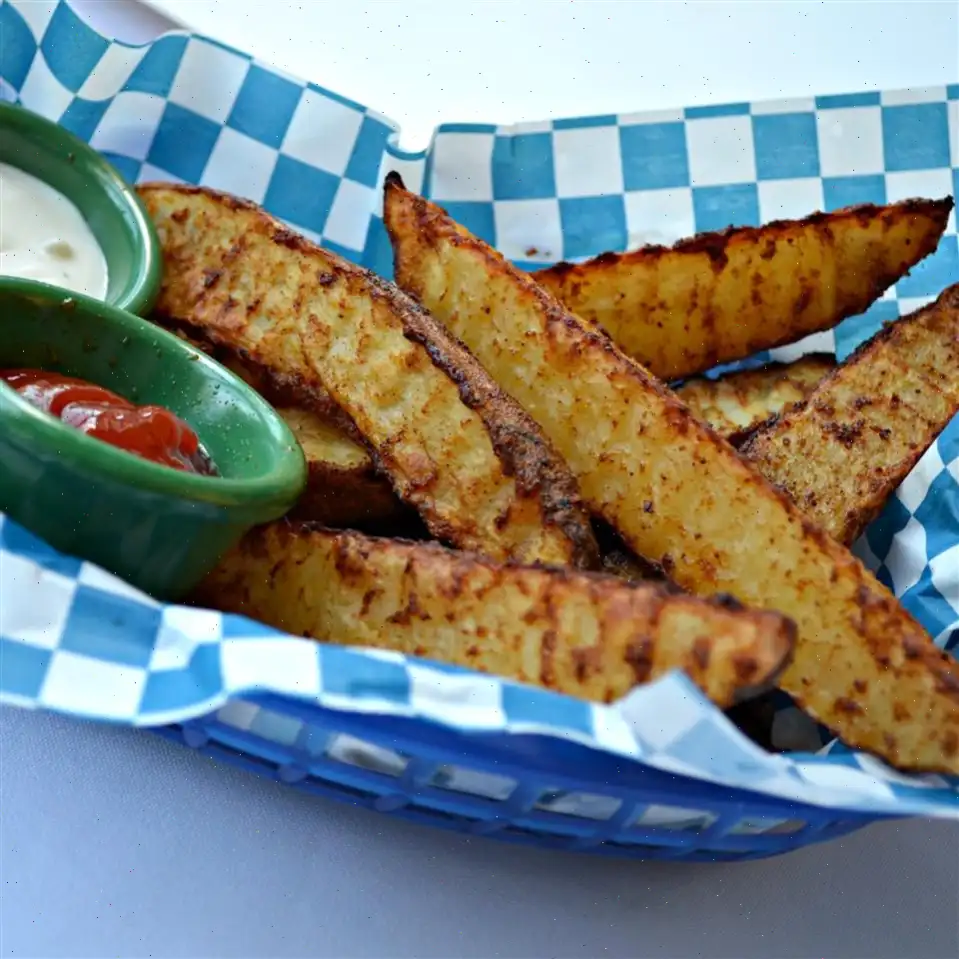
If you're looking to make this meal even more filling, consider pairing it with one of these homemade side dishes:
- Baked French Fries
- Classic Caesar Salad
- Perfect Mashed Potatoes
- Simply Steamed Asparagus
- Easy Roasted Broccoli
Check out our entire collection of side dishes for more options.
Nutrition Facts:
| Calories | 172 |
| Total Fat | 4g |
| Saturated Fat | 1g |
| Cholesterol | 72mg |
| Sodium | 689mg |
| Total Carbohydrates | 26g |
| Dietary Fiber | 1g |
| Total Sugars | 1g |
| Protein | 17g |
| Vitamin C | 1mg |
| Calcium | 18mg |
| Iron | 1mg |
| Potassium | 149mg |
Recipe Summary: This easy-to-make recipe yields 4 servings of delicious baked chicken tenders. Each serving contains 172 calories, 4g of fat, and 17g of protein, making it a nutritious option for a weeknight meal. Its also a hit with kids, so feel free to try this the next time youre in need of a family-friendly dinner!

Comments
lutzflcat
10/06/2025 01:52:54 PM
7.5.19 First, I have to say that there’s no way that this chicken needs to be cooked for 14 minutes @ 450ºF and then another 2 minutes under the broiler. It’s cut into 1/2-inch strips, and when checked after 7 minutes, it was done (I checked with a meat thermometer). They were crispy golden brown and there was no need to put them under the broiler. The breading is very tasty, the cooking time just needs to be adjusted, and I think you’ll be happy (we were). Served this evening with honey mustard dipping sauce, and they were a hit! As a side note, this recipe could be easily adapted to an air fryer. Thanks for sharing your recipe, I will make this again.
PowderedToastMan
01/31/2021 12:33:19 AM
My family loves these! I've made this recipe four times now and I've refined a few things. 1) I roll the chicken strips in plain flour before putting them in the egg wash. This helps the egg stick and I find you get better coating with this method. 2) I wasn't keen on the idea of hosing down everything with cooking spray so instead I used a silicone brush and gently brushed olive oil on each piece. They've turned out better and better each time!
Cindy Bain
02/27/2021 08:45:35 PM
This is a good starter recipe, and so easy for how good they taste. They are great as is and my husband loves them dipped in BBQ sauce. I used this recipe as a spring board to make these gluten free for my son’s family. I use GF panko and homemade gluten free seasoned bread crumbs so I don’t need to add the extra seasonings. I make them in large batches, freeze them individually and then bag them so you can pull out how ever many you want at a time. I am always alerted when their supply starts to dwindle!
DonSanAnto Tejas
04/26/2023 06:47:11 PM
Recipe was spot on but I added 1/2 tsp of Cayenne Pepper, used my dual air fryer @ 400°F & baked for 12min (6min per side) and then broiled for 2min. The poulet tenders came out crispy, spicy & tasty. Thanx!
Elizabeth
12/05/2024 04:47:13 PM
There are way too many steps, so I did the following to simplify: 1.Beat egg and melted butter and pour into baggie; add chicken and mix. If there is too much liquid, you will need to strain. 2.Mix all dry ingredients into another bag and add chicken. Toss to coat all pieces. 3.Air fry 1/2 in a single layer at 400 degrees for 9 minutes (no need to flip). Check temp of chicken; should be 165. I served it with homemade ranch dressing and coleslaw. I will definitely make this again, though I did make the mistake of following someone's suggestion to decrease the garlic powder.
Mary Duffy
04/14/2024 09:28:15 PM
Made this with gluten free Panko bread crumbs. Added a 1/2 stick of melted unsalted butter to the Panko mix bag and this was delicious.
Mary Jo Doherty
02/25/2021 11:59:40 PM
Great recipe! Easy and delicious! I used corn flakes and butter crackers and crumbed them with my rolling pin. Air fried until they're 165 degrees. My husband NEVER heats up food a second time but he did these!
TxCin2
07/03/2025 12:29:13 AM
Easy peasy lemon squeezy. This was fast and simple to do. I don't like fixing fried chicken as it's so many dishes and so much mess to clean up afterward. This was a great alternative to frying. I cut the chicken into squares instead of strips and made nuggets. I used crisco to grease the foil pan, and then brushed on vegetable oil and it worked just fine. I didn't have to use the broiler on them at the finish as the color was already golden and they looked fine. These were nice and had a garlicky taste but it wasn't too strong. It isn't the same as fried chicken though, so these aren't a substitute as the flavor doesn't come out identical, but these nuggets were tasty and I'd not hesitate to fix this again. As the title suggests these are easy.
Paula
11/04/2022 12:46:44 AM
I love how crispy these chicken tenders turn out using the panko bread crumbs. I baked these in the air fryer at 400° for maybe 8-10 minutes.
Joseph Althouse
03/31/2025 03:40:51 AM
I like the simplicity of the recipe. Personally, I think paprika is the least understood of all the spice. It's subtle. I added grated pecorino romano to the breading mix (a trick learned from my mother-in-law). Next time I will add a little cayenne. Oh! Most important, the temp is too high for thinner strips. The tenders I bought were almost a third of a breast. The higher temp worked ok for this.
CaringPasta9128
02/08/2024 03:05:10 AM
I used different seasonings and crushed buttery rounds instead of used bread crumbs, I also used parchment paper and baked each side for 8 minutes each, and broiled for the remaining 4 minutes and oh my goodness, the best Chicken tenders I've ever had!!! Very very delicious and so easy to make!
IcyRice1724
09/18/2025 06:30:34 PM
Did not need the broiler step.
liz
08/29/2025 12:17:39 AM
What a waste of chicken expensive.All came out floury, very tasteless, and lost most of the coating Never again taste better fried
RoseSauce8803
06/20/2025 11:21:37 PM
Excellent recipe. I followed it exactly and it was awesome . I am a picky 73 year old disabled veteran and believe me... not easy to please... Thank you. Rowdy Church
ChirpyPot9580
03/20/2025 10:34:13 PM
I didn't add as much paprika, I added only half. Otherwise, great! I would totally make it again.
Anne Goodrich
03/05/2025 11:19:10 PM
Delicious, and easy. Great fast dinner recipe!
Betty Smith
02/20/2025 01:13:15 AM
Perfect for busy weeknights.
CozyPizza2283
01/12/2025 10:52:22 PM
With this recipe the ‘fast food’ kind pale in comparison!
Pam
12/05/2024 12:11:13 AM
I love this recipe! It was very easy to follow and definitely worth the effort. The chicken came out very tender and crispy without going under the broiler. I cooked it for 7 minutes, turned it and after 3 more minutes it was 170 degrees. Just be careful and check the chicken carefully.
RondaH
11/24/2024 12:07:31 AM
Tasty but next time I'll cut back a little on the garlic powder. Just me. And I finally got my chicken tenders crunchy! So this will be my go to chicken tender recipe. I did set oven at 400° and baked for 20 minutes. Then I put the broiler on Lo and chicken in for 2 minutes. Yum! Thank you for this recipe!
 Recipe")


CookGuide is your culinary guide to discovering new flavors and cooking with confidence. Find trusted recipes, practical tips, and inspiration for both home and professional kitchens.
Any copying, distribution, or use of the materials from this service without authorization is strictly prohibited. Violations will be prosecuted under applicable law and may result in both civil and criminal liability.
© Cook Guide Studio 2025 | Cookies | Terms and conditionsFind the perfect recipe with AI. Just enter your ingredients and let CookGuide do the magic.